Tag Archives: cauliflower

12 Strategies for Battling Cabbage Moths

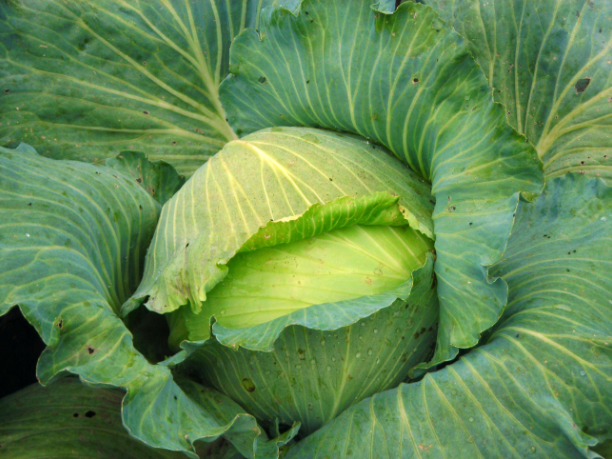
Premium Late Flat Dutch Cabbage

For many gardeners planting brassicas in anything but the very early spring or fall is asking to be devastated. Cabbage moths can quickly colonize a patch of brassicas leaving tons of eggs which seem to grow into caterpillars and strip entire plants in the blink of an eye.

Don’t give up on summertime brassicas just yet though! There’s many ways you can fight off the cabbage moths to reap bountiful harvests.

Pick the worms off by hand.

It’s certainly not fun but it can be effective particularly if you only have a few plants. Drop worms into a bucket of soapy water to kill them. Be sure to check the undersides of leaves. If you see a cabbage worm with little white cocoons on its back leave it be. The cocoons will hatch into parasitic wasps, killing that worm and eventually others.

Note: Know your worms! Species that also have a green caterpillar stage include Luna Moths, Black Swallowtail Butterflies, and Eastern Tiger Swallowtails.

Swat the moths.

Some gardeners swear by the tennis racket method. When the cabbage moths show up in the spring they head out with tennis rackets to swat them out of the air. If you go this route be sure avoid killing other non-harmful moths and butterflies.

Use your poultry.

If you have a backyard flock it may be worth letting a few birds into your cabbage patch once the plants have gotten big enough. Both ducks and chickens have been known to enjoy cabbage worms.

On the subject of birds, try to attract songbirds to your garden.

Many songbirds will eat cabbage moths but they need to be visiting your garden regularly to take notice. Make your garden more bird friendly by planting varying heights of plants for them to perch on or adding feeders, houses, and/or bird baths.

Try companion planting.

Red Acre Cabbage & Wormwood

There are several crops that can be planted in your cabbage or broccoli patch to deter pests. Wormwood, thyme, marigolds, tomatoes, tansy and peppermint are all believed to help keep the cabbage worms away. You can also use companion plants like buckwheat and yarrow to attract beneficial insects to fight the cabbage worms for you.

You may also consider interplanting single brassicas throughout a garden. Unlike a monoculture bed having a plant here or there is much harder for cabbage moths to find.

Be sure to read our other post, The 7 Benefits of Companion Planting.

Try moth decoys.

While we haven’t tested it there’s a belief that cabbage moths are territorial and will leave your plants be if you hang decoy moths on and around your brassicas. Check out this article from The Good Seed Blog for more information and printouts.

Make your own plant spray.

Some people have found that tansy tea or oil deters cabbage worms when sprayed on the plants because of the volatile oils it contains. Others have had success with sprays made from dish soap, crushed garlic, or blended hot peppers.

Plant a trap crop.

Have you ever noticed that cabbage worms or another garden pest really love a specific variety? While you might initially think you should avoid planting that crop the opposite is really true. Plant the offending variety and then the pests will be less likely to go after other varieties you planted. Some people also choose to burn the trap crop with a flame weeder once it’s covered in pests to eliminate many of them. If you choose the burn method make sure your fire doesn’t get out of hand and you follow local regulations.

You may want to try organic pesticides.

Before you think we’re advocating the use of harsh chemicals know that there are organic and natural substances that are considered pesticides. Probably the most well known example is diatomaceous earth which is a powder made from crushed, fossilized, prehistoric crustaceans. This powder will cut insects (but not people or animals) as they crawl through it but it does need to be re-applied every time it rains. If you want to be sure whatever you buy is organic look for an OMRI (Organic Materials Review Institute) certification label.

It’s also important to note that pesticides affect all insects, good or bad. Consider what beneficial insects may also be harmed by your pesticide choice before you choose this strategy.

Practice crop rotation and cover cropping.

Both crop rotation and cover cropping are important to a healthy garden for a couple of reasons. First they help lessen disease and pest problems by ensuring the same crop isn’t planted in the same area helping to break pest and disease life cycles by moving their food source. Second they help ensure plants receive necessary nutrients and stay healthy which makes them less susceptible to pest and disease issues to start with.

Remove and compost any leftover plant material at the end of each season.

Cabbage worms overwinter in dead plant material so it’s important to remove and compost it. Alternatively you can till it under.

Use row cover.

If you can’t find another solution that works for you, row cover will do the trick. Cover the plants right after you get them in the ground and cabbage moths will never get to your plants to lay eggs.

Gardening is never easy but it’s especially difficult when you have to deal without a lot of pests. Hopefully among these tips you’ll find a strategy that works for you and your garden.

How do you deal with cabbage moths? Did we miss anything?

Tips for Direct Sowing in Hot Weather

Lisa Dermer & Ira Wallace

Last week we finished harvesting our spring-planted cabbage and broccoli. Now it’s time to sow our first seedling bed for our fall brassicas: besides cabbage and broccoli, we’ll add cauliflower and Chinese cabbage. Later we’ll make sowings of fall carrots, beets, lettuce, rutabaga, turnips, and greens like spinach, chard, kale, and mustards.

Sowing outdoors during high heat can be tricky, but if you follow these tips you’ll find it’s worth the effort:

1. Sow in a closely-spaced nursery bed and transplant later. This lets you concentrate your efforts (keeping the soil moist and weed-free) on a small, more manageable area. (Don’t do this for crops that don’t transplant well, like carrots.)

2. Choose a location with afternoon shade. This will protect the sprouting seeds from drying out.

3. Sow under lightweight row cover or the newer temperature-neutral proteknet. Both protect from insect pests and help retain soil moisture.

4. Sow successions! Two weeks after your first sowing make another planting of the same varieties or other, earlier-maturing types.
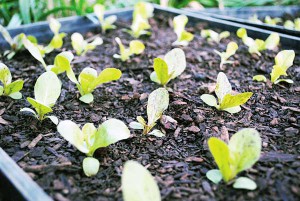
5. Count backwards. Plan for cool-season crops to mature when cool weather hits, and use the days to maturity to plan when to sow.

6. Transplant and/or thin your plantings. Giving plants more space helps their roots access enough moisture. Young seedlings grow faster in hot weather, so plan for quick turn-arounds. Summer-sown brassicas may be ready to transplant in 4 weeks or less (they should have 3 true leaves).

Check out our Fall and Winter Quick Reference for more details about timing and what to plant for fall and winter harvest.

Order now if you haven’t already reserved your planting stock for garlic and perennial onions. Each order comes with a Garlic and Perennial Onion Growing Guide to get you started.

Summer Sowings: Continuous Harvests all Summer and into Fall

With summer’s intense heat in full swing, it can be hard to remember to sow cool season crops, but some fall crops need to be started as early as June, and many need to be started in July.

On our farm in central Virginia our average first fall frost falls in late October, but even where frosts come later or not at all you should start fall crops during the summer. Later plantings will struggle with fall’s low light levels, and won’t produce before growth slows to a near standstill in early winter (the “Persephone Days,” November 21-January 21).

To make sense of all the seeds we’re sowing during the summer months, I divide our summer plantings into three types:

1. Warm-season, slow growing summer successions: these are the bonus crops that many gardeners forget. A second round of tomatoes, summer squash, sweet corn, or cucumbers can keep you harvesting all summer long without interruption.

2. Fast growing summer successions: these crops require frequent, regular sowing all through summer. Because we’re sowing so often, these can be easier to remember. We sow beans, carrots, salad greens, beets, and radish seeds weekly. Be ready to baby your summer sowings: we water daily to keep them from drying out before sprouting. Lettuce needs the soil temperature to be below 80 degrees F, so you may need to sow in flats indoors, or even in the refrigerator, or sow in the evening and cool the soil with crushed ice.

3. Cool season, slow growing crops for fall harvest. We sow the Brassicas first: Brussels sprouts in June, and then broccoli, cabbage, and cauliflower in July. By mid-July we’re sowing fall greens: collards, Swiss chard, leaf beet, and kale, plus winter radishes. We sow Chinese cabbage in late July. Sow thickly in nursery beds and keep up with your watering; we protect these young plants from summer’s insects with spun polyester row cover or the new more durable and temperature neutral “proteknet.”

For further resources on planning your summer sowings, check out: Brett Grohsgal’s article Simple Winter Gardening, our article on Summer Succession Plantings, and our Fall and Winter Planting Guide.

Successions can be overwhelming, so we have some tricks that help extend harvests with fewer plantings:

1. Plant indeterminate varieties of tomatoes and cucumbers, and pole-type beans and peas. We still find we need a late tomato planting, because our earliest plantings taper down toward the end of summer (and our Heritage Harvest Festival at Monticello needs lots of tomatoes for the Tasting Tent).

2. Select heirlooms bred to provide extended harvests: many modern farms want concentrated harvests that can be harvested with one or two passes; but for more traditional growers an extended harvest was the ideal way to manage the bounty. Look for roots that hold well in the ground. Lutz beets are one of our favorites: they can be spring planted and will hold all summer without turning woody. However, they will be very large, so this only works if you’re happy cooking with multi-pound beets (try slicing cross-wise for beet burgers). Open-pollinated broccoli provides extended side-shoot harvests. Choose bolt-resistant greens and harvest by the leaf before before taking whole plants.

3. Choose seasonally appropriate salad greens: we want salads all year-round, but this can be tricky both when it’s hot and when it’s cold! Mustards and brassicas are more mild in cold weather, so get adventurous by adding young kale and tatsoi to winter and early spring salads. Choose cold-tolerant lettuce: red varieties tend to hold up better in frost. For hot weather, choose fast-growing summer crisphead lettuce like Sierra, or heat-ready greens like Red Malabar spinach or Golden purslane.

4. Set up a root cellar or similar storage system. Ultimately, some of your crops will ripen all at once, or you’ll be faced with a glut of produce when frosts threaten. Be prepared: have a proper storage area ready to go for your carrots, parsnips, turnips, cabbages, winter squash, and more. Be ready to finish ripening the last fresh tomatoes indoors. For fresh produce through till spring, we need good systems for storing and slowly working through the harvest. Nancy Bubel’s Root Cellaring is an invaluable resource if you’re looking to improve your winter storage system, and has lots of low-cost and little-time options, if you haven’t blocked off your whole summer to dig a cellar.