Guide to Greenhouse Tomatoes

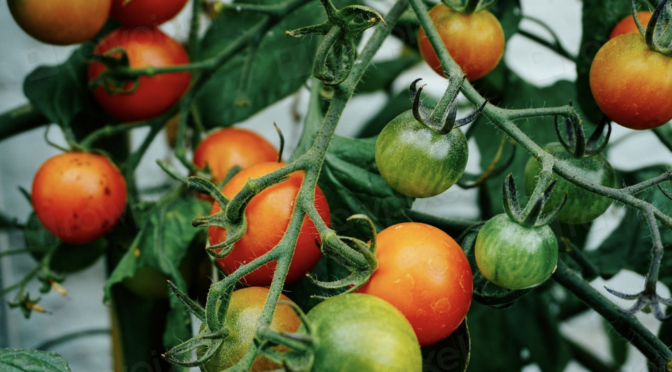
We’re seeing more and more gardeners and backyard farmers using hoop houses, high tunnels, and greenhouses for tomato production. They’re a great option for getting an extra-early harvest of tomatoes and other heat-loving crops. However, they also come with their own set of disadvantages, especially here in the hot, humid Southeast. For a great harvest of greenhouse tomatoes, consider these varieties and growing tips.Greenhouse Tomatoes Table

Best Varieties

You can grow any tomato in a hoop house, but some will perform better than others. An enclosed greenhouse or hoop house offers different climatic and pest conditions than out in the field. Here are some of our favorite greenhouse tomato varieties.

V, F, and N at the end of a variety name indicate known resistance to verticillium wilt, fusarium wilt, and nematodes, respectively. Check out our full Key to Tomato Disease Tolerance for other abbreviations.

Ventilate Your Greenhouse

High humidity allows fungal diseases to thrive. As the summer gets hot and humid, you need to ventilate your hoop house or greenhouse well to avoid disease. Where possible, roll up the hoop house sides. Use exhaust fans to regulate heat and humidity. Most fan options come with a thermostat that will open the shutter and turn the fan on automatically based on temperature.

Consider Growing Multiple Successions of Greenhouse Tomatoes

Many gardeners don’t consider tomatoes succession crops because healthy, indeterminate plants can produce until frost. Unfortunately, in hot, humid climates like the Southeast, tomatoes often succumb to diseases like blight before frost kills them. Even in other areas, the plant’s productivity may slow over time.

Sowing multiple successions of tomatoes can help ensure you have productive tomatoes throughout the season, whether you want them for fresh eating, the market, or canning.

Additionally, planting multiple successions allows you to grow different types of tomatoes. For example, you can plant Glacier early, followed by a succession of Atkinson. Glacier produces in just 58 days and is extra cold tolerant, while Atkinson, bred by the University of Alabama, excels in hot, humid conditions.A hoop house with tomatoes

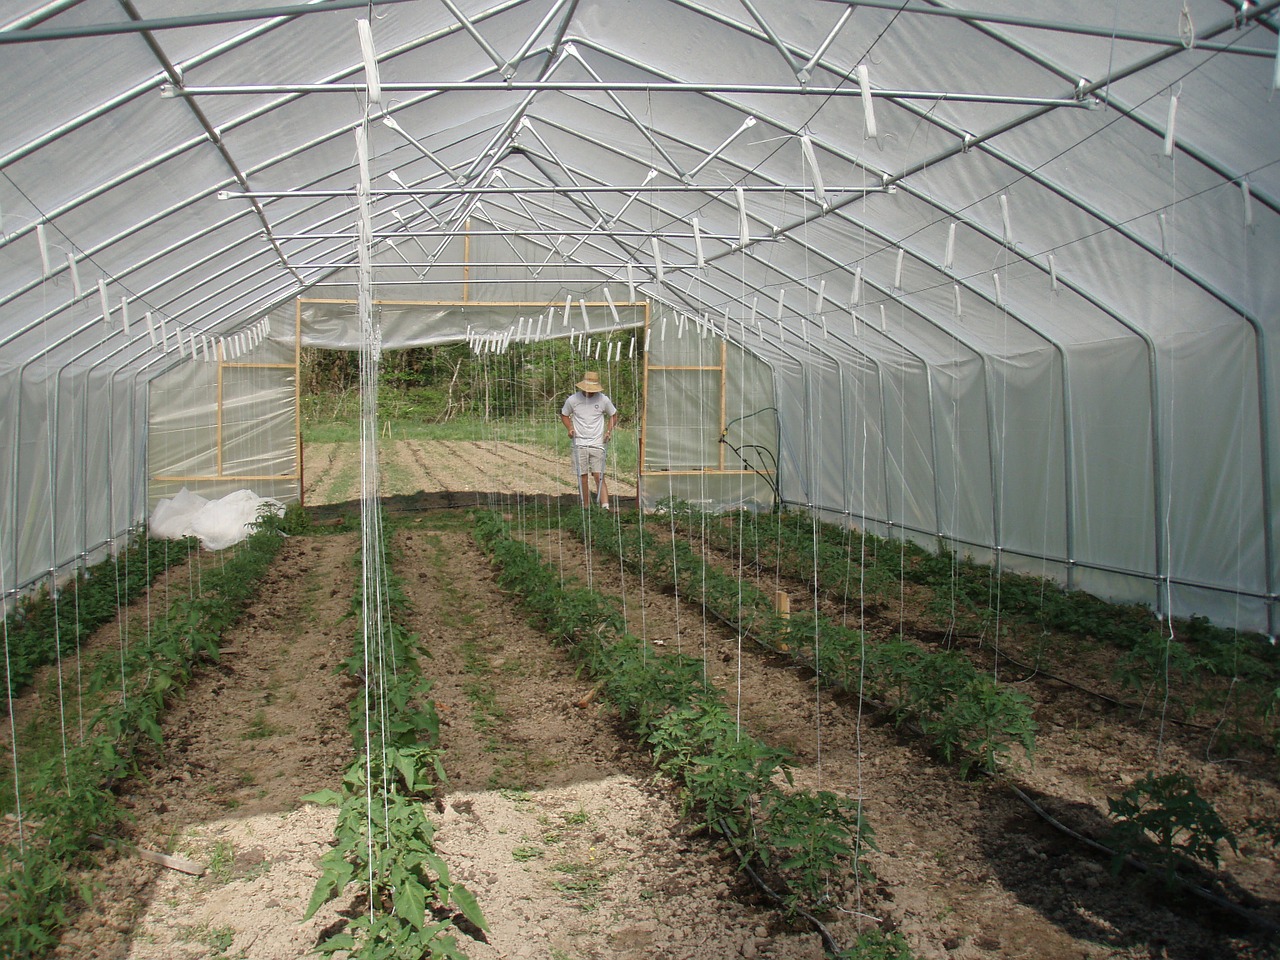
Trellis and Prune Your Greenhouse Tomatoes

Tomatoes are large, vining plants. To make the most of your greenhouse or hoop house space, trellis and train the vines vertically.

Most commercial growers use a vertical string system. Many of these systems use twine that’s suspended on a roller or pulley so that you slowly lower the twine as the plant matures, allowing the pruned bottom of the tomato vine to rest on the ground while the tip continues to grow. Growers often refer to this as the lower and lean method.

However, in smaller hoop houses or makeshift greenhouses, you can trellis plants with traditional field methods like the Florida weave, stakes, or fencing panels.

Training vines on a trellis will be much easier if you prune the tomatoes. Pruning also allows for additional air circulation, and when done correctly, can improve yields by encouraging flowering and fruit set. However, you still need plenty of foliage to maintain the plant’s growth. Check out our pruning guide for full instructions.

Irrigation

Tomatoes need consistent moisture, and hot greenhouses can dry out quickly. Water your tomatoes deeply on a regular schedule, allowing the soil to slightly dry between waterings. Consider installing drip irrigation or soaker hoses in your greenhouse to minimize your watering efforts. You can also hand-water small greenhouses and hoop houses with a hose and nozzle. Water the base of the plant and avoid splashing water onto the leaves.
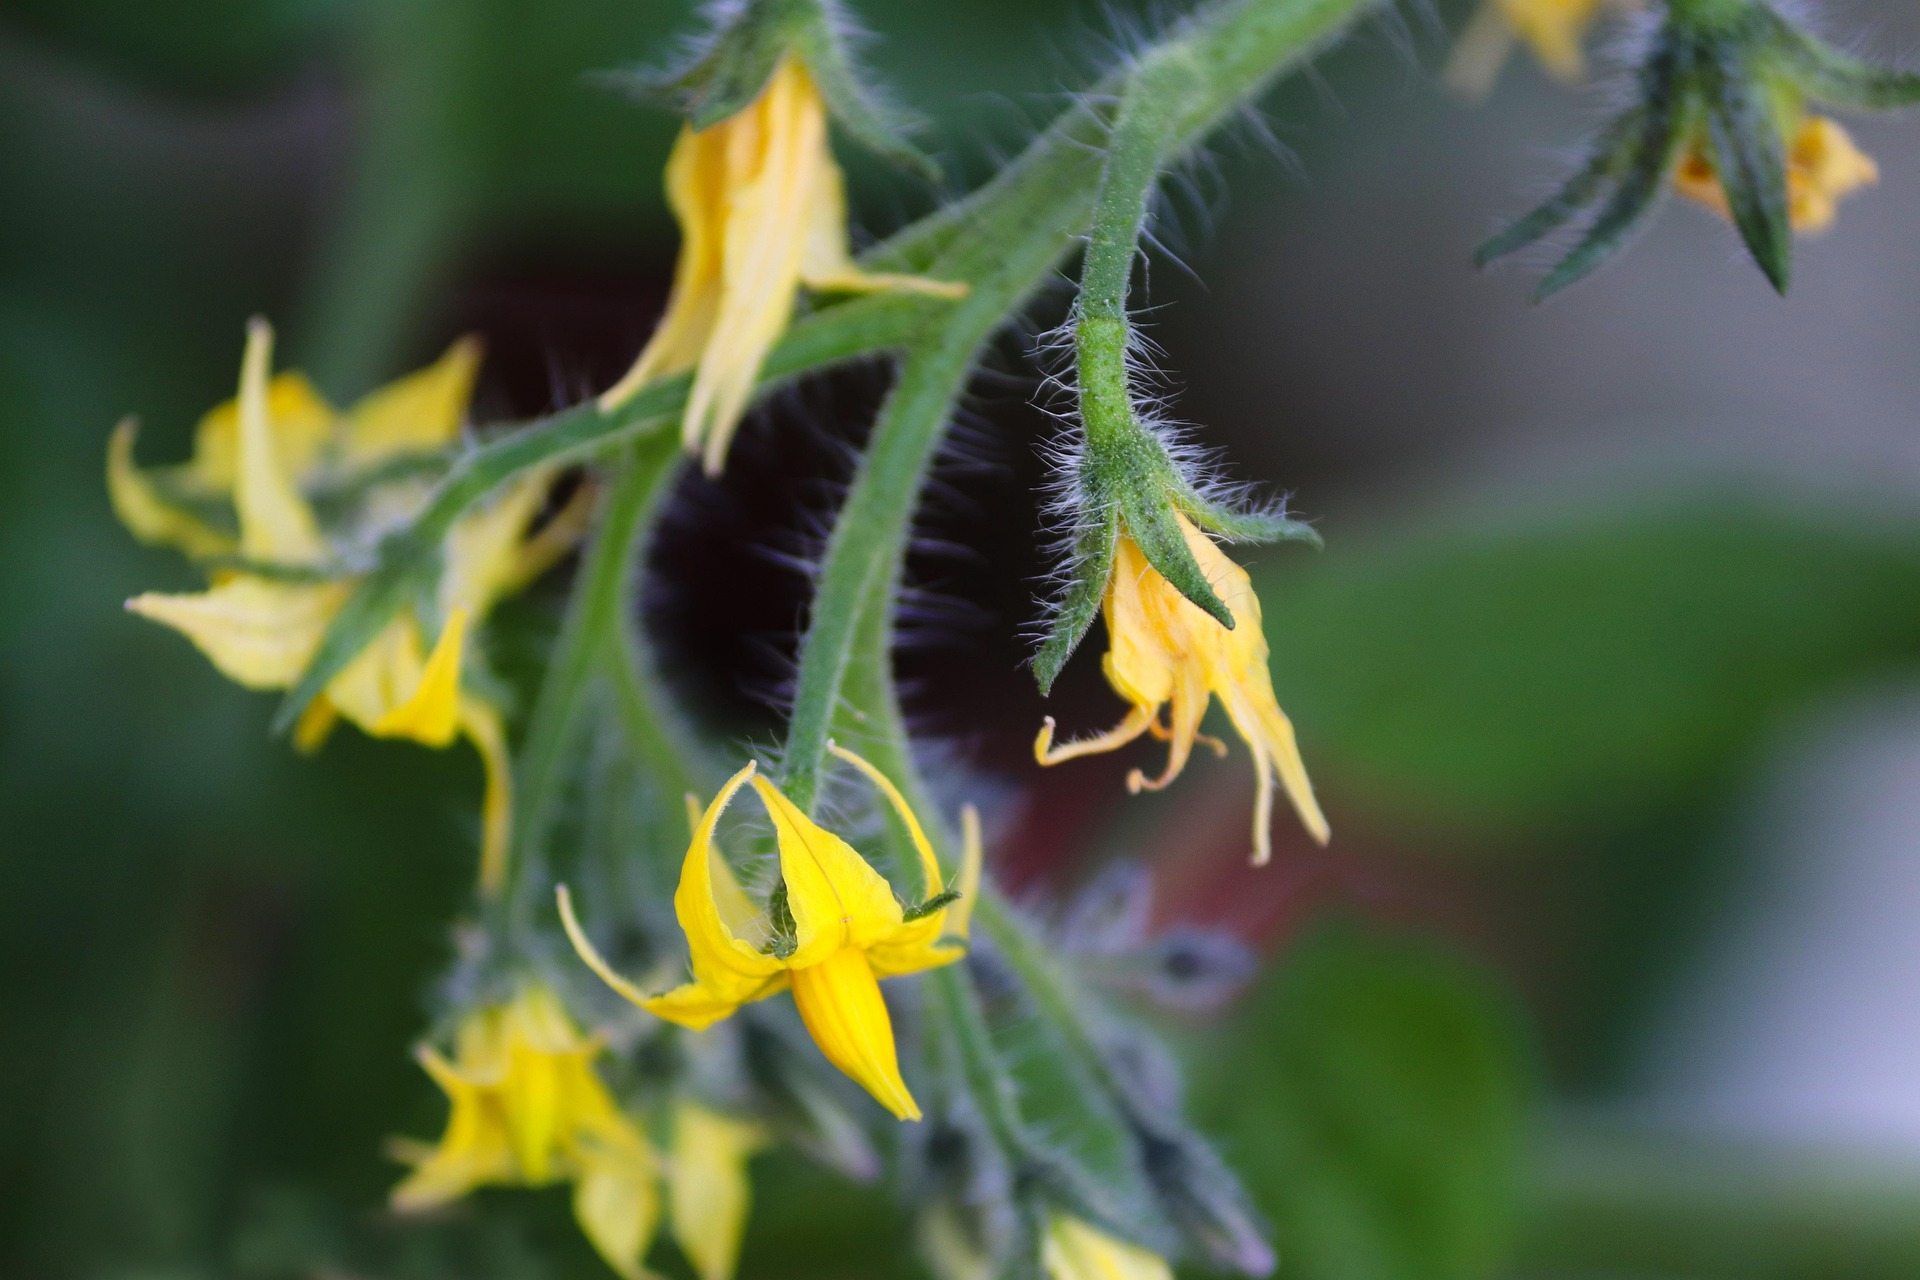
Tomato flowers

Pollination

Pollination is necessary for tomatoes to set fruit. If you have a hoop house where you can open the doors and roll up the sides, you may have no problem with pollination. However, in a closed greenhouse or hoop house system, bees and other pollinators won’t have access to your tomato flowers. If you can’t let pollinators in, you’ll need to do the work yourself by using a small paintbrush or Q-Tip to transfer pollen between flowers.

10 Heat-Tolerant Greens to Grow All Summer

Leafy greens are underrated workhorses in the garden. They’re nutritious, easy to use, and highly productive. Unfortunately, the hot weather that arrives all too quickly in southern gardens causes many greens to bolt or start flowering, making them bitter and inedible.

While we enjoy growing and even overwintering tender greens like spinach, endive, lettuce, and Chinese cabbage, we still want to enjoy greens during the summer. These are a few of our favorite heat-tolerant greens that you can grow all summer long to use for salads, sandwich toppings, smoothies, quiches, stir-fries, and more.

Malabar Spinach

The fleshy leaves and ruby-red stems of Malabar spinach make it look like a stunning ornamental, but it’s tasty too! This Asian green makes a wonderful summer spinach substitute, ideal for salads, stir-fries, and thickening summer soups.

Malabar spinach is quite hardy, will regrow even if severely cut back, and will readily self-seed. Thanks to its vigorous, vining nature, it performs best when grown on a trellis. We like to sow them at the base of our spring pea trellises. As the peas start to die back, Malabar spinach begins to flourish in the warm weather, climbing the trellis. It’s the perfect companion plant.New Zealand Summer Spinach plants

New Zealand Summer Spinach

Introduced to the U.S. in 1772, New Zealand summer spinach is a good spinach substitute for hot weather. While it enjoys similar soil conditions to traditional spinach, New Zealand summer spinach is exceptionally heat and drought tolerant. It’s best as a cooked green.

Before sowing, soak your New Zealand summer spinach seeds for 4 to 24 hours to help speed germination.Watercress

Watercress

Watercress is a leafy, aquatic vegetable with a delicious, peppery crunch that makes it a popular choice for salads and finger sandwiches. While it’s not technically the most heat-tolerant, you’ll need cool water and a bit of shade; it is possible to grow it in summer.

We recommend starting watercress in spring through midsummer. In hot weather, grow your watercress in at least partial shade. The traditional option is to plant watercress into a cool stream of fresh water, but you can also grow it in pots of water or trays in a cool spot; you just need to change the water daily. Use enough water so that the crowns float.Callaloo Amaranth Greens

Callaloo Amaranth Greens

We received this delicious Jamaican variety from Melissa DeSa in Florida. It’s a quick-growing, self sowing hot weather green that’s popular throughout the African diaspora, as well as in Asian cuisines. Usually folks enjoy the greens cooked.

After your last frost, direct sow or transplant 3-week-old seedlings. For continuous harvest, plant every 2 to 4 weeks. Space plants up to 18 inches apart. The upright plants can reach 6 to 8 feet tall in favorable conditions! Harvest greens before the plants flower.

Callaloo is tolerant of poor soil, root-knot nematodes, and bacterial wilt. It’s a great green for almost any garden! It also self-sows. Cucumber beetles may occasionally snack on callaloo, but it’s rarely enough to slow down the plant’s growth.Golden Purslane

Golden Purslane

Golden purslane features fleshy orange stems and large, succulent leaves that help it survive hot, dry weather. It’s cut-and-come again and offers a slightly tart, lemony flavor that’s perfect for salads. You can also pickle it for later use or use it medicinally. Herbalists sometimes use purslane, and it’s high in omega-3 fatty acids.

Transplant or direct sow your purslane after all chance of frost has passed, and the soil has reached at least 70°F. Purslane needs full sun to thrive.Magenta Magic Orach

Magenta Magic Orach

Add some color to any salad with magenta magic orach. Magenta magic is the deepest, darkest red of all the orach varieties available. The leaves are slightly spicy and good for salad mixes or sandwiches.

Direct sow your orach after the danger of frost has passed, about 2 inches apart. As the plants grow, thin them to 9 inches apart. You can enjoy the thinned plants. The plants hold their flavor even as they mature in the summer heat. You can continue to harvest leaves as the plants go to seed.Jewels of Opar (Fame Flower)

Jewels of Opar (Fame Flower)

A relative of purslane with panicles of little pink flowers, this elegant plant has many uses. The mild, succulent leaves are great in salads, on sandwiches, and as a spinach substitute. The seed stalks are attractive in dried arrangements with seedpods that dry down through shades of orange, red, brown, gold, and grey. Herbalists also use the plant medicinally.

Jewels of Opar is native to parts of the South and the Caribbean. It tolerates poor soil and will grow in full sun or partial shade. Perennial in zones 8 and up, Jewels of Opar also self-sows readily and may naturalize.

Prismatic Rainbow Chard

Swiss Chard

Just a few Swiss chard plants will provide plentiful greens through spring, summer, and fall. In warm climates or with a greenhouse, you may also overwinter Swiss chard, as it withstands light frost.

Swiss chard leaves have an earthy flavor with a hint of bitterness, while the midribs have a slightly sweet crunch that’s similar to celery. Cooking gives chard a mellower flavor, making it ideal for stir-fries.

In the Southeast, blister beetles may attack chard in midsummer. Pick off beetles (wear gloves!), or pull up plants and wait to replant for fall.

Jericho Romaine Lettuce

Jericho Romaine Lettuce

Jericho is among our most bolt-resistant lettuce varieties. Bred in the desert heat in Palestine, Jericho thrives in our hot summers. The tall, heavy, light-green heads retain their sweetness even when other lettuces have gone bitter. Jericho has good tipburn resistance and is a favorite among market growers.

Minnie Mizelle Collards in a greenhouse
Minnie Mizelle Collards

Collards

Collards are among our favorites on this list, and we carry so many great heirloom varieties, it’s too hard to pick just one! Collards tolerate heat and cold well, making them a great option for the Mid-Atlantic, Appalachia, and Southeast. They’re tasty, easy to grow, and high in iron and in vitamins A and C.

Folks mostly use collards as cooked greens, but you can harvest young leaves for salad mixes. Some collards, like cabbage collards, have a milder cabbage-like flavor, while some, like Alabama blue, offer stunning color, and others, like Minnie Mizelle, have a classic earthy, mustard-like flavor. Learn more about how to choose a collard variety for your garden.

The Best Organic Mulch for Your Garden

Organic mulch can help block weeds, add organic matter, hold in moisture, keep the soil cool, and increase your garden’s production. We’ve found that mulch is one of the best ways to improve soil over time. Like us, many of our customers garden in heavy clay soils where mulch is helpful for slowly building up organic matter. It’s also been critical for reducing our water usage when much of the Southeast has been in drought. If you want to add mulch to your garden this season, there are many options to consider.

The Best Mulches for Vegetable Gardens

The best mulch for your garden will depend on several factors. You want to consider your climate, your soil, and what’s readily available in your area.

Grass Clippings

If you have a mower with a bagger, grass clippings can be an excellent free option. They’re great for adding organic matter and a bit of nitrogen to the soil. While they’re decomposing, grass clippings can form thick, slimy mats. If you’re worried about this, dry your grass clippings in the sun for a couple of days, flipping the pile over with a rake a few times before placing them on your beds.

Avoid using grass clippings from lawns that may have been treated with pesticides or herbicides. It’s also best to avoid long, overgrown lawns that are full of grass and weed seed heads.

Old Leaves

Old leaves are one of our favorites because in our area, they are free and abundant. However, whole leaves have a tendency to blow away during dry periods. Shredding them or allowing them to decompose partially before applying them to the garden can help keep them in place.

Many cities have people collect leaves in bags, and you can sometimes get these for free. However, you risk that the leaves may be contaminated with herbicides or other chemicals on someone’s lawn.

Straw

Many gardeners prefer straw for their vegetable gardens. It’s attractive, easy to apply, and keeps produce like cucumbers and squash clean and dry. It’s also pleasant to walk on and usually isn’t treated with any chemicals.

The one major downside of straw is the price. Depending on your location and the size of your garden, using straw mulch can get expensive fast.alliums in hay mulch

Hay

Usually more affordable than straw, hay is a similarly popular choice for vegetable gardeners, especially those looking to build up organic matter. It can provide a dense layer to protect the soil and keep produce clean.

Unfortunately, most hay harbors weed seeds, which can sprout in your garden. You can help prevent the seeds from germinating by using a thick layer and re-applying two to three times throughout the season.

Sadly, the prevalent use of herbicides and pesticides across the United States can also make sourcing clean hay tricky. Some gardeners have had contaminated hay ruin their gardens.

Pine Needles or Pine Straw

Pine needles or pine straw is a popular mulch option in parts of the southern United States and other regions where pine forests are common. While many gardeners worry about it making their soil more acidic, old dried pine needles have a negligible effect on soil pH.

However, pine needles take a while to break down, meaning that they don’t add organic matter to the soil quickly. That said, if you have an abundance, they’re still a good option.

Avoid purchasing artificial pine straw mulch. It isn’t real pine needles; it’s made from shredded plastic and you shouldn’t use it in a vegetable garden.

Paper/Cardboard

Paper and cardboard are a common base layer in new vegetable gardens to block weeds, but you’ll want to select them carefully. Some cardboard and paper options may contain toxic dyes, glue, staples, plastic tape, or plastic linings. Use only undyed material and carefully remove and staples or tape before placing it in the garden.

Thick cardboard can also provide a pleasant spot for slugs to hide beneath. If you’re seeing signs of slug damage, check under the cardboard in the morning and remove any slugs.Rows of collards growing in wood chip mulch

Wood Chips

Though not everyone agrees, wood chips are another of our favorites, especially for pathways and perennial beds. You can often source wood chips for free from local power companies that chip trees and limbs they clear from power line right-of-ways. They make a good mulch that breaks down slowly over the season, meaning we don’t have to re-apply too often.

One concern many gardeners have is that wood chips will tie up nitrogen. However, this isn’t really an issue unless you’re tilling the wood chips into the soil. They don’t tie up nitrogen when they’re sitting on top. They can also create homes for insects like slugs or ants, but they provide space for beneficial insects, bacteria, and fungi. In fact, many gardeners grow edible mushrooms on wood chip mulch.

While usually more expensive, shredded, undyed bark mulch also works well.

Using Mulch in the Vegetable Garden

Always collect more mulch than you think you will need. In order for mulch to provide its many benefits, from blocking weeds to adding organic matter, it needs to be thick. For dense mulches like wood chips, a few inches will do, but for light, fluffy mulches like old leaves, you want to add at least 6 to 8 inches.

Before placing mulch, it’s ideal to start with a clean slate and remove any weeds. After adding your mulch, water it in. Alternatively, you can place it on a rainy day.

Avoid placing mulch over seeds that haven’t germinated or covering tiny seedlings. In wet climates, don’t pile mulch over plant crowns or up against plant stems, as it can encourage rot.

If you have slug problems, pull mulch away from plants for a time to remove the hiding places for slugs while you deal with the issue.

Saving the Past for the Future