Transplanting Tomato Seedlings

Most of you have probably already transplanted your tomato seedlings, but here at SESE we do it a bit later than most. Why? Because we want the vast array of tomatoes we grow for the tastings at our late August open house and at the Monticello Heritage Harvest Festival in September to be ready for picking just at the right time for those events. We’re growing more than 70 varieties for you to come and taste!

Just a tiny selection of the tomatoes going in our tasting patch

Here’s the technique we use for quick and successful transplanting of tomato seedlings:

After hardening them off for a couple weeks in our cold frames, we’re ready to take them out to the garden. For us, this means lots of careful labelling and mapping to keep all those varieties clearly separated!

Step 1: We start by spreading hay thickly over the whole area where the plants will go. This serves to keep the ground cool, hold moisture in, and choke out weeds, and in the long term it adds organic matter to improve the soil. If you try this, make sure you get hay that hasn’t been treated with herbicides or pesticides. You’ll also want to get hay that’s been sitting for a year or so, giving all the seeds a chance to have sprouted and died, or you’ll be growing grains alongside your tomatoes.

Step 2: Make a nest in the hay at each place where you want a tomato to go. Space them about 4 feet apart and make each nest about a foot in diameter, pushing the hay away until you can see the ground.

tomato planting nest

Step 3: Dig a hole at the bottom of the nest, toss in a double handful of compost, and mix the compost with the soil you have loosened.

removing tomato seedling from flat

Step 4: Gently pull the seedling out of its container and lay it on its side at the bottom of the hole you’ve dug, all the way at one edge of the nest space. This way you can cover not just the root ball, but also a good portion of the stem with soil. You want to bury a third to a half of the plant. Tomatoes will grow roots along any portion of the stem which is underground, and this method gives you a much sturdier root structure. Be careful that the sideways portion of the stem is supported by soil so it doesn’t break.

tomato seedling planted

Step 5. Cover the root ball and stem portion with soil and press it down firmly. Good soil to root contact is essential to get the plant sucking up water and nutrients right away. Then pull the hay back into place all around the stem of the plant, tucking it in cozily. Finally, give it a good watering and watch your baby grow!

Tomato seedling tucked in

If you do come to the Heritage Harvest Festival, here are a few of our top picks to look out for:

  • Rutgers 250 This is a brand new variety which brings added durability to a flavourful old heirloom and we plan to add it to our 2017 catalog.
  • Matt’s Wild Cherry This one is always a favourite at tastings, an intensely sweet wild cherry tomato originating in Mexico.
  • Garden Peach A delightful novelty tomato disguised as a peach.

Planting for Pollinators: Black Swallowtail Butterfly

Eastern Black Swallowtail

As a garden lover, you know that pollinators are in trouble. For decades now huge amounts of pesticides have been dumped on US crops in order to control pests (335 million lbs in 1965, up to 948 million lbs by the year 2000, as the bugs keep gaining resistance.) At the same time pollinator populations are being destroyed. Compounded with the chemical stress, they are losing their food sources as more invasive species of plants that they cannot eat crowd out native species. It’s up to us enthusiastic gardeners (even if you’re not quite as enamored of all the creepy crawlies as I am) to plant the first line of defense and grow with an eye not just to our plates, but to the care of our buggy friends. We know from how quickly our Insectiary Mix gets snapped up that people want to be doing this, so we’d like to offer more in-depth information about particular pollinators and how to attract and care for them.

Butterflies are an easy sell for gardeners. Unlike wasps and bees, no one is afraid of them, and they make a beautiful addition to any garden. Moreover, butterflies help to pollinate your plants and feed your songbird population. While adult birds can live well on seeds and berries, nestlings are unable to digest these yet and require juicy caterpillars to help them grow. Without a steady supply of caterpillars arriving at the nest – it takes thousands to feed one clutch – baby birds starve to death. Read more here.

The Eastern Black Swallowtail is a wonderful candidate to attract to your garden. They are efficient pollinators and their striking black wings dabbed with yellow and blue are a delightful sight among the flowers. There are hidden benefits too: the caterpillar of the black swallowtail smells bad to predators and helps to deter them from your garden. The black swallowtail has a large range, covering all but the northeastern part of the United States, and extending well south into Mexico.

So what can you grow to draw these lovely critters? Black Swallowtail caterpillars feed on plants in the Apiaceae family – that’s carrots, dill, fennel, parsley, celery, caraway. Keep in mind that feeding caterpillars means sacrificing some plants, so if you’re trying to feed yourself too it’s a good plan to grow extra plants that you won’t mind sharing with the caterpillars.

A quick guide to recognizing the black swallowtail in all its stages:

Eggs: tiny yellow spheres on leaves and stems, turn brown before hatching (actually, it’s turning translucent and the brown is the caterpillar seen through.)

Caterpillars: They grow in 5 instars. Starting out black and spiky, they moult to light green striped with black with yellow spots, with a little spike in each yellow spot. The last three instars are similar, but often with more light green at each and spikes disappearing.

Pupa: The skin splits to form chrysalis (no cocoon like with silk moths), held on to a twig with a thread harness. It can be green or brown. The last generation of the season overwinters as a pupa, for as long as nine months.

Adult males have more yellow, females more blue on the wings, and a wingspan of about 7-8.5 cm.

More about black swallowtails.

Black Swallowtail Caterpillar

Cover Crops for Great Green Manure, Mulch, and More

By Ira Wallace

Warm weather and late April rains have our fall-planted crimson clover, winter rye, and Austrian winter peas growing like weeds and just starting to bloom.  As an edible bonus, the winter peas gave an abundance of sweet pea shoots to add to salads all winter and spring. The bright red flowers of crimson clover provide much-needed pollen and nectar for pollinators and other beneficial insects in spring.

To select the best cover crops for your garden, consider which functions are your priorities, the time of year, and how long the cover crop will be in the ground. Cover crops are important tools all year for filling in gaps between crops while also preventing soil erosion, suppressing weeds, providing habitat for pollinators, and improving fertility. Some even provide an edible bonus, for you and for pollinators. Here are some cover crop favorites in the Southeast.

Winter Nitrogen Fixers – soil fertility out of thin air.

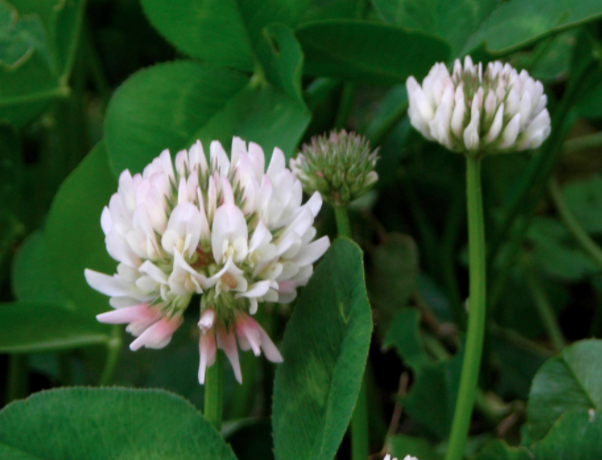
  • red-Clover-2-GryphonClover (crimson, white, and red Sow clover six to eight weeks before your average first frost date. Clovers fix nitrogen in the soil and thus boost nitrogen for next spring’s garden. Mow one or two times when about half of the crop is flowering. Allow the residue to decompose for at least two weeks before planting vegetables.
  • Hairy Vetch– Sow hairy vetch six to eight weeks before the average first frost date. This vine-like, vigorously-growing, cold-tolerant, winter-hardy, annual legume adds nitrogen and builds soil organic matter. Hairy vetch grows well in cereal grain mixtures and is an excellent spring weed suppressor.
  • Pea shoot and Brassica Flower xaladWinter Peas (Austrian)– Sow winter peas four to six weeks before the average first frost date. Sometimes called “black pea” and “field pea”, this is a cool-season, annual legume with good nitrogen-fixing capabilities. Usually planted with rye, oats, or barley to reduce the chance of winter kill. Cut and turn under at full bloom for maximum nitrogen.

Winter Soil Builders and Subsoil Looseners – for the surface or deeper down.

  • Winter Rye (Cereal Rye)
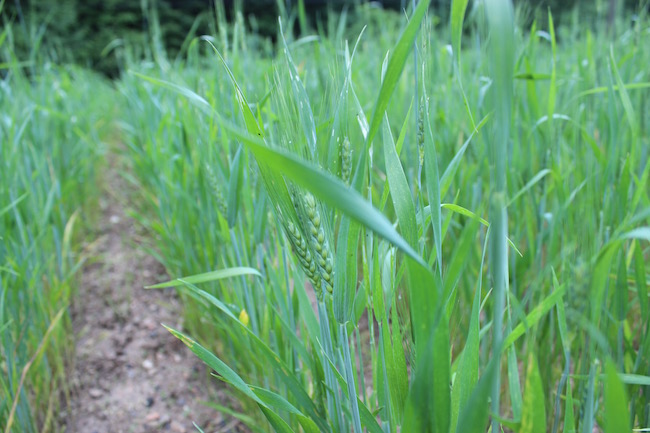
    Sow winter rye six weeks before the average first frost date and up to two weeks after. A cold-hardy crop, winter rye will grow well into the spring. Winter Rye increases soil organic matter as it decomposes. Mow one to two times when at least 12 inches tall, or when half of the crop has immature seed heads. Allow residue to decompose for at least two weeks before planting vegetables.
  • Oats – Sow oats eight to ten weeks before the average first frost date. Oats are killed by the hard frosts. They form a winter surface mulch, preventing erosion and increasing soil organic matter as they decay.

Edible Cover Crops

Traditional gardeners in the Southeast plant a big bed of winter greens (turnips,  mustards, kale, and collards) to keep the garden covered and provide fresh eating until spring.  Plant this beautiful edible greens cover crop in August or September to build organic matter and provide healthy meals all winter long. Try a mixture of the old Southern favorites and contemporary choices like Seven Top turnip, Lacinato kale, Red Russian kale, Southern Giant Curled mustard greens, and Tatsoi.

If you are in the upper South or in the mountains, cover your winter greens with row cover or plant in a cold frame for winter harvests. Left uncovered in cold winters, the leaves will be too damaged for good eating, but you’ll have fresh new growth in early spring if winter lows aren’t too bad.

For more reason to plant cover crops read our Cover Cropping for Unpredictable Weather


Warm Season cover crops and filling in the summer gaps

  • Sorghum-Sudan Grass hybrid Plant in spring and summer, beginning after the soil has warmed and up until six weeks before first frost. This hybrid is unrivaled for adding organic matter to worn-out soils. These tall, fast-growing, heat-loving summer annual grasses can smother weeds, suppress some nematode species, and penetrate compacted subsoil.


  • pink-eye-purple-hull-webSoybeans (Edamame) and Southern Peas (Cowpeas)
    Plant in early summer through mid-summer, between spring and fall crops. Mow before pods have formed or when pods are still green and have not matured. These legume family plants can fix nitrogen for an added bonus.
  • buckwheat-webBuckwheat
    Plant from spring through early fall when the ground will be open 5 weeks or more. Buckwheat establishes quickly, suppresses weeds and attracts pollinators. Mow one to two times when half the crop is in flower and before hard seeds have formed. Will be killed by frost.

Although fall through winter is the most common time when gardeners grow cover crops, savvy gardeners include summer cover crops in their garden plans. No matter which cover crops you choose or when you fit it in your garden rotation, cover crops allow you to grow your own nitrogen and organic matter in place.

When to Mow or Turn Under Cover Crops

A lot of factors go into determining the best time to turn under or at least cut down your winter cover crop. To get the most biomass, wait until half of the cover crop is in flower but make sure to get it cut down and incorporated before it goes to seed. Some freshly cut cover crops like winter rye inhibit seed germination for the following crop. If you are planning to direct seed allow 2 to 4 weeks for your cover crop to decompose before planting. This same property can be an advantage in weed suppression if the cover crop is just crimped or rolled and left as a mulch for transplanted tomatoes.

Another factor to consider is when you want to plant the next crop. For early spring plantings you may need to cut and turn in your cover crops well before flowering and allow a longer time (maybe 3 to 6 weeks) for the organic matter to decompose before planting. You can speed up decomposition of the cover crop 1 or 2 weeks by sprinkling in some mature compost or applying compost tea to add beneficial soil organisms before turning it under.

For most home gardens you can cut your cover crop with a hand sickle or scythe and add it to your compost. This leaves the considerable roots to add organic matter and aerate the soil. You can also weed-eat it or mow it and just let it lay there on the ground as mulch or till it in.  For the home gardener, Roto-tilling  is the fastest and easiest way to incorporate your cover crops, but you can also spade in your crop residues the old fashioned way. Digging in your covers crops aids in faster decomposition and less nitrogen loss into the atmosphere.


Saving the Past for the Future