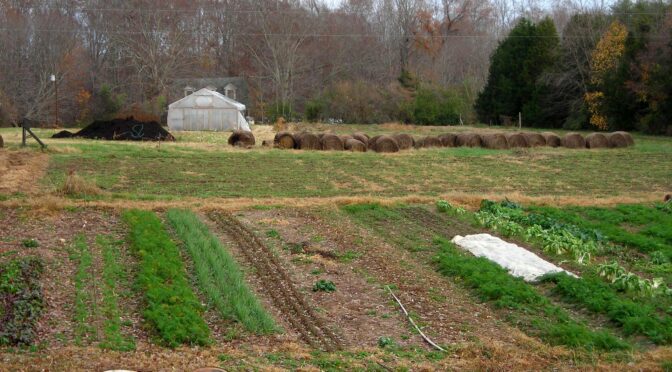
There’s nothing like meals with homegrown ingredients straight from your garden. Grocery store produce can’t compare in flavor or price. If your goal is to eat as much fresh food from your garden as possible this season, you’ll need to use succession planting.
Succession planting means that you don’t plant all at once. For example, you can sow a patch of lettuce or salad greens every couple of weeks so that when some bolts, another batch will be ready to harvest. This method also works great with crops like sweet corn that mature all at once. Sow a block every two weeks to have sweet corn over a more extended period.
Here in the Southeast, you can get several successions of many crops. Just check your estimated first frost date. Then look at a crop’s days to maturity and count backward. Note, when daylight hours are dwindling during the fall, you need to add on some extra days.
Here are some of the crops that are ideal for succession planting:
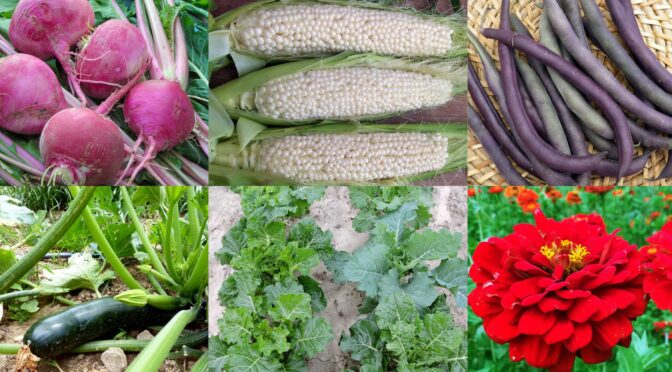
Collards
Especially in the Southeast, collards can be grown for quite a long season. Here in zone 7a, we begin sowing collards on March 10th and continue until September 1st.
Sweet Corn
As I mentioned above, sweet corn planted simultaneously will all be ready to harvest at the same time. This method of planting is excellent if you want to freeze or can a bunch, but not ideal for fresh eating. In zone 7a, we plant can plant successions of corn from about April 21st through July 15th.")
Zinnias
Flowers can be succession planted too! Zinnias are one of the easiest cut flowers to grow, and sowing several successions can keep you in beautiful bouquets all summer long.
Beans
Succession planting may not be necessary for dry beans, but planting a few successions can be a good idea if you’re growing beans for fresh eating. Planting beans at different times can also help figure out a good planting time to avoid bean beetles. In zone 7a, we begin planting beans around April 15th. We sow pole beans until July 15th and bush beans until August 1st.
Summer Squash & Zucchini
If you’ve been gardening for a few years, you’re probably familiar with the gluttony of squash just a few plants can provide. To help mitigate this, plant just a couple of hills at a time and spread that harvest out! In zone 7a, we plant summer squash and zucchini from April 21st through July 21st.
Cucumbers
Like summer squash, cucumbers can provide an overwhelming abundance if you plant a large patch. If you’re canning pickles, this is a great thing! However, if you want to enjoy the crunch of fresh cucumbers over a longer season, you’ll need to plant multiple successions. Succession planting can also help you get a larger crop even if you struggle with losing plants to Downey mildew and other diseases. Here in zone 7a, we’ll sow cucumbers from around May 1st to July 21st.
Beets
Beets thrive in cool weather, but you can still get several successions in. We recommend doing a few in the spring and a few in the fall. Fall beets are ideal for storage. In zone 7a, we sow beets during the spring from March 15th to June 15th and then again in late summer from August 15th through September 15th.")
Broccoli
Many gardeners think of broccoli just as an early spring crop, but with a little work, you can get multiple broccoli harvests throughout the season. Here in zone 7a, we can do a combination of direct sowing and transplanting. We begin sowing indoors on January 31st and continue until May 31st. We start transplanting out on March 15th and continue to July 15th. We also direct sow from March 10th through July 1st. Check out our post, Tips for Direct Sowing in Hot Weather for advice on sowing cool-season crops like broccoli during the summer.
Turnips
Like beets, we sow turnips in the spring and again for our fall garden. In the spring, we sow them from March 10th through April 15th. In the fall garden, we sow them from August 7th through October 1st.
These are just a few of the crops well-suited to succession planting. You may also want to try carrots, radishes, spinach, Swiss chard, and other vegetables. We even do tomatoes to ensure we have enough late tomatoes for our fall taste testings! Use succession planting in your garden to have smaller quantities of fresh produce over a longer season.