Raised garden beds are a great choice for many gardeners. They allow you to turn unused space, like a rooftop or yard, into a productive garden. They can also make gardening more accessible for those with limited mobility. While there are many ways to make a raised bed, there are a few features you want to consider when designing a raised bed to have a productive vegetable garden.
Selecting a Site for Your Raised Beds
When choosing a spot for your raised beds, you want to consider the site’s accessibility, access to water, sunlight, and surface. Most people find they use their garden’s fresh produce more when it’s easy to harvest. If you can, placing raised beds near a door may encourage you to enjoy more fresh herbs in your recipes or fresh side salads. Passing them daily can also help you remember to weed, water, and harvest frequently.
Ideally, your beds should also be within reach of a hose or irrigation source. You can hand water raised beds, but lugging heavy watering cans isn’t most people’s idea of a good time.
Sunlight is perhaps most critical. Raised beds need to receive at least 6 to 8 hours of sunlight per day for your crops to thrive. Vegetables like tomatoes, peppers, and summer squash will all grow, produce, and ripen faster when they receive plenty of sunlight.
Last, think about what surface you will construct your raised beds on. Is it a front yard with good quality soil, a paved extra driveway spot, or a once abandoned lot for a community or urban garden? In an area with good soil, your plants will send roots down through the raised bed and into the ground. However, if you a growing in an area where the ground could be contaminated, construct a raised bed with a solid but permeable bottom so that water can drain out but your plant’s roots can grow down into the soil.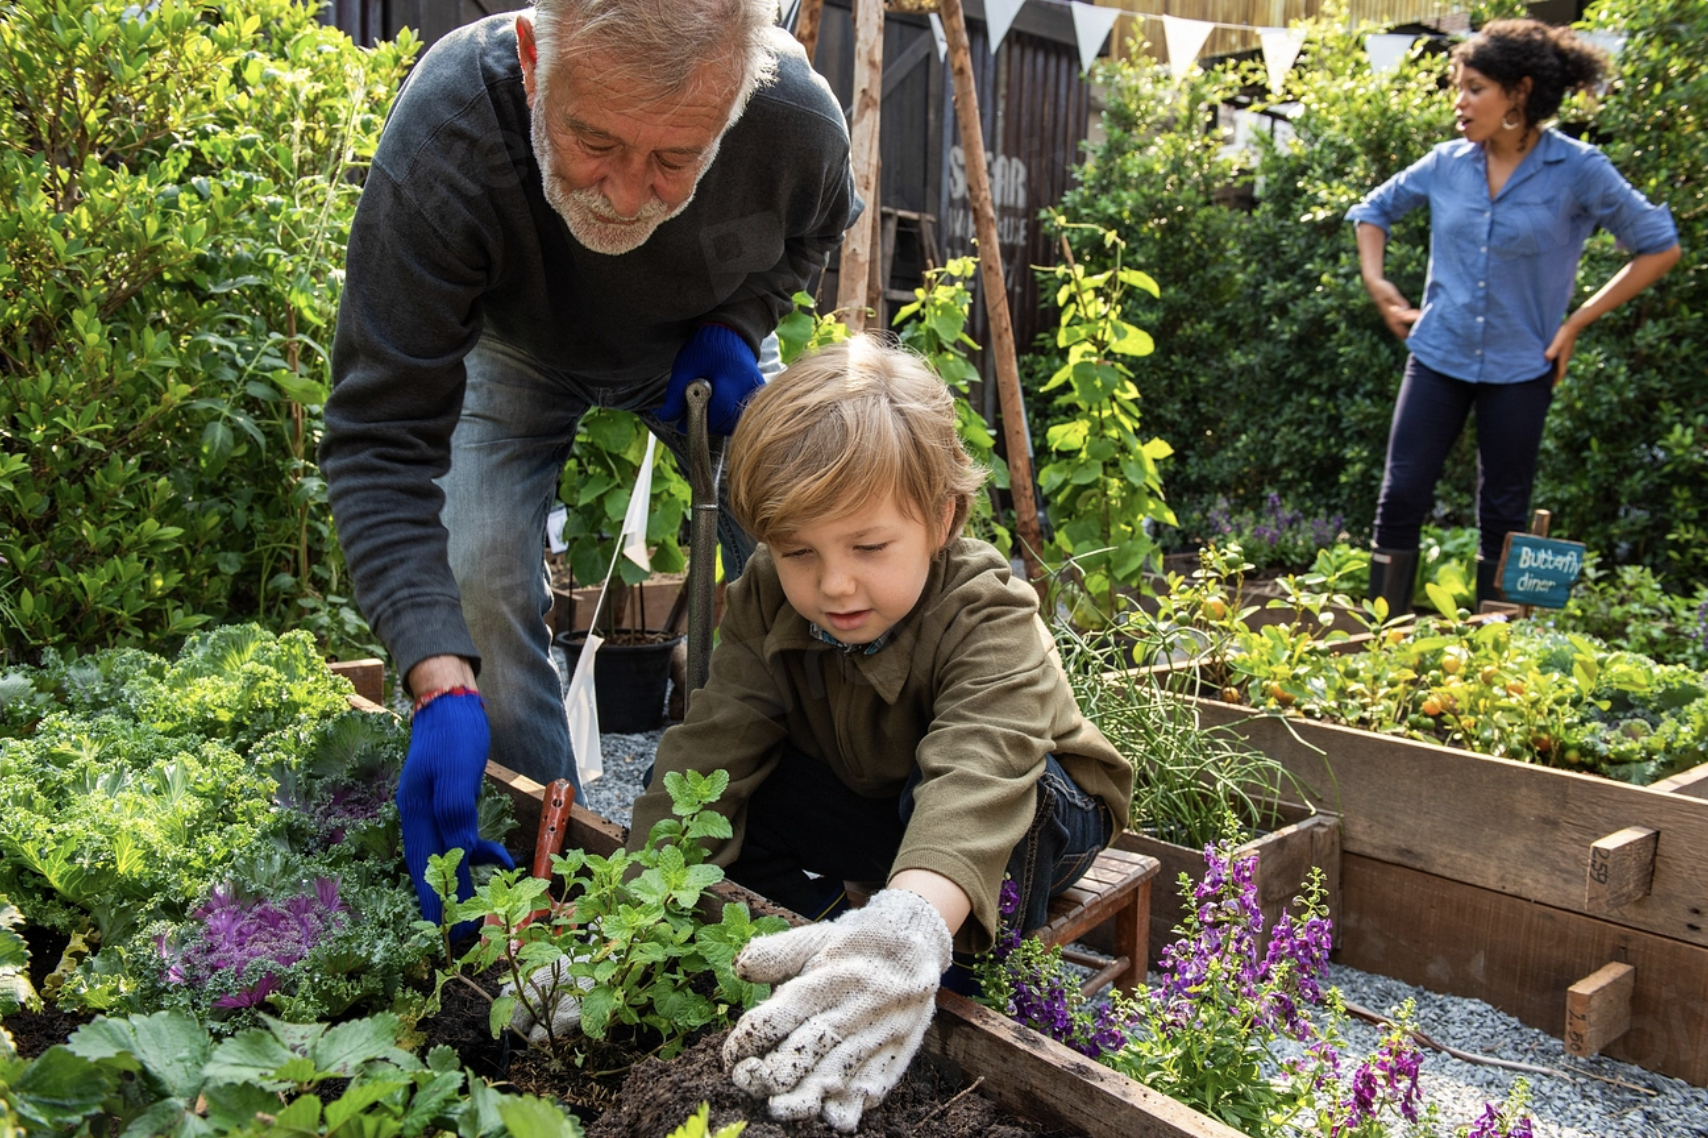
How Deep Should My Raised Bed Be?
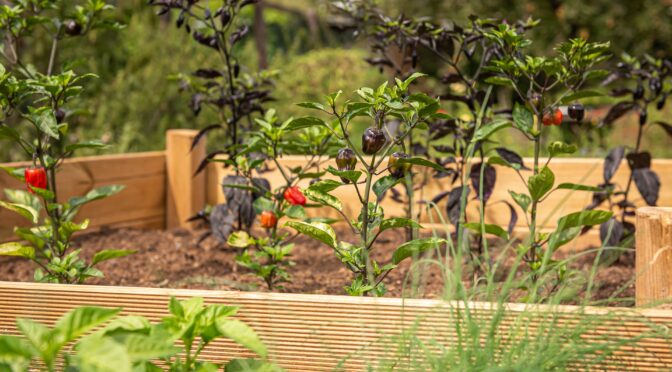
Raised beds should be as deep as possible so that large crops like tomatoes, artichokes, and sweet potatoes have plenty of room to grow healthy roots. At a minimum, you want your raised bed to be 12 to 18 inches deep.
Unfortunately, many gardeners are limited by their budget or their space. If you don’t have the setup or budget for a deep raised bed, you can always focus on shallow-rooted crops like lettuce, strawberries, cilantro, spinach, onions, spring radishes, and other greens and herbs.
How Big Should My Raised Bed Be?
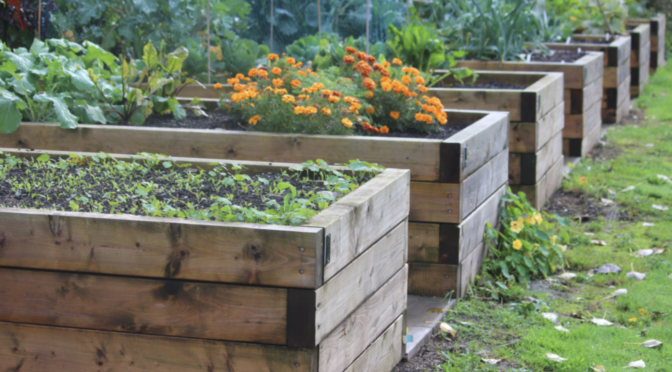
Raised beds can be any size that works for you! One thing to keep in mind is how far you can reach. We like to keep raised beds about 3 to 4 feet wide so that someone weeding or planting can easily reach into the center.
Having several shorter raised beds rather than one long one can also make them more accessible. Pathways all the way around your beds will allow you to maneuver to weed, harvest, water, or bring in wheelbarrow loads of compost. Keep pathways about 2 feet wide or wider for easy access.
You may also want to choose a unique design, like a keyhole or U-shaped raised bed, so that you can easily reach all of the garden without moving your position. These types of raised beds lifted onto tables or built tall are ideal for wheelchair access.
Laying out your raised bed positions with stakes and string or large pieces of cardboard can help you make the best choices for sizing and layout.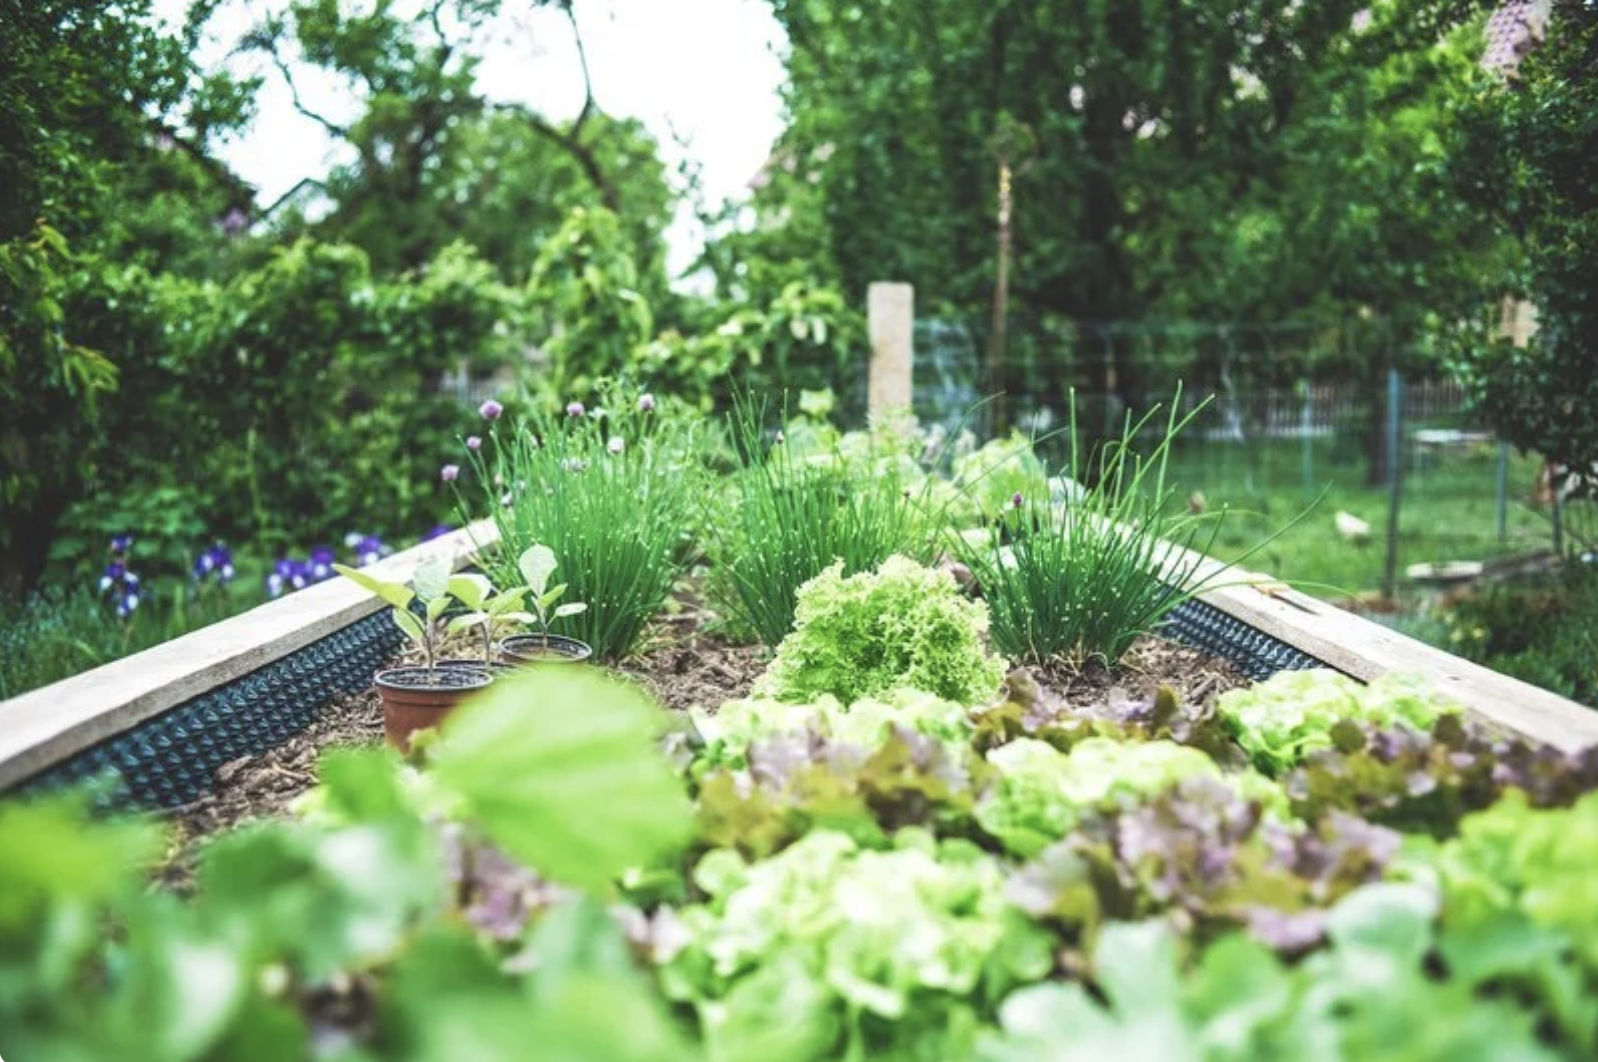
What Materials Should I Use for Construction?
There are so many materials you can use to construct raised beds, but there are a few things to consider, like your budget, the material’s longevity, its weight, and how easy it is to source. Many gardeners opt to create raised beds from materials that already have on hand or can find used.
Popular options for raised beds include bricks, stones, galvanized or powder-coated steel, or rot-resistant lumber like cedar, black locust, black cherry, oak (chestnut, bur, post, white), or Osage orange. Using reclaimed lumber or logs is another common choice, just keep in mind that most wood will rot fairly quickly and need to be replaced.
Some gardeners also use cinder blocks or cement blocks to create permanent raised beds. However, many of these contain fly ash, which is a byproduct of burning coal. Fly ash contains heavy metals and hazardous materials. While some sources indicate these blocks are safe for raised beds, we encourage gardeners to make their own decision.
You also want to avoid other materials that might leach toxins into your soil. These include railroad ties treated with creosote, used tires, pallet wood that has an “MB” stamp, meaning it’s treated with methyl bromide, or CCA-treated wood from prior to 2003 that contains toxins like arsenic and chromium. Painted wood may also be an issue if you don’t know the source. The paint could be lead paint. Lastly, some plastic materials could break down and leach toxins over time.
What Soil Should I Use?
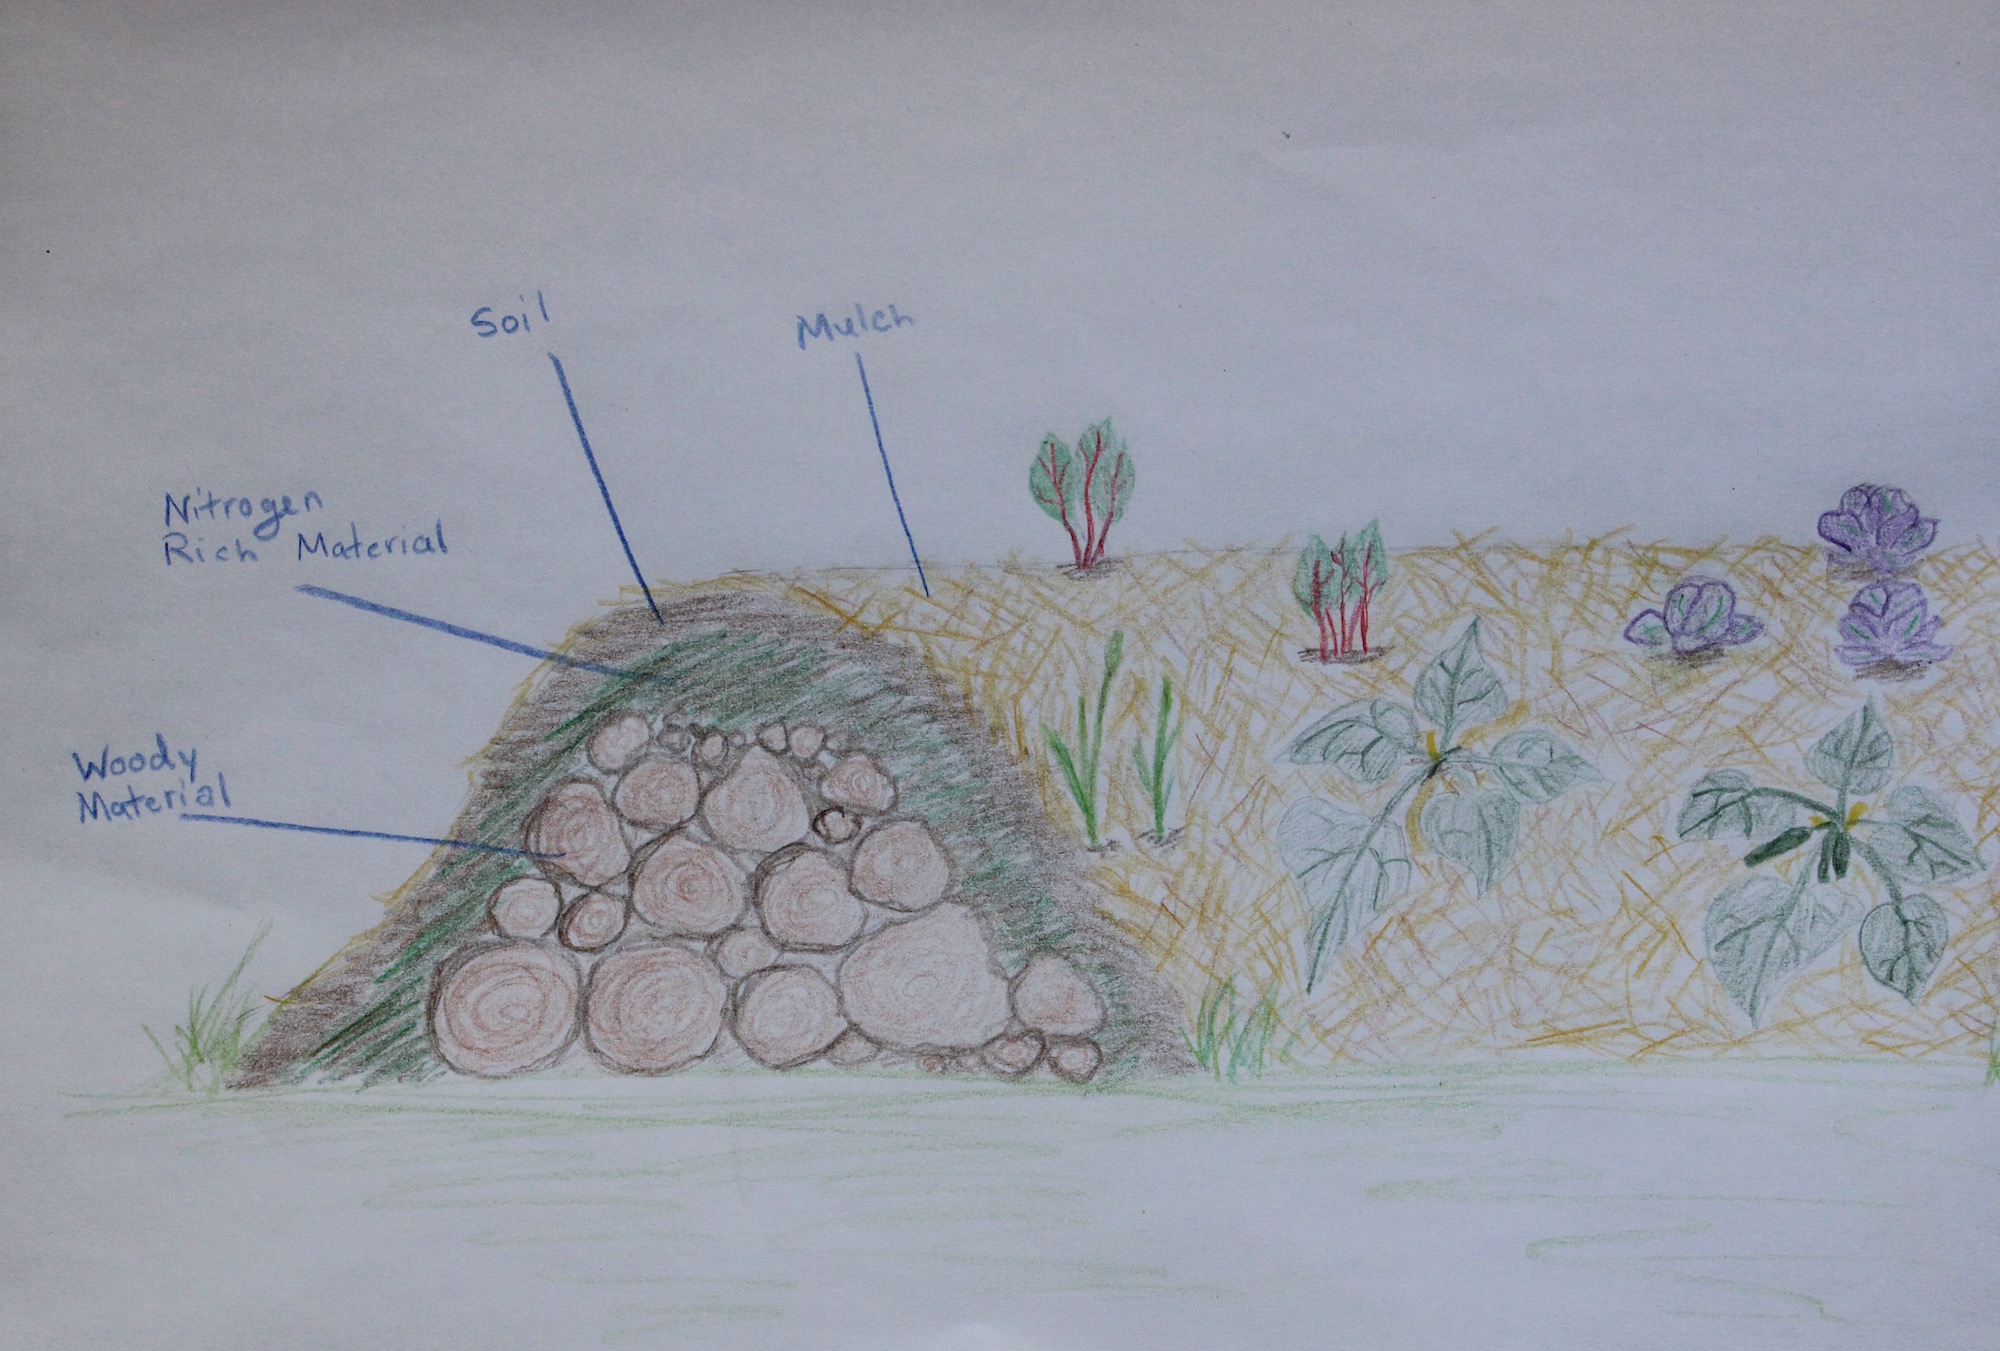
One of the major expenses associated with raised beds is the soil to fill them. Unfortunately, it’s best not to just dig soil from the backyard. To fill your raised beds, you need soil that’s well-draining and rich in nutrients.
A mix of finished compost and high-quality topsoil or potting mix is a good option. We recommend about 50% to 60% topsoil and 40% to 50% compost. It’s best to purchase topsoil from a trusted local nursery, as many states lack any regulation on topsoil quality. If you have plenty of homemade compost, you can also opt to fill your beds entirely with it.