Tag Archives: beginner garden

Best for Beginners: Top Ten Crops

Planning your first garden is a thrill. There are so many beautiful varieties to choose from, but it can also be overwhelming. If you’re just getting started, there are a few crops we always recommend to beginners, especially in the Southeast.

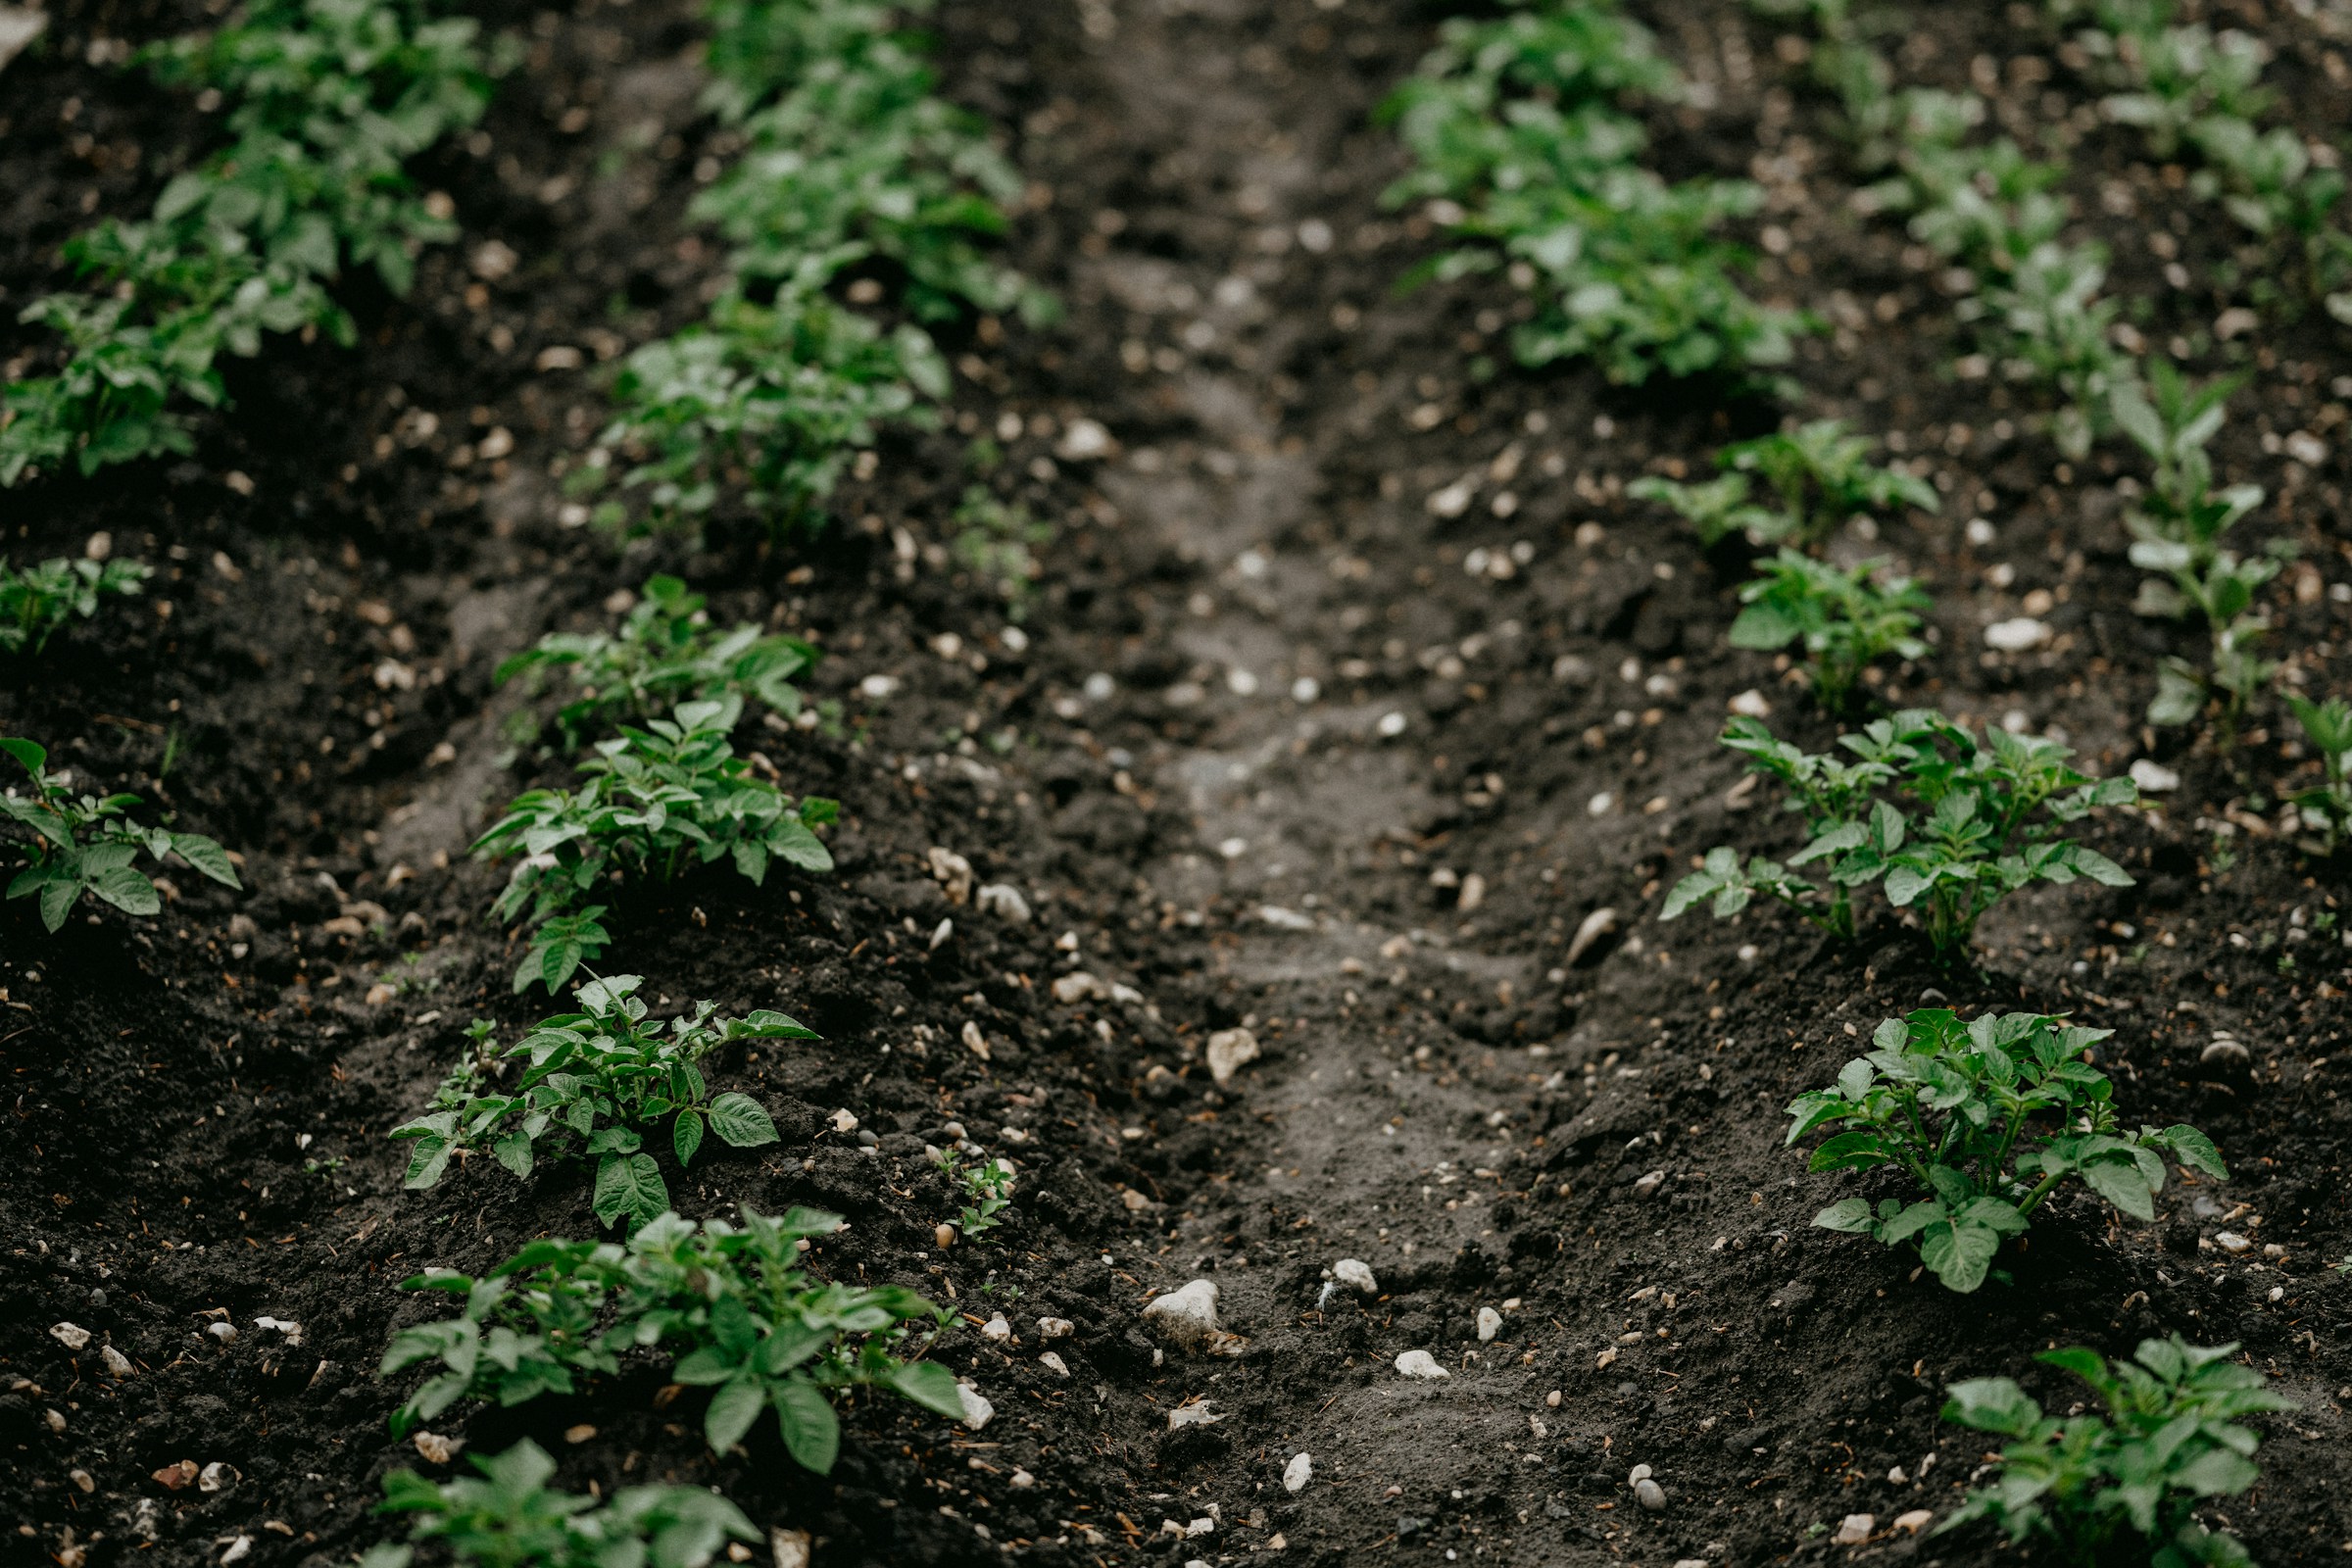
It can be tempting to till up an enormous garden, but my best advice for beginners is to keep it small. As gardeners, we all start the season with the best intentions, but with vacations, work, and family commitments, it’s easy for the garden to get away from us. A well cared for small garden will be much more productive than a neglected large garden.

Virginia Select Paste Tomato
Virginia Select Roma VF Paste Tomato

Tomatoes

When you’re getting started with tomatoes, stick to a rugged, disease-resistant variety. Many cherry tomatoes, like Matt’s Wild, Yellow Centiflor, and Black Cherry tomatoes, are vigorous and will bear until frost. They’re also suitable for growing in large containers, though you’ll still need a sturdy trellis or hoop.

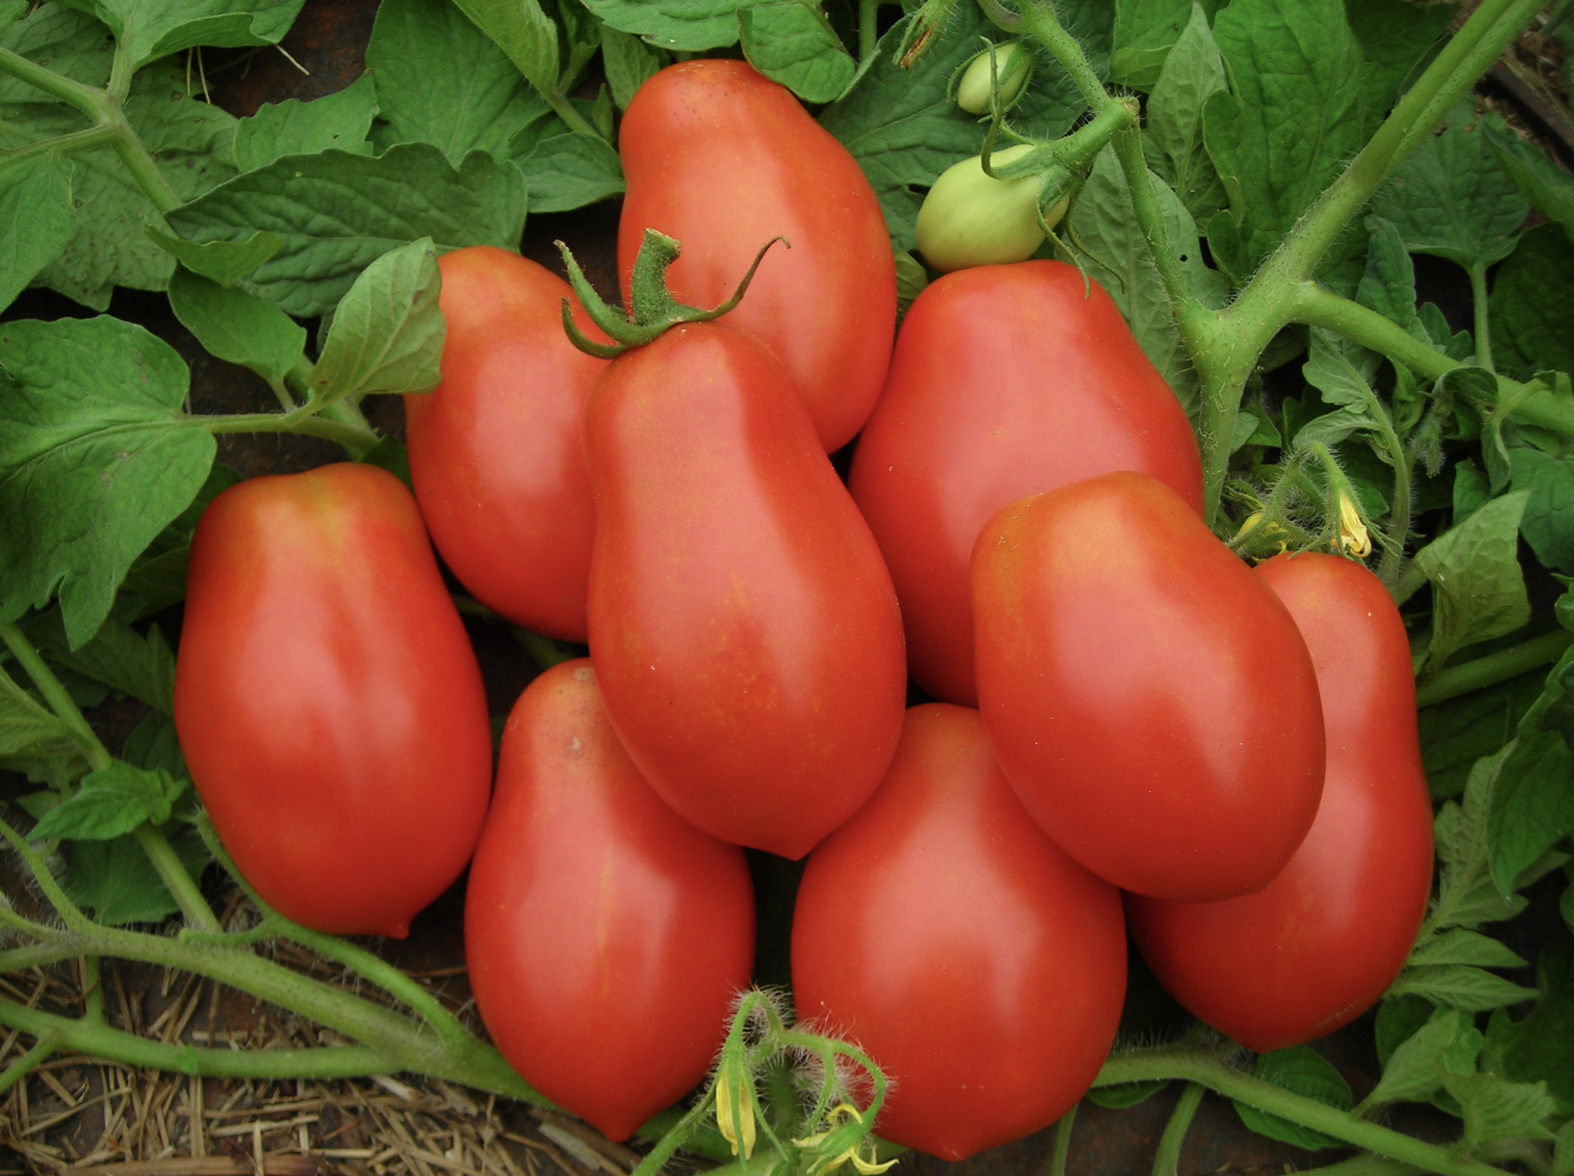
If you love to cook or can, paste tomatoes are another great option. Varieties like Amish Paste, Yellow Bell Paste, and Super Italian Paste tomatoes are productive and disease resistant. For small gardens, try a determinate paste tomato. Determinate varieties (as opposed to indeterminate) grow to a certain height, produce a bunch of tomatoes, and then stop. They don’t require pruning or heavy-duty trellises; a single large stake or tomato cage will suffice. Some disease-resistant determinate varieties include Virginia Select Roma VF, Principe Borghese Drying, and Heinz 1350 VF Processing.

Easter Egg Spring Radishes

Radishes

Radishes are a thrill to grow, especially for kids, because they grow so quickly. You can enjoy spring radishes like Sparkler White Tip or Easter Egg in as little as 24 days! The entire plant is edible, including the roots, leaves, flowers, and seed pods. 

Radishes can also help you detect soil deficiencies early. If your spring radishes fail to grow or form spindly roots, you likely have nutrient-poor soil. Add finished compost to your beds before planting again.

Genuine Cornfield Pole Snap Bean

Pole Snap Beans

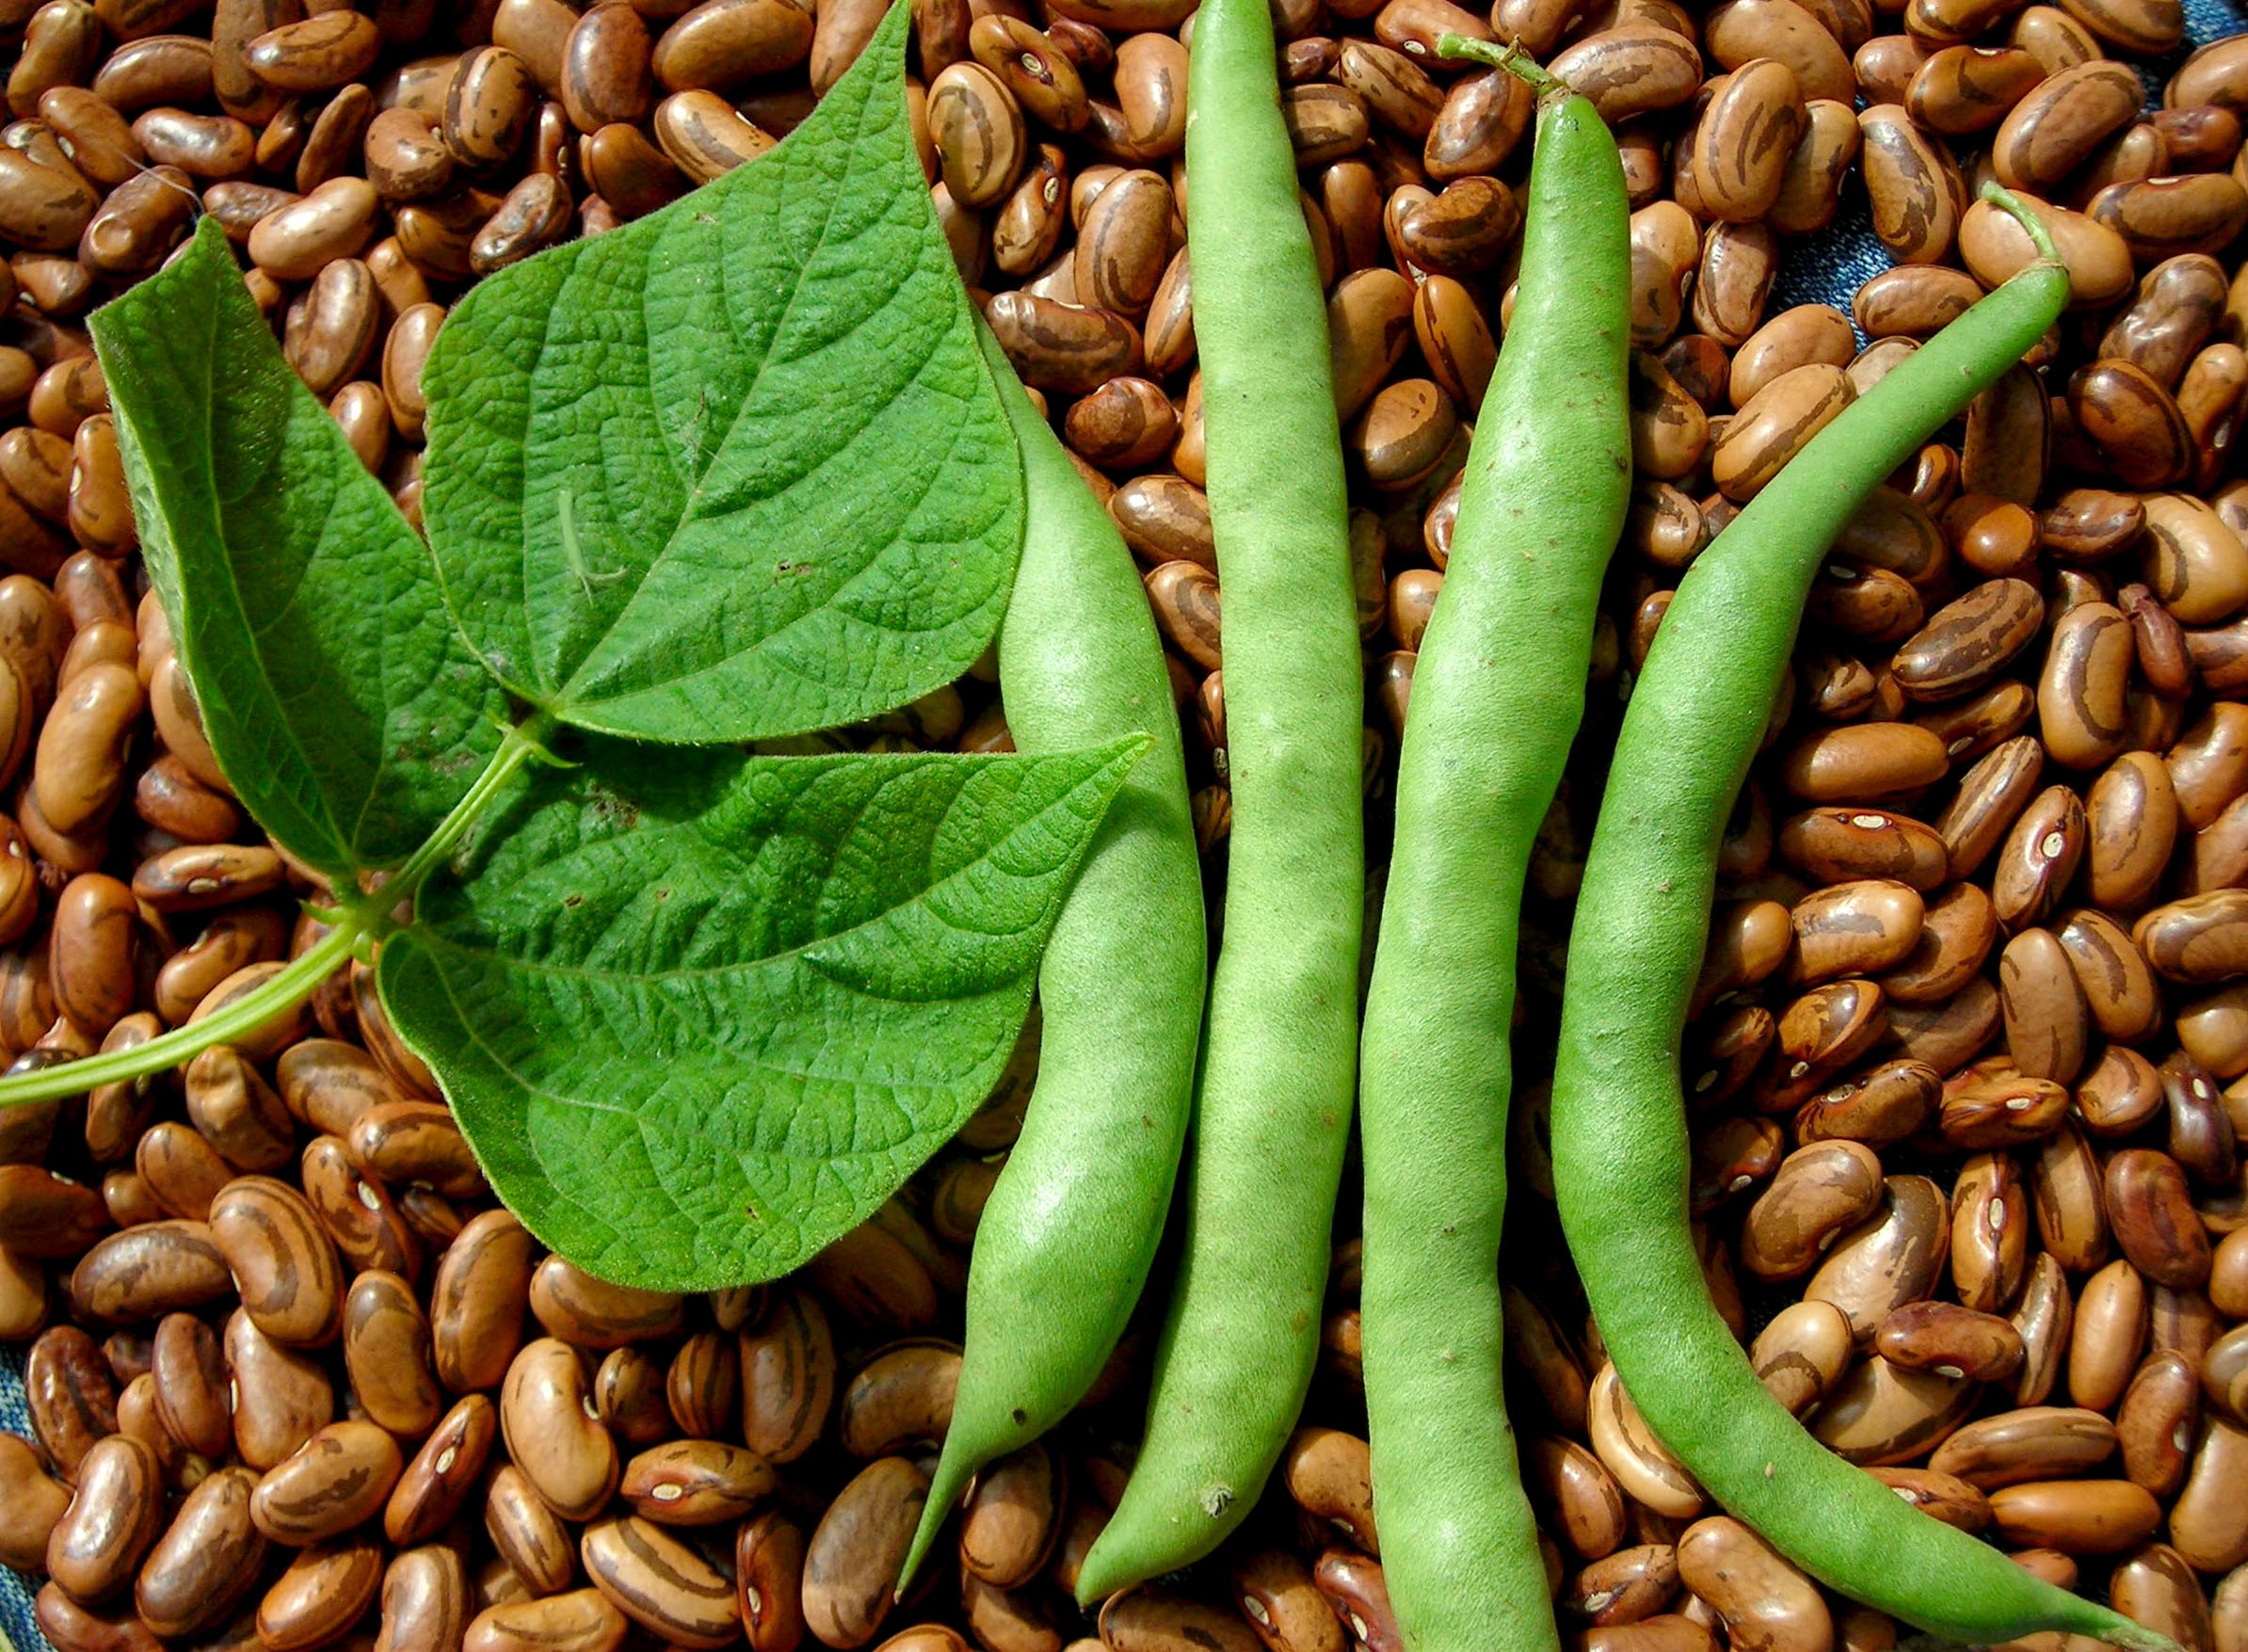
Pole beans are among our favorite crops for beginners, and they’re disappearing! Pole beans are difficult to harvest with equipment, so many seed companies are switching to bush beans, leaving these heirlooms in the past. 

However, pole beans are a great option for home gardens. Pole beans have large seeds, great for getting young kids involved in the planting. You can use pole beans to create bean teepees or tunnels, which makes harvesting extra fun and doubles as great summer forts for kids.

Some great varieties for beginners are Kentucky Wonder (Old Homestead) Pole Snap Bean, Rattlesnake Pole Snap Bean, and Genuine Cornfield Pole Snap Bean.
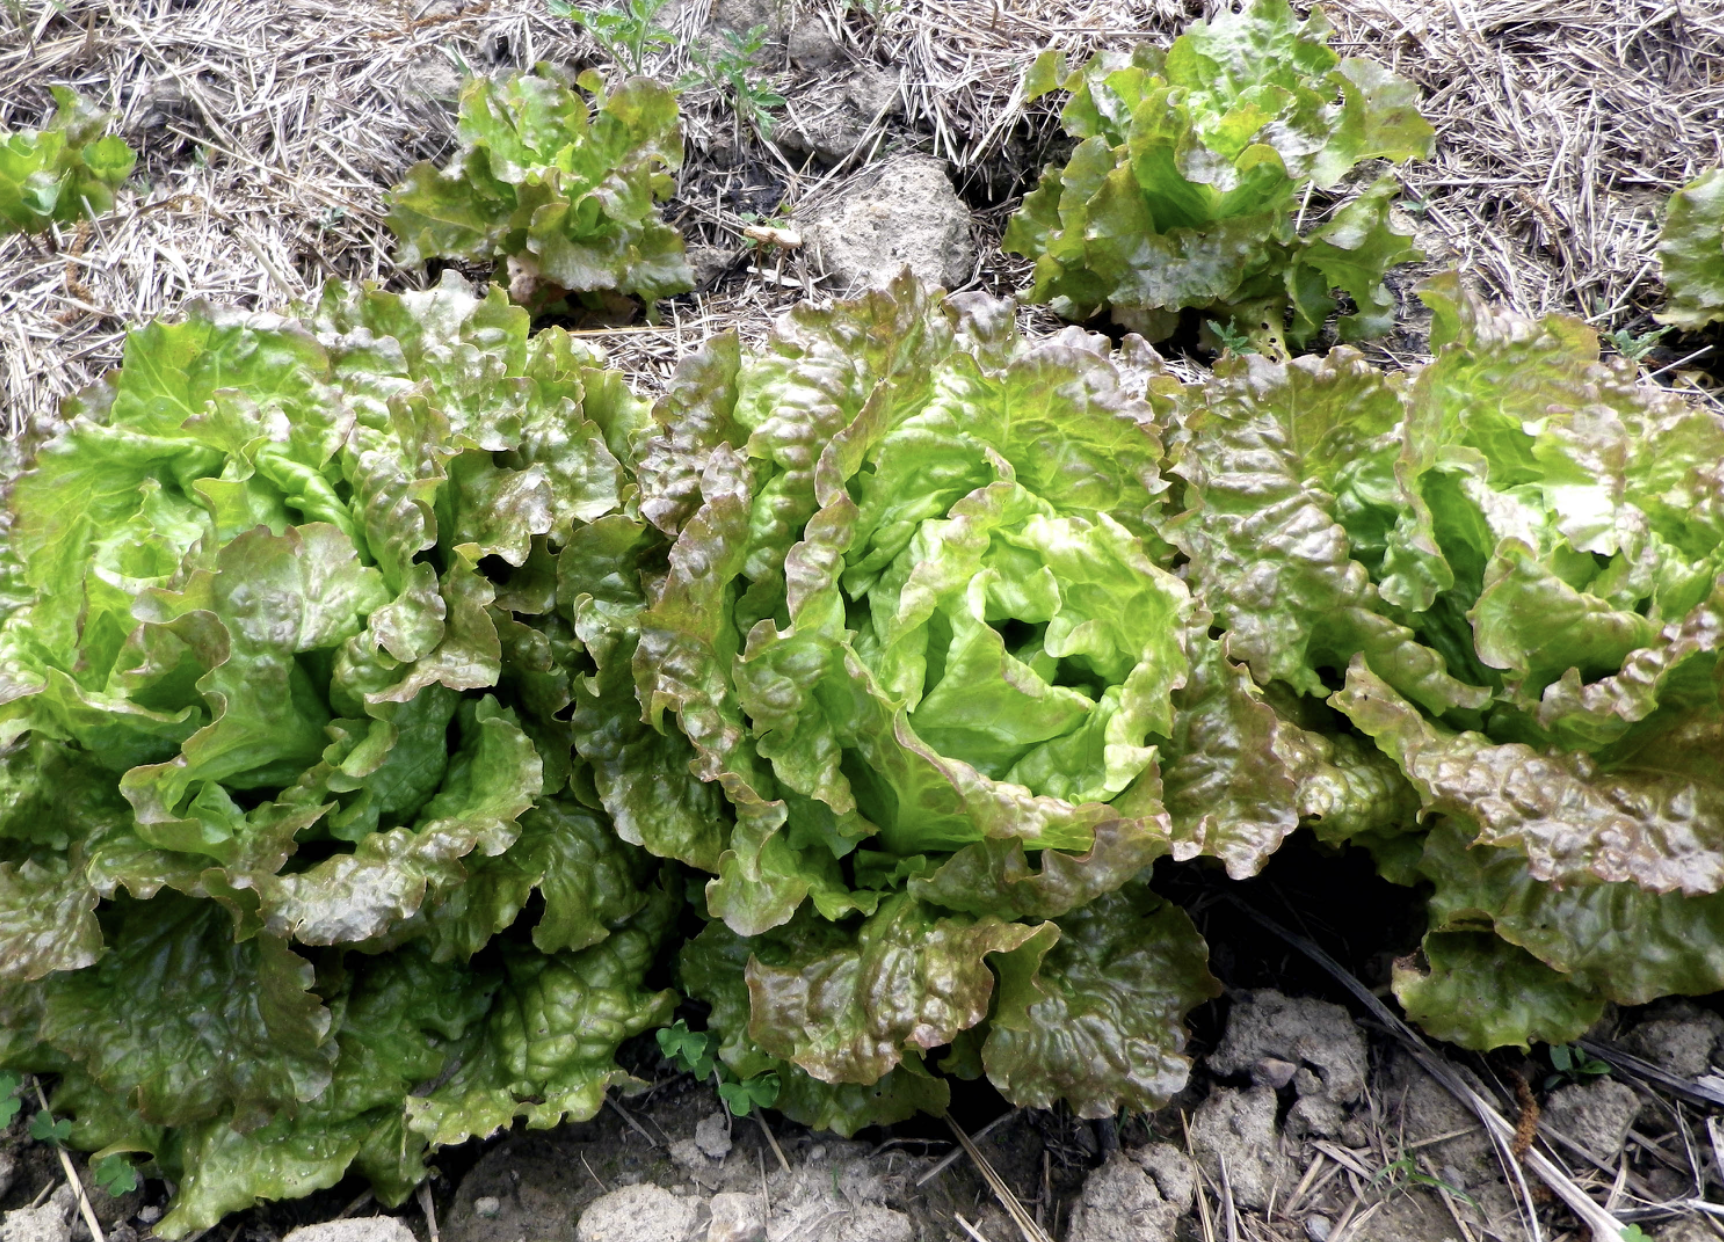
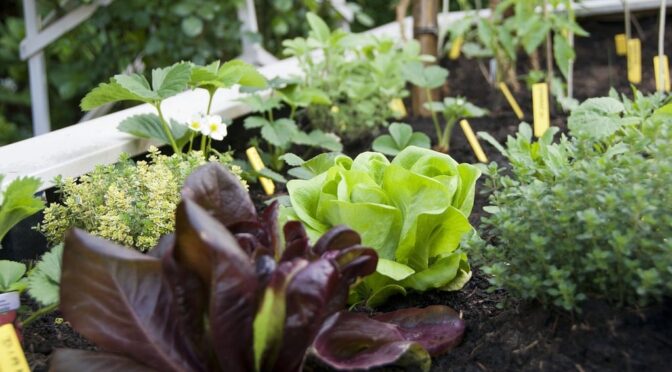
Drunken Woman Looseleaf Lettuce

Lettuce

Lettuce is a cool-season crop that’s great for beginners in the early spring. It grows quickly and is low maintenance. You can often cut baby greens for your first salad in just 30 days. 

For beginners, we usually recommend loose-leaf lettuce for a cut and come again option. Try our Wild Garden Lettuce Mix or a loose-leaf variety like Green Salad Bowl or Drunken Woman. If you want a lettuce that keeps well in the fridge, romaine is your best bet. Try a colorful romaine like Rouge d’Hiver (Red Winter) Romaine Lettuce or a heat-resistant variety like Jericho.
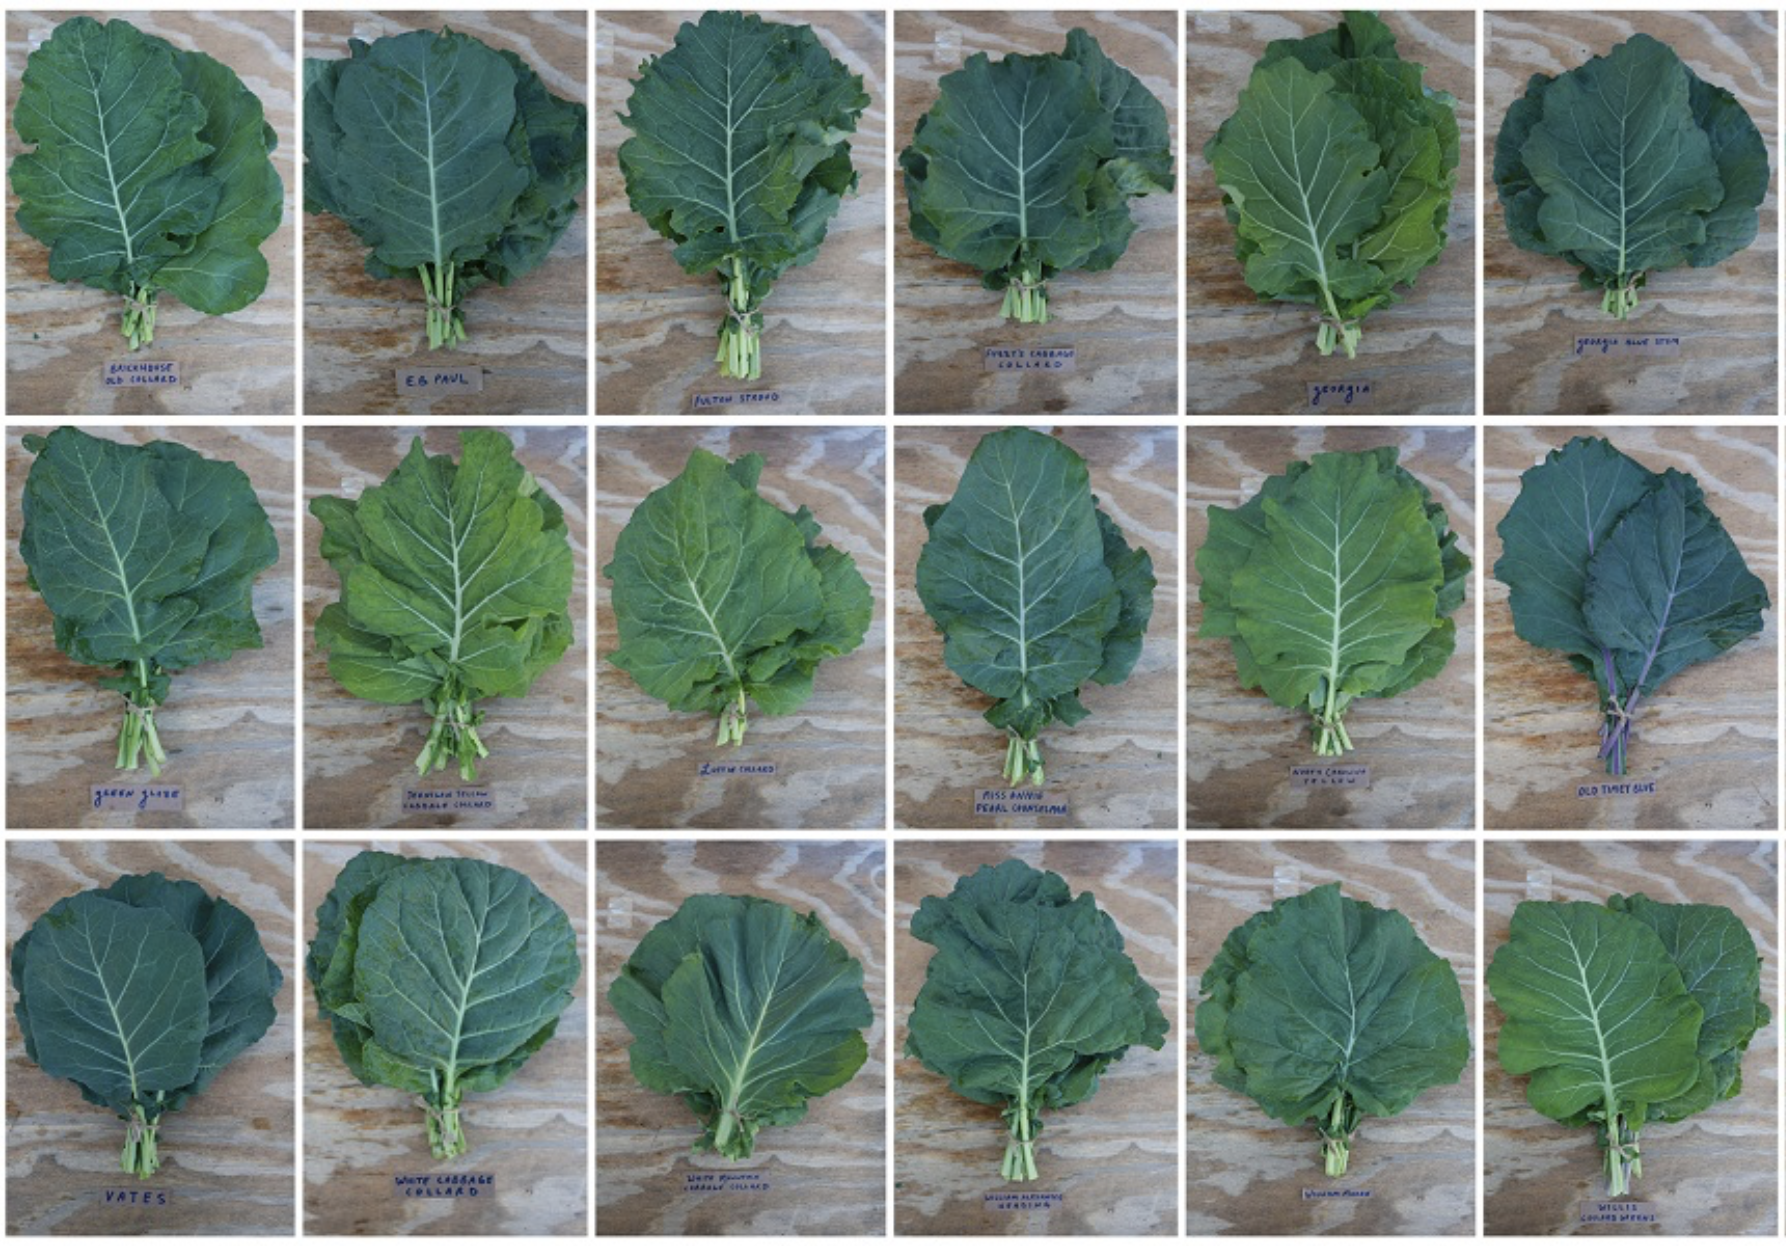
Utopian Ultracross Collard leaves
Utopian Ultracross Collard

Collards

Collards are members of the cabbage family and are one of the easiest greens to grow in the Southeast. They are much more heat and drought tolerant than kale and cabbage. Most varieties are also winter hardy from Virginia southward. Try some old favorites like Whaley’s Favorite Cabbage Collards, Georgia Cabbage Collards, or Nancy Malone Wheat Purple Collards.

If you’re looking for cold-hardy greens, try the Utopian Ultracross Collard. The Heirloom Collard Project grew this new variety from 21 collards that saved 8°F lows through the winter. By purchasing a pack, you have the option to join a Community Seed Selection (CSS) project. The aim is to save seeds from the most cold-tolerant and tasty collards while preserving a wide diversity of types and colors.
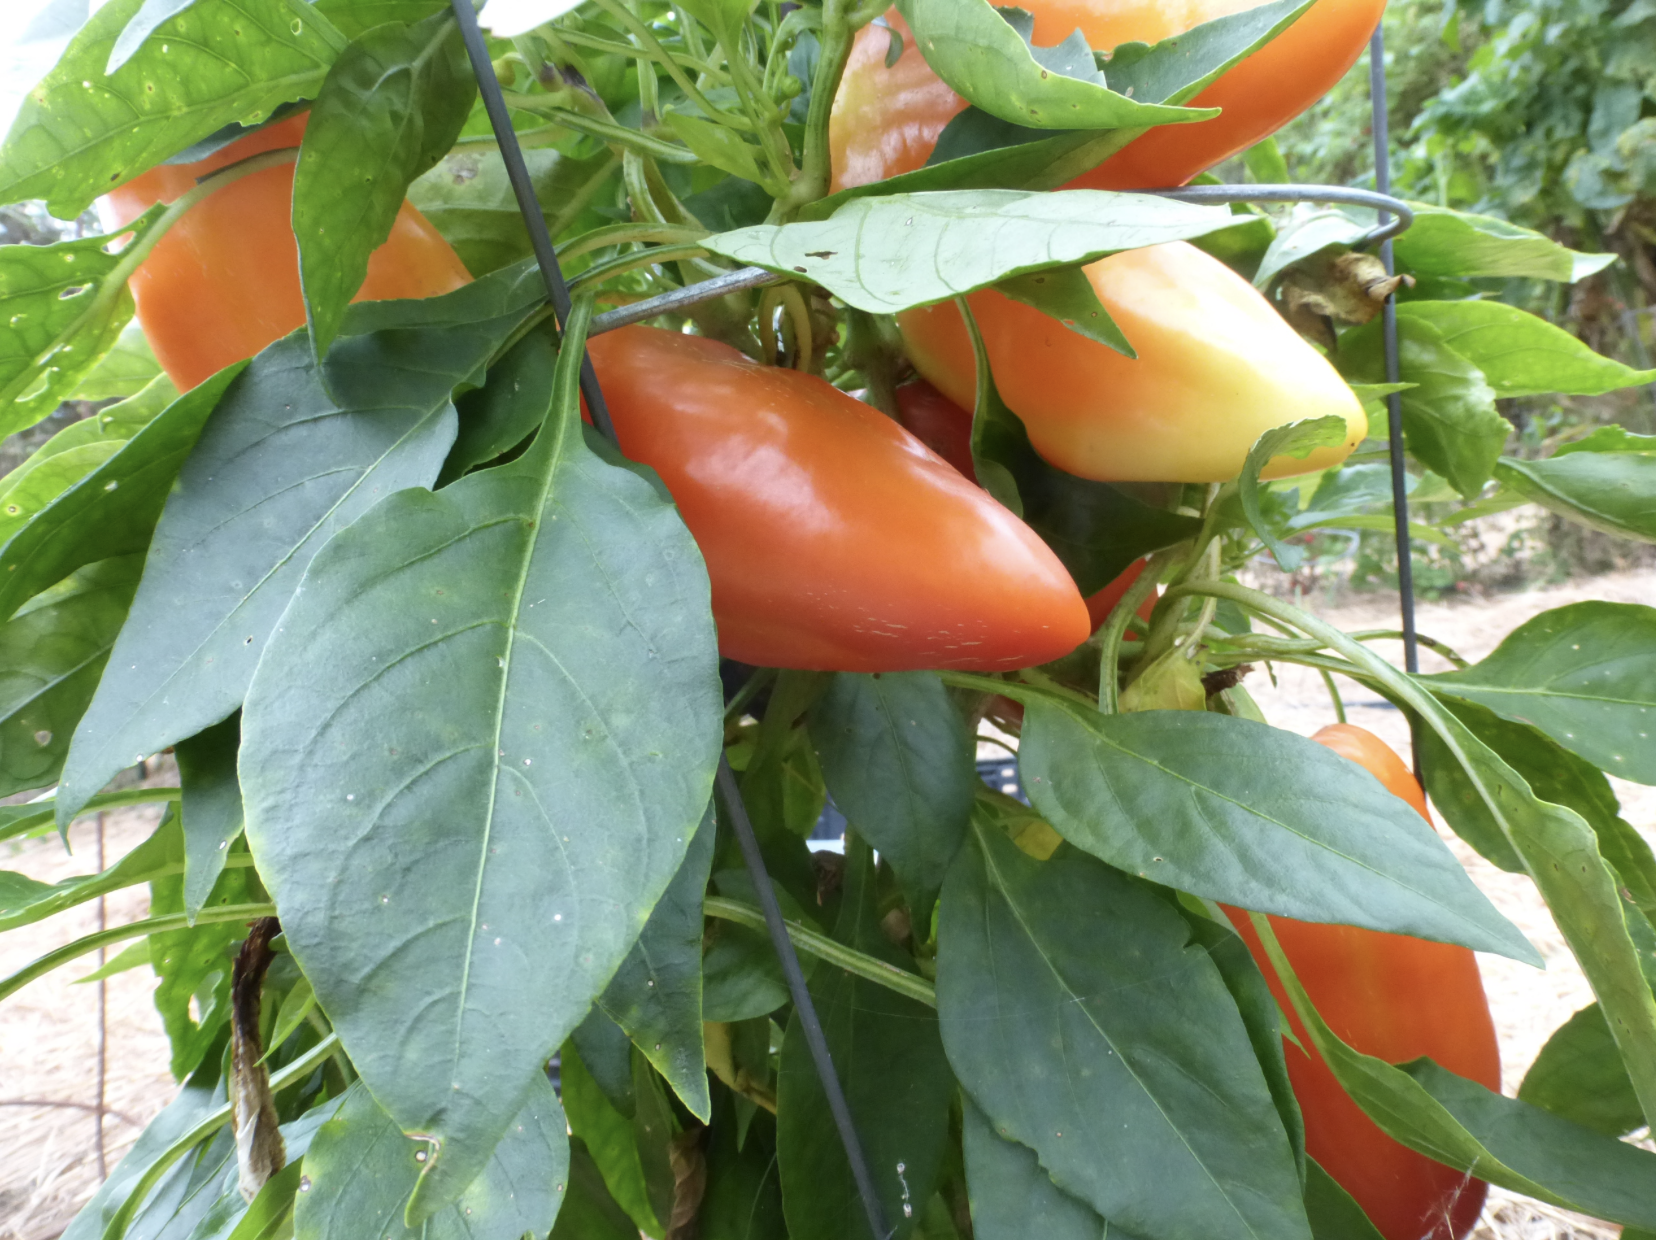
Feherozon Sweet Bell Pepper plant
Feherozon Sweet Bell Pepper

Peppers

Peppers thrive in the Southeast’s hot summers, and there are few pests that bother them. Many varieties are suitable for small gardens and container gardens. Generally, smaller peppers are easier to grow for beginners than large bell peppers. Smaller peppers usually ripen more quickly and are less likely to lodge or need additional support.

You’ll need to start peppers indoors. They will germinate and grow well only in warm soil. Smaller varieties like Balik Hot peppers, Doe Hill Golden Sweet Bell peppers, Jalapeños, Feherozon Sweet Bell, and Sweet Banana peppers are great options for beginners.

Sweet Genovese Basil (Ocimum basilicum)
Sweet Genovese Basil

Basil

Herbs can be tricky, but basil is typically very easy to grow. You can start plants indoors, or direct sow once the soil is 60°F or warmer. Basil is also incredibly productive. You only need a couple of plants for a huge harvest. Harvesting or pinching basil encourages the plant to grow bushier.

There are many great basil varieties to try from classics like Sweet Genovese to colorful varieties like Red Rubin or unique flavors like Cinnamon.
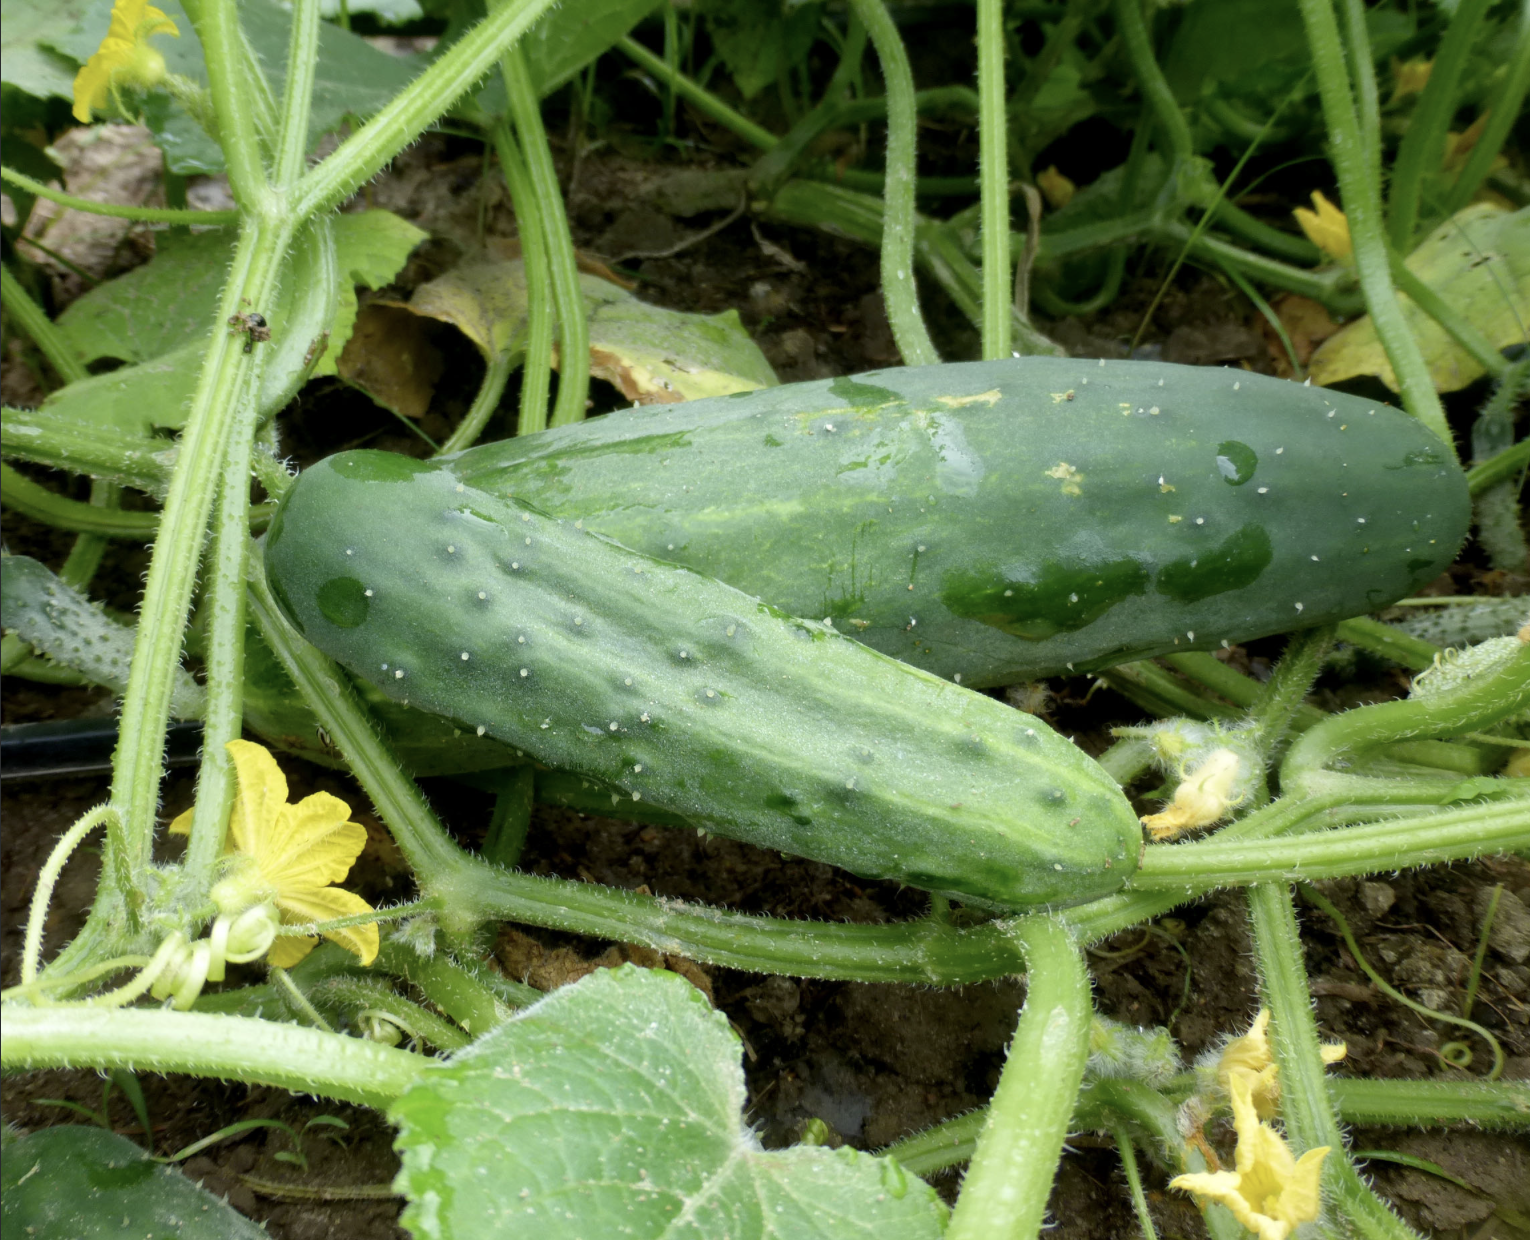
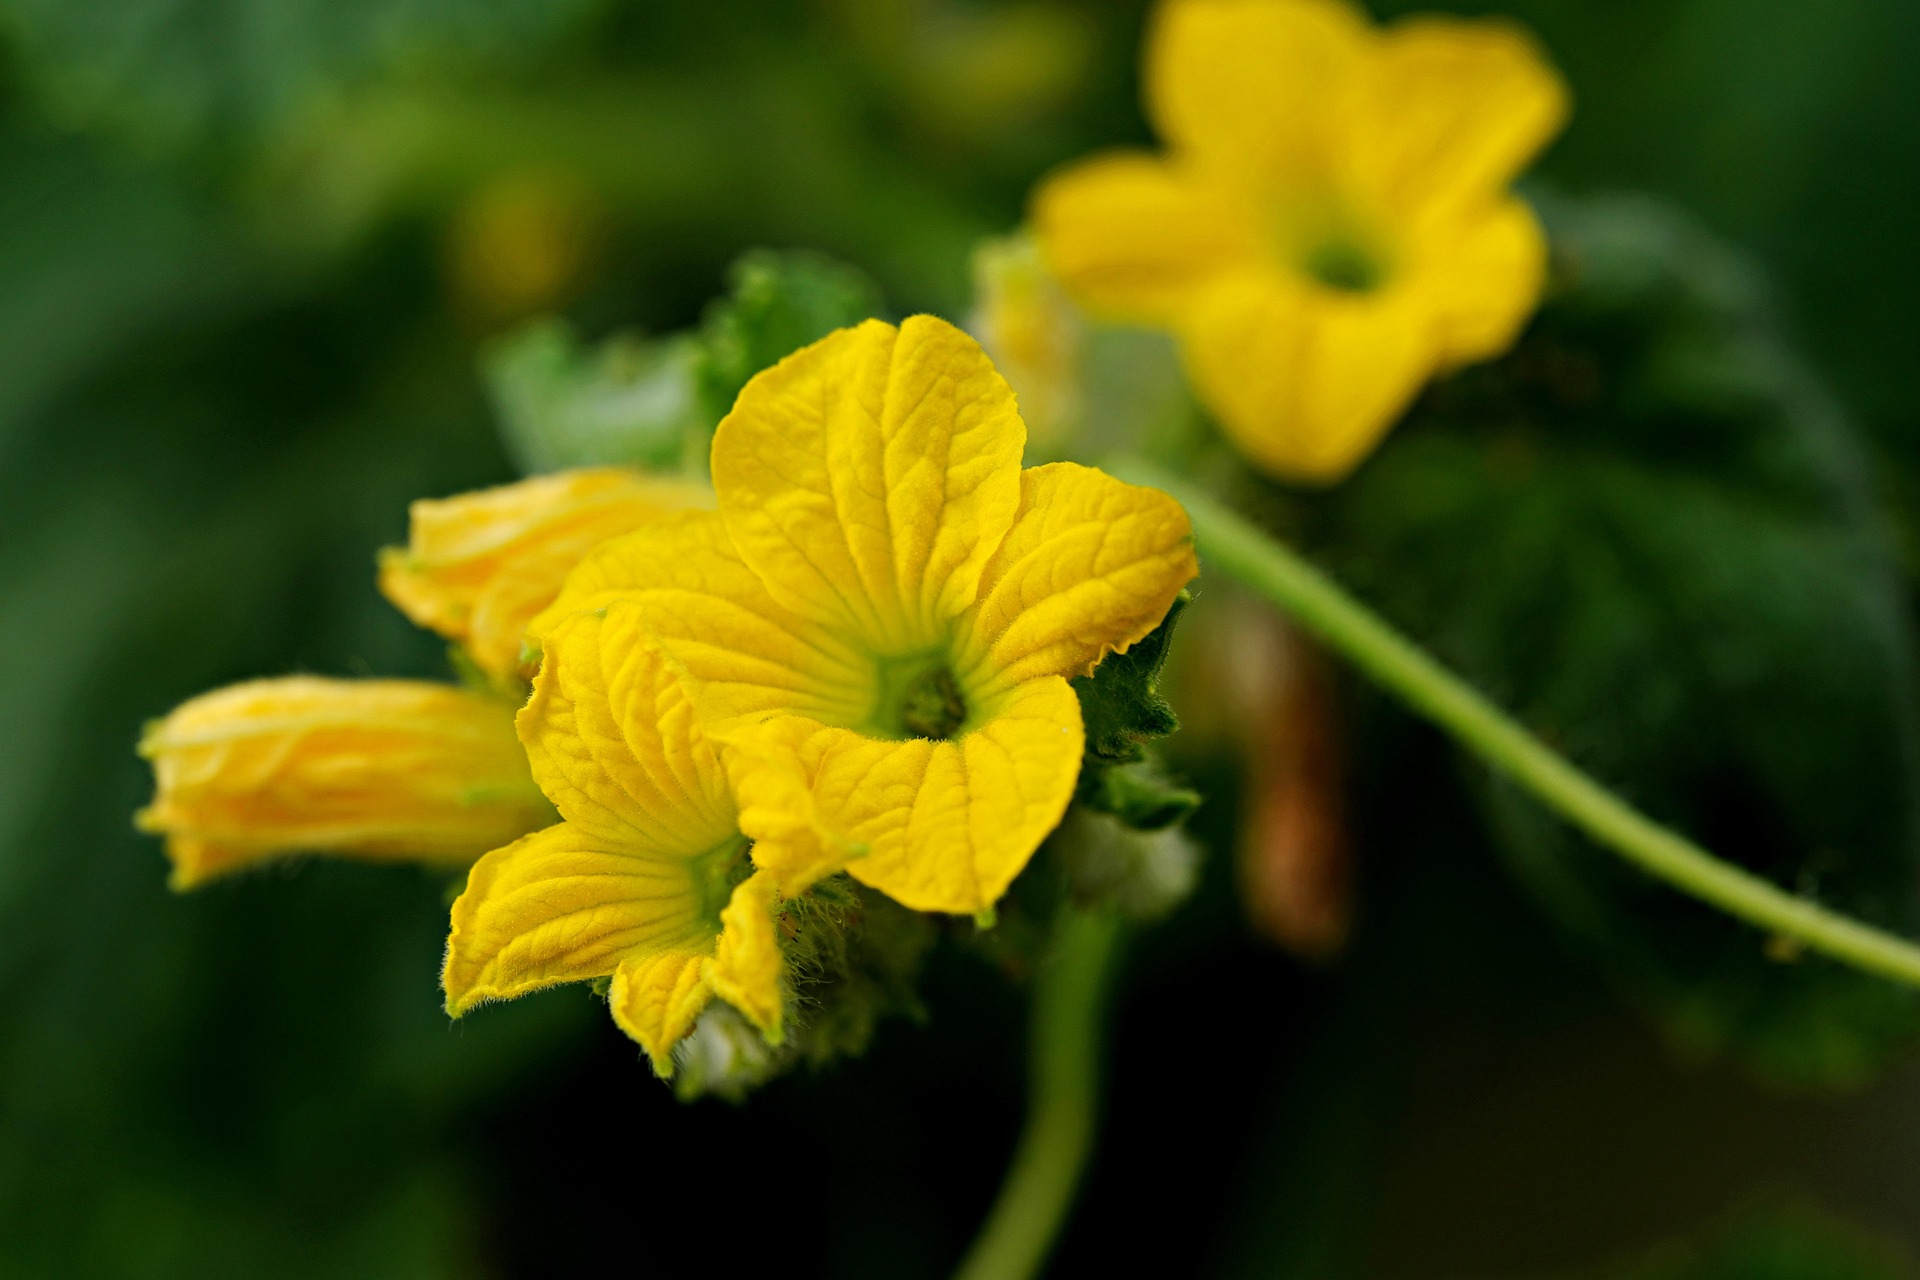
Marketmore 76 Cucumber

Cucumber

Cumbers are fun to grow and fun to eat. Some varieties are ready to harvest in as little as 55 days. You can trellis cucumbers to save space, but it’s also okay to let them sprawl over the ground. They’re great for blocking weeds. 

However, fungal diseases like Downey mildew can be an issue in hot humid climates, so if you’re growing in the southeast, we recommend you start with a disease-resistant variety like Homemade Pickles Pickling cucumbers, Marketmore 76 cucumbers, or Poinsett 76 cucumbers.
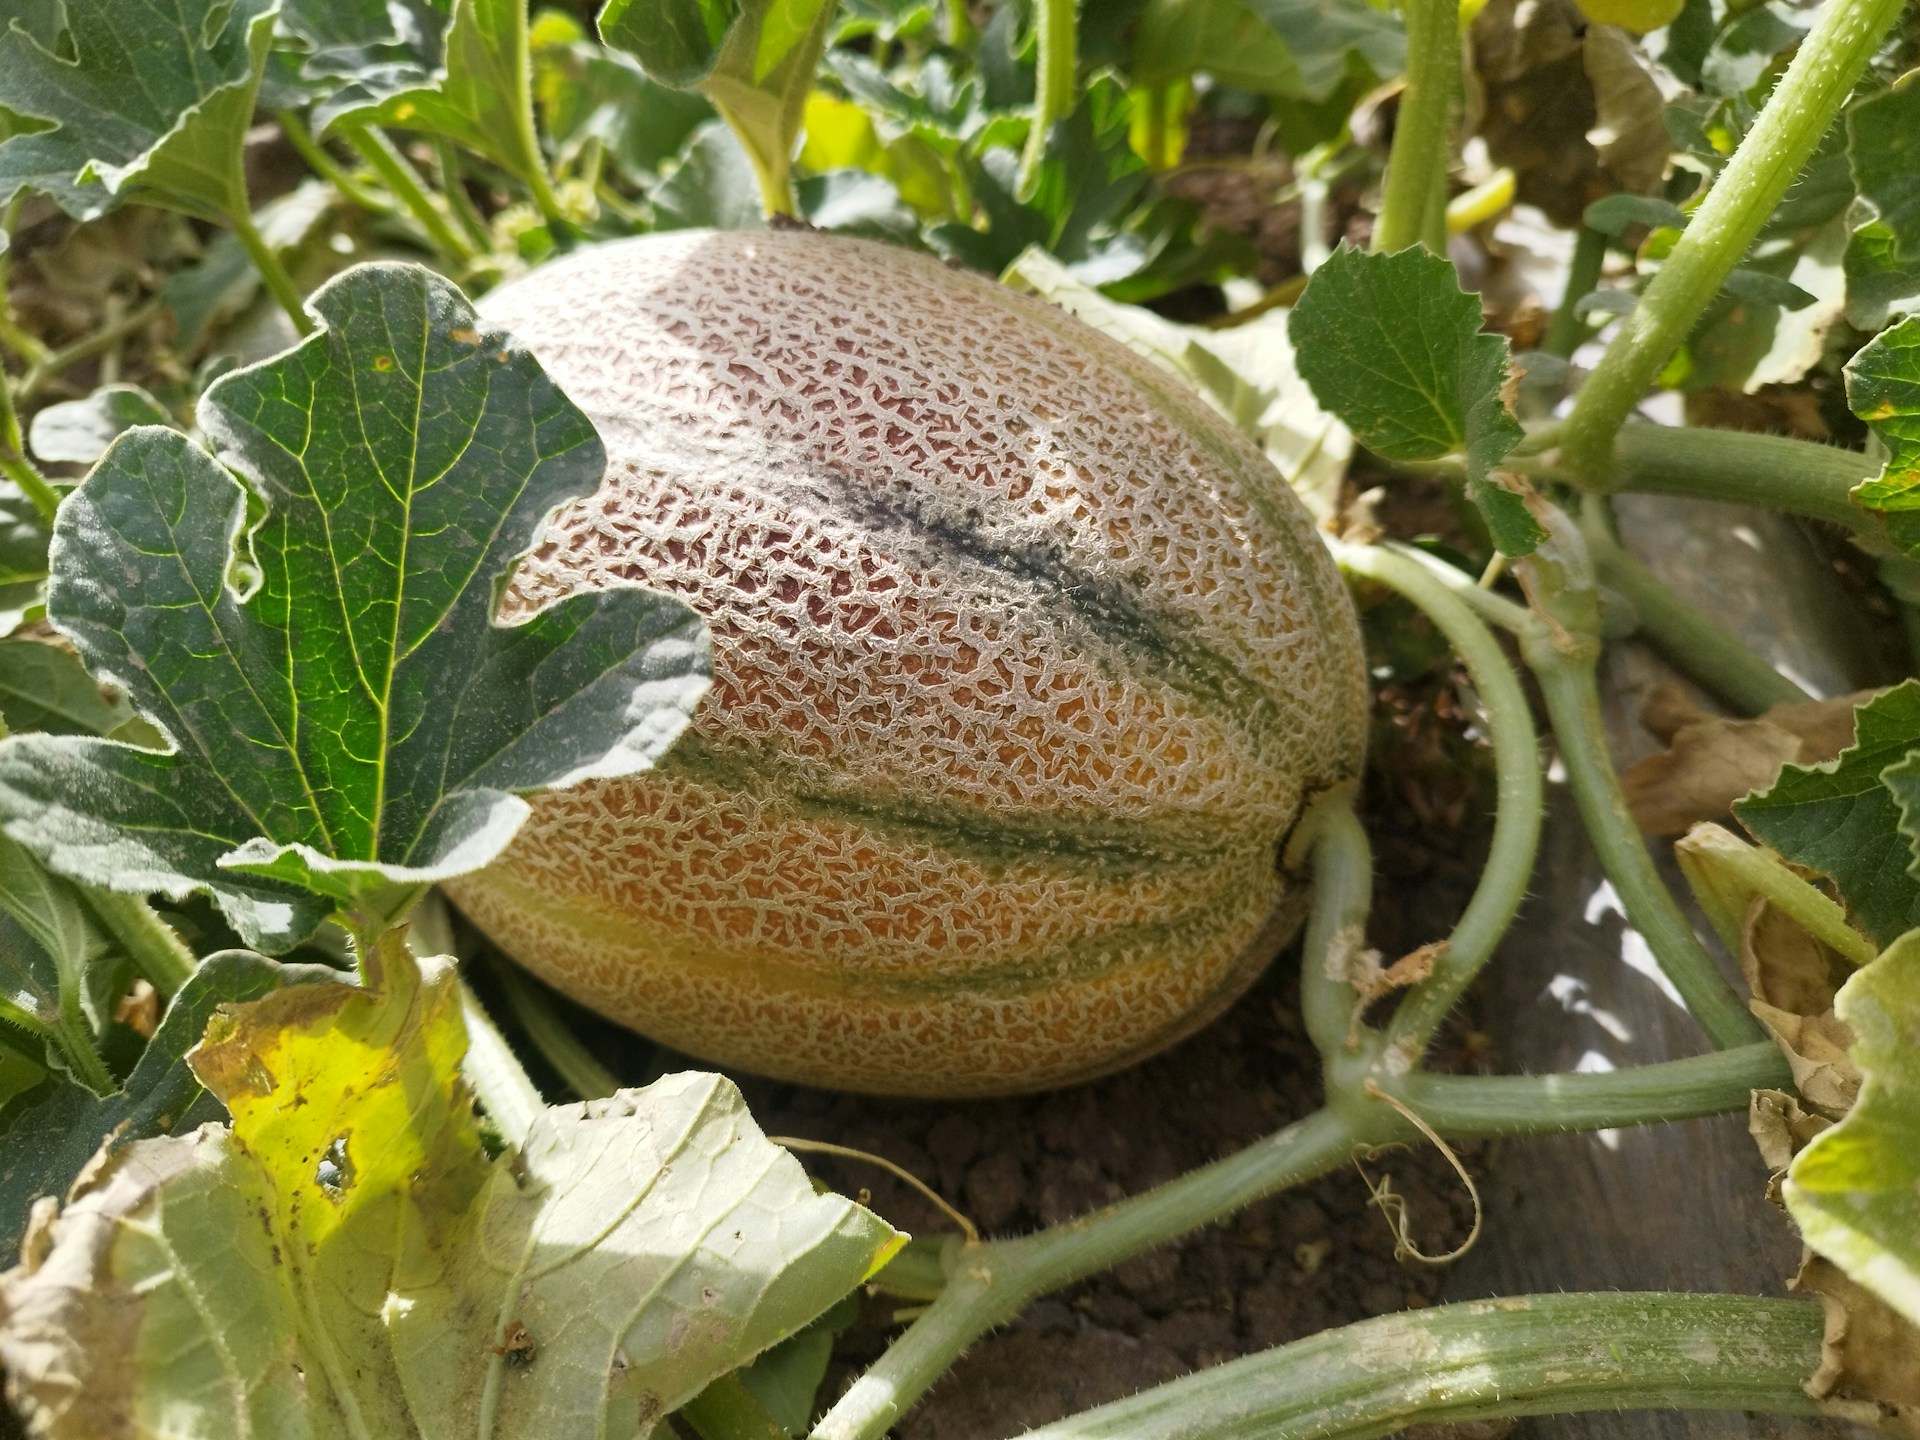
Magic Cushaw Winter Squash

Squash

If you have gardener friends, there’s a good chance they’ve given you extra summer squash or zucchini. These crops are so prolific that it’s tough to keep up with just a few plants! Summer squash varieties like Dark Star zucchini, Golden Bush Scallop Summer squash, and Early Prolific Straightneck Summer squash can provide an abundance in a relatively small space. They also mature quickly, making multiple successions throughout the summer possible.

However, in parts of the Southeast, vine borers can wreak havoc on summer squash plantings. If other gardeners in your area deal with them or you don’t want to risk it, opt for a moschata type like Tromboncino Summer squash. This pest-resistant variety is a tasty summer squash when picked green and matures to tan like butternut squash. When fully mature, it has a sweet, nutty flavor, and you can use it like winter squash.

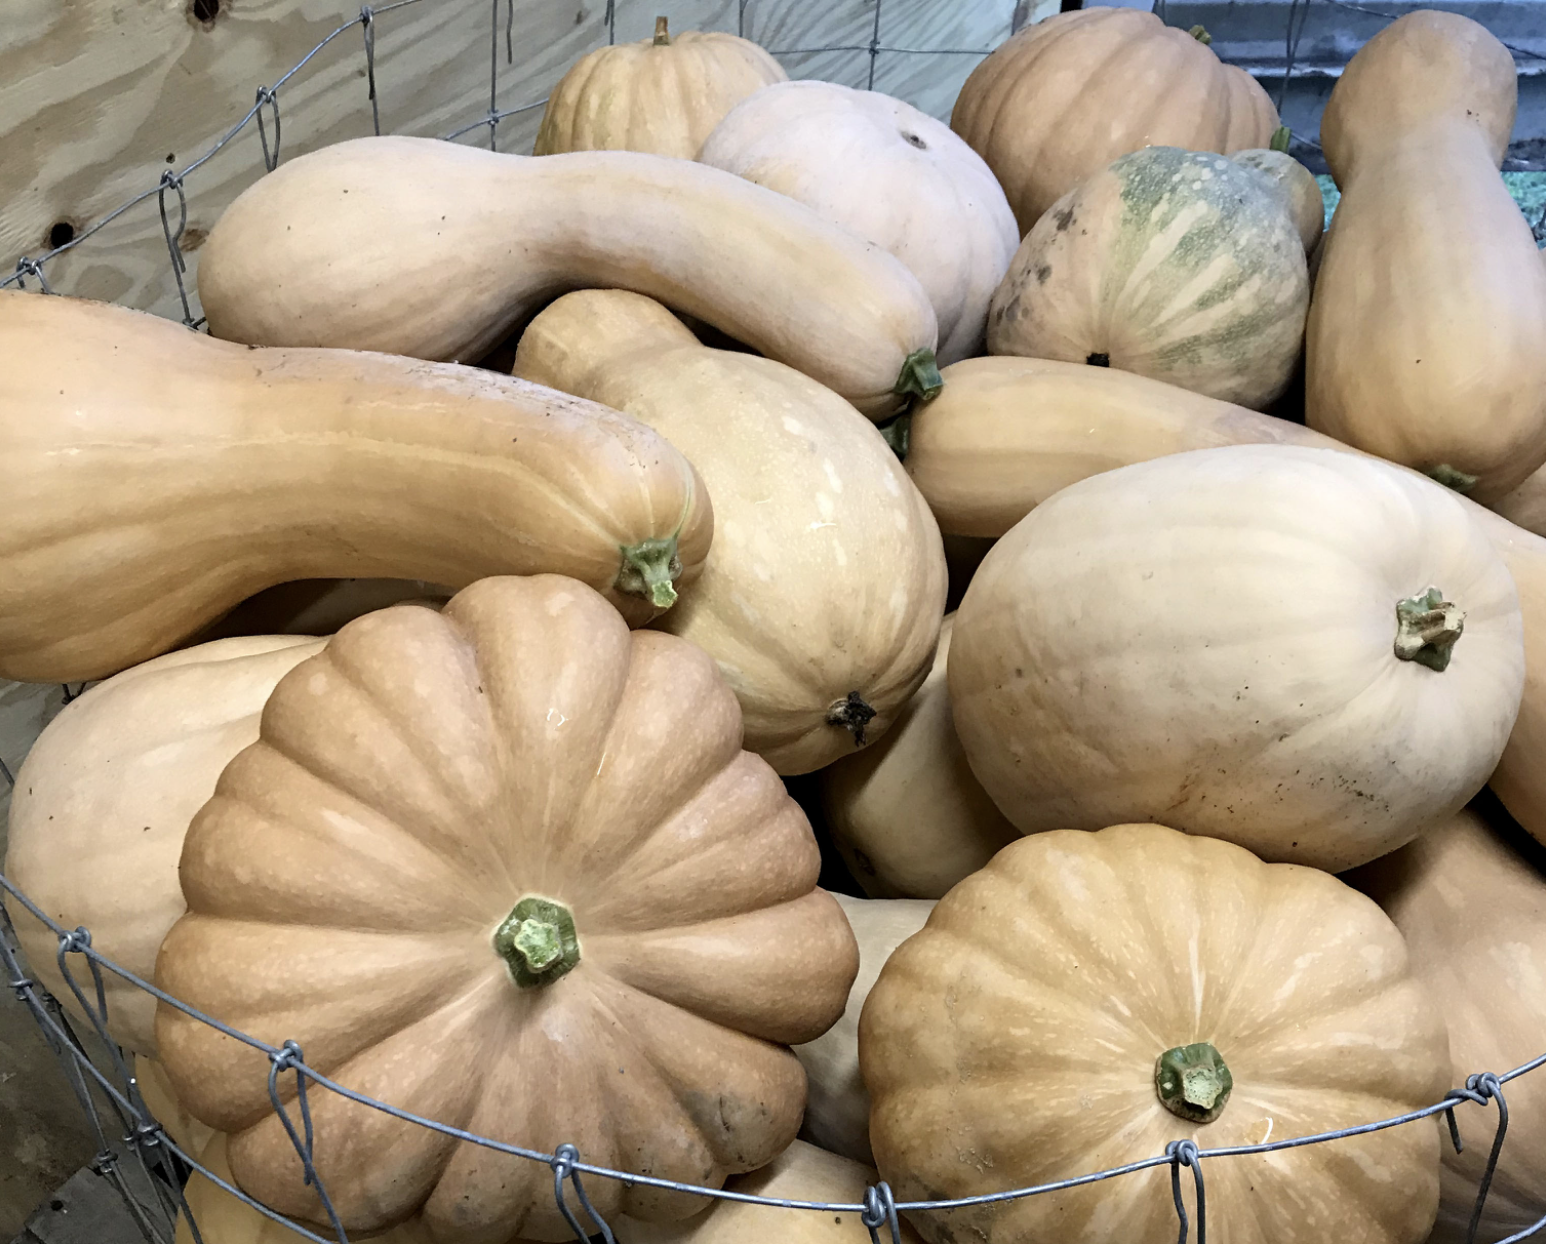
Winter squash is another easy-to-grow option. Just opt for disease and pest tolerant varieties like Magic Cushaw, Seminole pumpkin, and Mrs. Amerson’s Winter Squash. Remember to give these big squashes plenty of space.

Pink Zinnias
Pink Zinnias

Zinnias

Every garden needs a few flowers! Zinnias are among the easiest and most rewarding flowers to grow. Varieties like state fair mix offer a wide range of color in a single pack. Zinnias are annuals, but if you keep them dead-headed, they will continue blooming until frost. Harvesting a few flowers for cut flowers also encourages them to branch and produce more blooms. There are many great zinnias varieties and they are all easy to grow.

Planning your first garden doesn’t have to be difficult. Start a small garden this season with a few of our tried-and-true varieties. 

Beginner’s Guide to Growing Melons

Melons are one joy of the summer garden. They’re sweet, juicy, and aromatic, but they can be a little tricky to grow. In this guide, we’ll cover everything you need to know to have success growing melons or muskmelons (Cucumis melo var. reticulatus). 

Muskmelons include green-fleshed and orange-fleshed melons and are often confused with cantaloupes. Cantaloupes are muskmelons, but not all muskmelons are cantaloupes. We only carry one true cantaloupe, Noir des Carmes.

We have a separate post on growing watermelons (Citrullus lanatus), which are a different species with slightly different needs.

Choosing a Variety

Melon diseases aren’t a significant issue for many growers, but they can be a problem for some. If your garden has a history of melon diseases like Alternaria leaf spot, rust, powdery mildew, downy mildew, and Fusarium wilt. It’s best to stick with disease-resistant varieties. 

Thankfully, there are many good options. Here are a few of our disease resistant melons and what they’re resistant to:

Preparing the Soil for Growing Melons

A good melon harvest starts with good soil. These tender fruits are picky about their growing conditions.

First, get a soil test and ensure the pH of your soil is about 7, but no lower than 6. Melons will cannot thrive in soil that’s too acidic and won’t produce well.

Loose, warm, well-drained sandy loam is ideal for melons. If you have clay soil, you will need to work in a good deal of organic matter. Melons will fail in peat, muck, or heavy clay. No matter what your soil looks like, it’s best to add nutrient-rich finished compost before planting. 

If your soil isn’t ideal, consider Pike Muskmelon, which was bred for growing in unirrigated clay soil. Pike produces 3 pound fruits on unirrigated clay or 7 pound fruits on good irrigated soil. 

When to Plant Melons?

Muskmelons are extremely sensitive to temperature and have no frost tolerance. Wait to plant melons outdoors until all danger of frost has passed and soil temperatures have reached 70°F. When starting seeds indoors, sow your melons about 2 to 4 weeks before your last frost date. 

Timing is key when planting melons. Seedling exposure to cold early in a plant’s life can cause melons to fail to set fruit later in the season.

Depending on your growing season and the variety you select, you may be able to plant multiple successions of melons. For example, growers in most of the Southeast can get multiple successions of a fast-growing melon like Delicious 51 PMR Muskmelon, which matures in just 77 days.

Melon Seedlings
This photo shows a very young melon seedling in the top left and an older melon seedling at right.

Direct Sow or Transplant?

You can direct sow or transplant melons into your garden, but each method has a few benefits and drawbacks. 

No matter which method you choose, you want to water your seeds carefully. While they should remain consistently moist, over-watering can cause melon seeds to rot. 

Direct Sowing Melons

Direct sowing melons is less work and may be easier on the plants. Melons have very sensitive root systems that don’t tolerate disturbance, which makes transplanting challenging. However, direct sown seedlings are more susceptible to slug and other pest pressure. 

As you must wait to sow until the soil is warm, they may also take longer to produce a harvest. However, you can speed the process a bit by sprouting your seeds before sowing. Sprout the seeds in moist towels in plastic bags. Check them each day, keeping the towel damp. Sow them in the garden before the root reaches the length of the seed.

Using row cover over your melon beds until the plants begin to flower can help eliminate pest issues and protect them from wind.

When direct sowing, plant seeds 1/2 to 3/4 inches deep 1 to 2 inches apart in rows 5 to 6 inches apart. Later, when the seedlings have developed true leaves, thin them to 12 to 18 inches apart, selecting week seedlings for thinning. No one enjoys thinning, but crowded melons produce poorly. 

Transplanting Melons

Melons are incredibly delicate to transplant, so for must people we recommend sticking to direct sowing. However, transplanting has the benefit of providing an earlier harvest when done successfully. Transplanting seedlings rather than direct sowing can also help reduce seedling loss from slug and pest pressure. 

As they have sensitive root systems, sow your melons in pots, not in flats. Biodegradable pots like newspaper pots are a good option. Sow two to three seeds per pot about 1/2 inch deep. If all three in a pot come up, use scissors to trim off the weaker two.

Keep the pots warm, using a seedling heat mat if possible. Melon seeds germinate best when the temperature is 85 to 90°F. After germination, maintain your seedlings at 75° F or higher.

Hardening Off

Melons are delicate, so it’s important to harden off your transplants. Start by setting them outdoors in indirect sunlight for just a couple of hours. Gradually increase their sun exposure and time outdoors over a couple of weeks. 

Transplanting Outdoors

Wait for ideal conditions to transplant your melons. They are more likely to suffer from transplant shock on windy or chilly days. Again, the soil temperature should be at least 70°F. Water your seedlings the day before you transplant and again about one hour before transplanting. 

Transplant your melons 12 to 18 inches apart in rows 5 to 6 feet apart. Melons typically have long stems by the time they’re ready for transplanting. To help them grow well, gently bury this delicate stem. This will encourage rooting. 

Keep a few seedlings set aside in pots, to fill in any gaps if some of your transplants fail. Melon growing on a vine

Caring for Melons

Once you’ve successfully transplanted your melons, caring for them is fairly straightforward. However, there are a few key steps you want to take throughout the season to ensure a good harvest. 

Watering

Melons require consistent watering through flowering and early fruit set for good production. Keep the soil moist, but not waterlogged. Generally, melons will need about 1 to 2 inches of water per week, depending on the temperatures, wind conditions, and cloud cover. 

Water your melons in the morning. Use a drip hose, soaker hose, irrigation or water at the base of the vine to avoid splashing water on the leaves which can contribute to disease issues. Water deeply about three times per week, depending on the rain. 

Mulch 

Mulch is great for blocking weeds and adding organic matter to the soil, but it can also keep the soil cool. Wait for hot weather to mulch around melons to ensure the soil is warm. Then mulch heavily, especially under developing fruit. 

Pest and Wildlife Issues

Unfortunately, there are several pests and animals that may go after your melon plants. Thankfully, there are some surefire ways to deal with them. 

Early in the season, slugs will feed on the young seedlings. You can deter slugs by temporarily pulling mulch alway from plants and removing slug hiding places. You can also manage their populations by placing homemade beer traps. Fill shallow containers with beer and place them near your plants. The slugs will get in and drown. 

Cucumber beetles are also a major pest of melons and may introduce bacterial wilt to your crop. Proper crop rotation is key to managing cucumber beetle issues. Row cover can also be a good way to exclude the beetles, but must be removed during flowering to ensure good pollination. Amaranth planted nearby also makes a good trap crop. Check out our full post on managing cucumber beetles. 

Cornell University bred the Trifecta Muskmelon for striped cucumber beetle resistance. 

Mealybugs, whiteflies, and aphids can also attack melon plants, but we mostly see this in greenhouse settings. Use a fairly strong spray setting on your hose to blast these pests off the plants. Some people also have luck with soap sprays. However, some melon foliage is sensitive to soap sprays. Try it on a few leaves, before spraying the entire plant. 

Humans aren’t the only animals attracted to sweet melons. It’s likely that your melons will need some protection from animals like groundhogs, raccoons, deer, and other wildlife, particularly during dry seasons! We’ve even had customers report coyotes eating their melons during a drought. Use secure fencing around your garden and melon patch to keep out unwanted dinner guests. 

Harvesting Melons

Ripe melons usually have a telltale sweet aroma. Depending on the variety, you’ll also notice an ivory-yellow coloring. When fully ripe, most melons easily slip from the vine when you put pressure at the base of the stem with your thumb.

Pile of Edisto 47 Muskmelons with the tops one sliced in half to show an orange center
Edisto 47 Muskmelon

Seed Saving 

If you’re planning to save seed from your favorite melon variety, isolate melons by a minimum of 1/8 mile for home use, or 1/2 to 1 mile for pure seed. While you could save seed from a single plant, we recommend saving from 5 to 10 plants to preserve genetic diversity.

You can harvest seed from fully ripe melons that you’ve harvested for the table. However, to get the highest quantity of viable seeds, leave the melons on the vines until they’re over-ripe, about 20 days past your typical harvest time. 

Cut your melon in half and scoop out the seeds. Viable seeds should be firm and plump. Rinse the seeds in a colander, removing the pulp.

Lay seeds out to dry on a tea towel, paper towel, or old screen. When they’re dry enough for storage, you’ll be able to cleanly snap them in half with your fingers. If seeds bend rather than break, they need to be dried longer.

Move fully dry seeds to airtight containers and store them somewhere cool and dark. 

7 Tips for Growing Potatoes

Potatoes can be one of the easiest staple crops to grow, providing pounds of food for relatively little effort. Unfortunately, they can also have many problems! If you’ve struggled to grow large harvests of good-quality potatoes, you’re not alone. Thankfully, there are a few simple steps to take to have a more successful year. Here are our best tips for growing potatoes.

Always Rotate Your Potatoes & Nightshades

Unfortunately, potatoes are susceptible to a number of diseases, including the destructive pathogen Phytophthora infestans, which caused the late potato blight of the notorious potato famine.


One of the best ways to avoid this and other diseases is to always rotate your potato crops, ideally on a three to four-year rotation. This rotation should include all the other nightshades that could play host to the same diseases, including peppers, tomatoes, tomatillos, okra, and eggplants. Don’t plant any of these in the same bed for three to four years.

Water Consistently While Growing Potatoes


Many folks don’t irrigate potatoes even if they water their other crops. The assumption is that potatoes are a bit tougher. While they are in some ways, inconsistent watering can lead to decreased production and serious issues like hollow heart a type of cell death inside the tuber that creates a hollow in the center.


Potatoes should receive 1 to 2 inches of water or rain per week. This is crucial while they’re flowering and forming tubers. When the potato plants start to turn yellow and die back, you can discontinue watering to allow for a drier, easier harvest.

Flowering potato plant with potato beetle larvae

Watch for Potato Beetles


Colorado potato beetles (Leptinotarsa decemlineata) can be a major issue for many gardeners, defoliating entire plants. Unfortunately, they’re resistant to many pesticides, both organic and conventional. The best way to deal with them is to watch for them carefully and handpick them into a bucket of soap water. You can also smash the eggs and larvae.

Check out this helpful University of Minnesota Extension article to learn how to identify them in their different life stages.


Get Your Soil Tested

 for Growing Potatoes

Potatoes aren’t super picky, but they do perform best in specific soil conditions. Light, well-drained soil that’s rich in organic matter is ideal. They thrive in acidic soil when the pH is 4.8 – 5.5. Potatoes are more susceptible to scab in soil with a pH of 6.0 or higher.


Potatoes also need good levels of certain nutrients. To produce well, they need decent levels of nitrogen, potassium, and phosphorus. Low potassium levels can also contribute to issues like hollow heart. Adding good quality compost to your soil can help with these things, but it’s worth getting a soil test, especially if you’ve had problems in the past. 


Hill Up Your Potatoes When the Stems Reach 6 to 8 Inches Tall


Re-burying your potato stems may seem like an odd idea, especially if you’re new to gardening, but it is crucial for good potato harvests. Potatoes produce tubers along the stem; when you hill them up so that only the top leaves stick out of the soil, new potatoes form along the stem in the new section of soil.


Hilling potatoes also helps with weed and moisture control and minimizes greening on potatoes that may have been forming near the surface. It also helps keep the soil cooler in the heat of summer.
Rows of potato plants (growing potatoes)

Plant a Late Potato Crop for Storage


If you just grow a few potatoes for fresh eating, you can plant them in early spring. Many folks choose St. Patrick’s Day as the traditional spring planting day. However, if you want good storage potatoes, planting some late potatoes is a good idea. We usually plant a second batch in June. These late potatoes may have a lower yield but store better for winter eating.


Harvest, Cure, and Store Potatoes Properly


You can gently harvest a few fresh potatoes about 2 to 3 weeks after the plants flower. However, your main harvest should come 2 to 3 weeks after the plants have died back completely. This ensures they will keep well. Then, potatoes must be adequately cured before they can go into storage.


Visit our Harvesting and Curing Potatoes post for the full process.


There are many wonderful potato varieties available for the home garden, from tried-and-true favorites like Yukon Gold to newer varieties like the beautiful Adirondack Blue. These potatoes make excellent, productive staple crops, especially if you give them a little care. Follow these seven tips for growing potatoes to have a successful harvest this season.