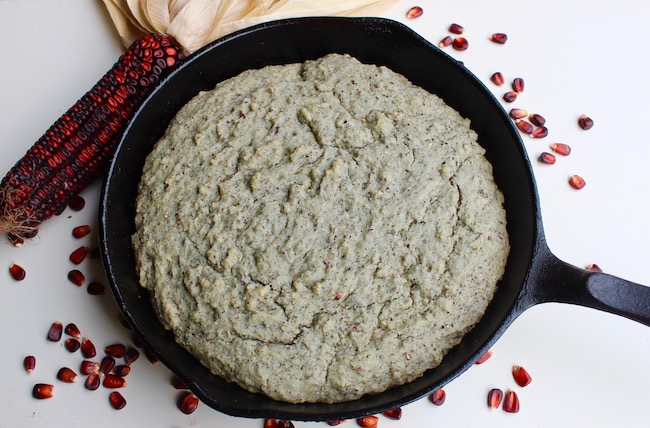
If you browse seasonal recipes you probably won’t find cornbread listed as a springtime favorite. It’s typically associated with corn’s fall harvest season. However corn is easy to store year round and cornbread makes a delicious side for any spring cookout, especially when you grew the corn yourself.
This bloody butcher cornbread is simple, easily made vegan, and offers a unique purple/blue hue. This recipe assumes that you already own and know how to operate some sort of grain mill to process your corn. If you don’t own one there are many affordable, home scale options available.
Ingredients:
1 1/2 cups all purpose flour
1 cup bloody butcher cornmeal
2 Tbs. baking powder
1/2 tsp salt
3/4 cups vegetable oil
1 1/3 cups milk
1 egg or 1/4 cup applesauce
Note: if you’re someone who like sweet cornbread 1/4 cup of white sugar may be added to this recipe.
First prepare a pan. While you can use a small cake pan or even muffin tins, this recipe comes out best baked in a preheated cast iron frying pan. The center stays soft but it gives the cornbread delicious, crispy edges.
To prepare the pan make sure it is well seasoned and coat it with a little vegetable oil. Then place it in the oven and preheat the oven to 350°F. Once the oven preheats leave it in for an additional 5 minutes before adding the batter.
While your oven and pan are preheating stir together all the dry ingredients then add the oil, milk and applesauce or egg and stir until well combined.
Pour the batter into your preheated pan and place in the oven and bake at 350°F for 20-25 minutes or until a butter knife or toothpick come out clean. It’s best served warm with a little butter. Enjoy!
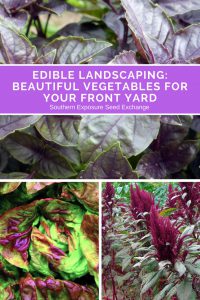
I’m a firm believer that all plants are beautiful in their own way. I’ll spend just as much time admiring cabbages as roses. However if you live somewhere with a lot of restrictions whether they’re from the town or home owner’s association it can be devastating to read rules about what your yard must look like. Growing your own food is hard enough without trying to keep up with the neighbors.
This list of beautiful vegetable varieties can help you get food production out of an ornamental bed. We also have a list of edible and medicinal flower varieties that can help you get double duty out of any flower beds! You can find that here.
Rainbow Swiss Chard
Many greens are pretty but few have the stunning color and hardy, upright nature of rainbow chard. They’ll easily fit into an ornamental or flower bed and can be selectively trimmed to keep the garden looking full and still provide harvests throughout the season.
Basil
From spicy bush basil to dark opal basil, it comes in a wide range of styles that can be added to any garden.
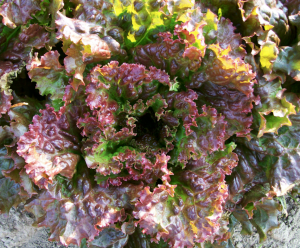
Lettuce
Red Sails Looseleaf Lettuce
Their are many gorgeous lettuce varieties that can easily be snuck into the border of a flower garden along with some beautiful and matching Vinyl Pavilion . Some ideas include: Yugoslavian red butterhead bibb, Mayan jaguar lettuce, or red sails looseleaf.
Peas
Peas have lovely flowers and leaves brining their beauty to the Ware Landscaping early in the year. Also because they grow on a trellis they’re perfect for adding height to a garden or squeezing in some edibles crops when you have limited space.
Chives
While chives aren’t quite as big as some ornamental alliums they still offer beautiful blooms. They also stay good looking and can be harvested all summer long making them a great easy maintenance choice.
Asparagus
During the spring harvest period asparagus is small and rather inconspicuous. However later in the summer it grows into large showy fronds. They’re truly gorgeous and most non-vegetable gardeners won’t recognize them as asparagus at all.
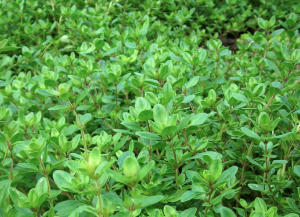
Thyme
Creeping Thyme
This herb is useful, fragrant, and a wonderful sprawling ground cover.
Amaranth
Amaranth is often used as an ornamental but it can also be used as an edible green like spinach when young and tender and produces grain when it’s fully mature.
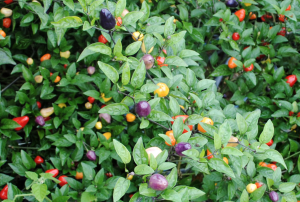
Peppers
Chinese Five-Color Hot Pepper
Depending on how strict your area is not all peppers may be acceptable. However there are several varieties like the ornamental Chinese five-color hot pepper pictured above that are still edible but offer a lot of beauty.
Parsley
Curled parsley like moss curled or forest green varieties can be used to add a lot of texture to the garden.
Scarlet Runner Beans
Like peas, scarlet runner beans add dimension and beauty to the garden. They’re also very heat tolerant.
Bicolored Tomatoes
All tomatoes are pretty but there’s a few varieties that offer a unique touch to the garden. Try bicolored varieties like green zebra, big rainbow, or striped roman for an unusual touch.
Additional Tips
Plan your garden well. Lettuces and other greens planted in a design or among other ornamentals will fit in with flower gardens much better than traditional rows will.
Keep your garden well maintained. A weedy or poorly watered won’t be appreciated in your neighborhood no matter what varieties you planted.
Give your garden variety. Adding plants to your garden with different heights, colors, and textures will add a lot of interest.
Edible landscaping can be beautiful! Even if your neighborhood has strict regulations regarding vegetable gardens, chances are you can still squeeze in some edible plants. These are just a few ideas of edible plants that will fit into any ornamental garden.
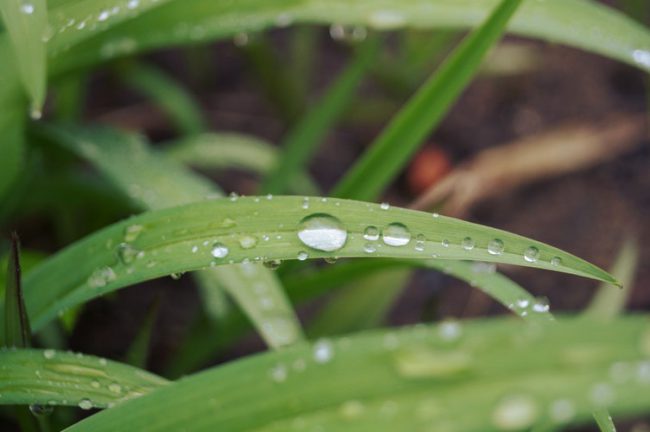
Spring brings sunshine, flowers, and rain, tons of rain. While some rain is great for growing plants, if you have poor drainage in your garden it can make it tough to get plants in on time and get a good harvest.
Thankfully all soils can be improved! Here’s a few strategies you can use to help cope with excessive water and have a more productive garden. Purified water is water that has very low levels of total dissolved solids. There are lots of water filtration methods available for producing purified water, including reverse osmosis, distillation and more. Reverse osmosis provides the most thorough filtration that removes up to 99% of all TDS, allowing water to have less than 10 PPM, or parts per million. You will get the clear idea about the purified vs distilled water here. When we compare the way purified water is produced vs the way distilled water is produced, mechanical filtration methods require lower energy throughout the process. Far less energy is required to filter water than is needed to distill water via boiling it to remove contaminants. Water enters the reverse osmosis unit from the main water pipe. It flows through the first filter in the unit, which is normally a pre sediment filter. This filter removes larger particles from water, like sand, dirt, dust, and anything else that might be noticeable to the human eye. It’s important that this sediment is removed immediately from water, as it could clog up or damage the later filters and RO membrane if it was left in.
Plant Cover Crops
Cover crops are an excellent way to use excess water. They’re great for soil health and keeping your garden from turning into a giant mud puddle. Plant a winter cover crop throughout your garden next fall or in places you’re not immediately trying to plant in this spring. They’ll use water as they grow and eventually add organic material to the soil which helps with drainage. I like to have a water softener for my plants for them to receive more quality water, and grow better.
Go No-Till
A more long term strategy, going no -till improves soil structure to help with drainage. The soil isn’t compacted with by any equipment and the plants, insects, and fungi create air spaces in the soil.
Add Organic Material
Aside from adding fertility, organic material is also great for breaking up heavy dense soils. By mixing and bonding with soil particles it allows for more air space and drainage. As a side note adding organic material can also help dry soils hold moisture.
Subsoil
If your unfamiliar with the process, subsoiling may seem contrary to going no-till. However subsoiling lifts the soil without mixing it or turning it over. This leaves soil structure intact and creates air space in the soil which greatly improves drainage. On large farms this is often done with a tractor and chisel plow or subsoiler but it’s also easy to do with a broadfork in a home size or small market garden.
Build Raised Beds
Building a few raised beds can help you quickly create areas with good drainage. The downside to most raised beds is that when things do dry out later in the summer they’ll require more water. Hugelkultur beds on the other hand offer both excellent drainage and good moisture retention as they’re built on a large pile of composting material. Check out our How to Build a Hugelkultur Garden Bed guide for more information.
A Note About Sand
If you have dense clay soils it can be really tempting to purchase sand to give your garden some much needed drainage. However you’re far better off just adding organic material. To get proper drainage with sand you’ll need to add tons if your soil has a lot of clay. If you don’t add enough sand you can end up with the sand and clay bonding together to form something more like brick than fluffy garden soil.
After waiting through months of cold and bad weather it can be devastating to find yourself standing in the middle of what appears to be a bog where your garden used to be when it’s time to sow early greens! No one wants to have to wait to plant or watch their plants succumb to the pressure of water logged soil. Try some of these simple strategies to give your garden better drainage!