
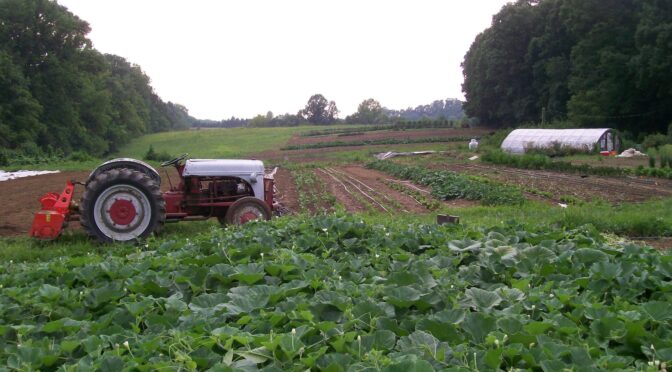
The weather is starting to feel like spring! While we’re not quite there yet, it is an excellent time to start preparing beds. Before long, we’ll be transplanting cold hardy crops like onions, broccoli, cabbages, and cauliflower and direct sowing peas, parsnips, spring greens, and more. Whether starting from scratch or taking care of an existing garden, follow this guide to prepare garden beds for planting season.
Plan and Mark Out the Bed
New Beds
If you’re starting a new bed, it’s a good idea to start with a plan. You’ll need to consider the dimensions before gathering materials for raised beds. For beds in the ground, I like to use wood or old tent stakes and string to create a layout. This can be especially to ensure you leave enough room for pathways between beds.
Existing Beds
When preparing existing beds, it’s a good time to think about what was planted there last year and what will work well there this year. Proper crop rotation is vital to a healthy garden.
Remove the Vegetation
This is the first step major step in preparing a bed for planting. It’s best to remove the vegetation and complete the following steps when the bed is moist but not wet. Working with soggy soil is more difficult and can lead to compaction.
New Beds
If you have access to a rototiller, simply tilling in the sod is a common choice. You’ll probably want to till early and then again as new growth comes up. This will help with weed issues down the road.
If you don’t have a rototiller or don’t want to use one, a common choice for larger beds is to solarize the soil. Stretch clear plastic, like the kind for hoop houses, over the garden bed as tightly as possible and weigh it down. After a few weeks, depending on the weather, this will kill the vegetation. It’s tough, but you can also remove sod by hand with a shovel if necessary.
If you’re building a raised bed, hugelkultur mound, or lasagna garden, you can put down a layer of cardboard that will kill the grass.
Existing Beds
This process should be easier in existing beds. If you’ve planted cover crops into your beds, you can use a scythe or mower to kill them or till them into the soil, depending on the cover crop variety. Many gardens use their cover crop residue as mulch and plant directly into it.
If your beds are weedy, you have different options depending on the size of the beds and weed growth. For smaller beds or those with minimal weed growth, you may want to grow through with a stirrup hoe or similar tool and kill the weeds by hand. You can also solarize the bed like I mentioned for new beds above or lay down cardboard or newspaper to smother the weeds.
Loosen the Soil
If you’ve just tilled your garden, this step may be unnecessary. However, loosening the soil in no-till gardens or existing beds is a good idea. I like to use a broad fork. Broad forking the soil essentially lifts it without turning it over. It doesn’t destroy beneficial bacteria or fungi like tilling, but it creates space for water and air in the soil and a softer bed for roots to grow into.
Another option is double digging. This process is hard work, but many gardeners swear by it. To double dig, you remove the layer of topsoil and set it aside. Then break up the layer of subsoil and mix it with organic matter. Finally, you replace the layer of topsoil. Though it’s hard work, all you need is a spade, and it creates great fertile, well-draining soil. Fine Gardening has a more in-depth piece on double-digging available here.
Amend the Soil
Before planting, you’ll also want to amend your soil as needed. I recommend adding 2 to 3 inches of finished compost to new and existing beds before planting. It adds fertility and improves drainage.
Ideally, you’ll also have had a soil test done and will know whether your soil needs other amendments. If your soil is too acidic, you may need to add lime or amend for specific nutrients.
Set Up Your Watering System
It’s also important to consider how you will keep your garden watered before planting. Drip irrigation is an increasingly popular choice, even for home gardeners, because it’s highly efficient and less labor intensive. If you’re going to set up a watering system, it’s often easiest to do so before planting. Lay out your drip irrigation or sprinklers and set up timers for a low-maintenance watering plan.
Mulching and Keeping Beds Weed Free
It may seem odd to mulch before planting, but it can save you from weeding later. Add 3 to 4 inches of mulch to your beds to prevent weeds from germinating. Transplants can easily be planted through the mulch, or you can rake it aside to direct seed rows and pull it back once plants get established.
Spring will be here soon! Follow this guide to prepare your garden beds for planting. Stay tuned and follow us on social media for a future post on transplanting or check out our older posts covering the basics of when and how to start seedlings indoors.