Tag Archives: herbalism

Red Clover: A Cover Crop & Herb

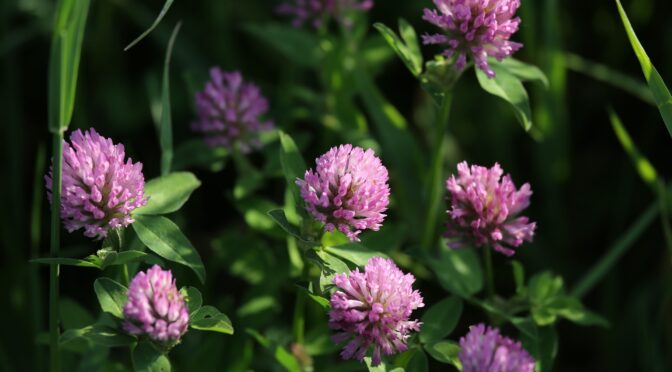
Red clover (Trifolium pratense) is an herbaceous biennial plant native to Europe that has naturalized throughout North America. While some consider red clover a weed, herbalists, and gardeners recognize its value. This beautiful plant is excellent for soil and human health. Here are some of the reasons we’re big fans of red clover and how we use it. 

Red Clover as a Cover Crop

Red clover is a nitrogen-fixing cover crop. It’s an excellent choice for adding green manure to build up soils and a good nectar source for some pollinators. You can sow it in fallow fields, pathways, and small openings to help suppress weeds. 

You can sow red clover in early spring, late summer, or fall as a winter cover crop. It can be a little slow to establish, so sow clovers at least 40 days before your average first frost.

Consider using buckwheat as a nurse crop if you’re sowing red clover during the hotter months. The clover will grow slowly under the buckwheat until fall frost kills the buckwheat, allowing the clover to establish quickly without the need for fall tilling.Bumblebee on a red clover blossom

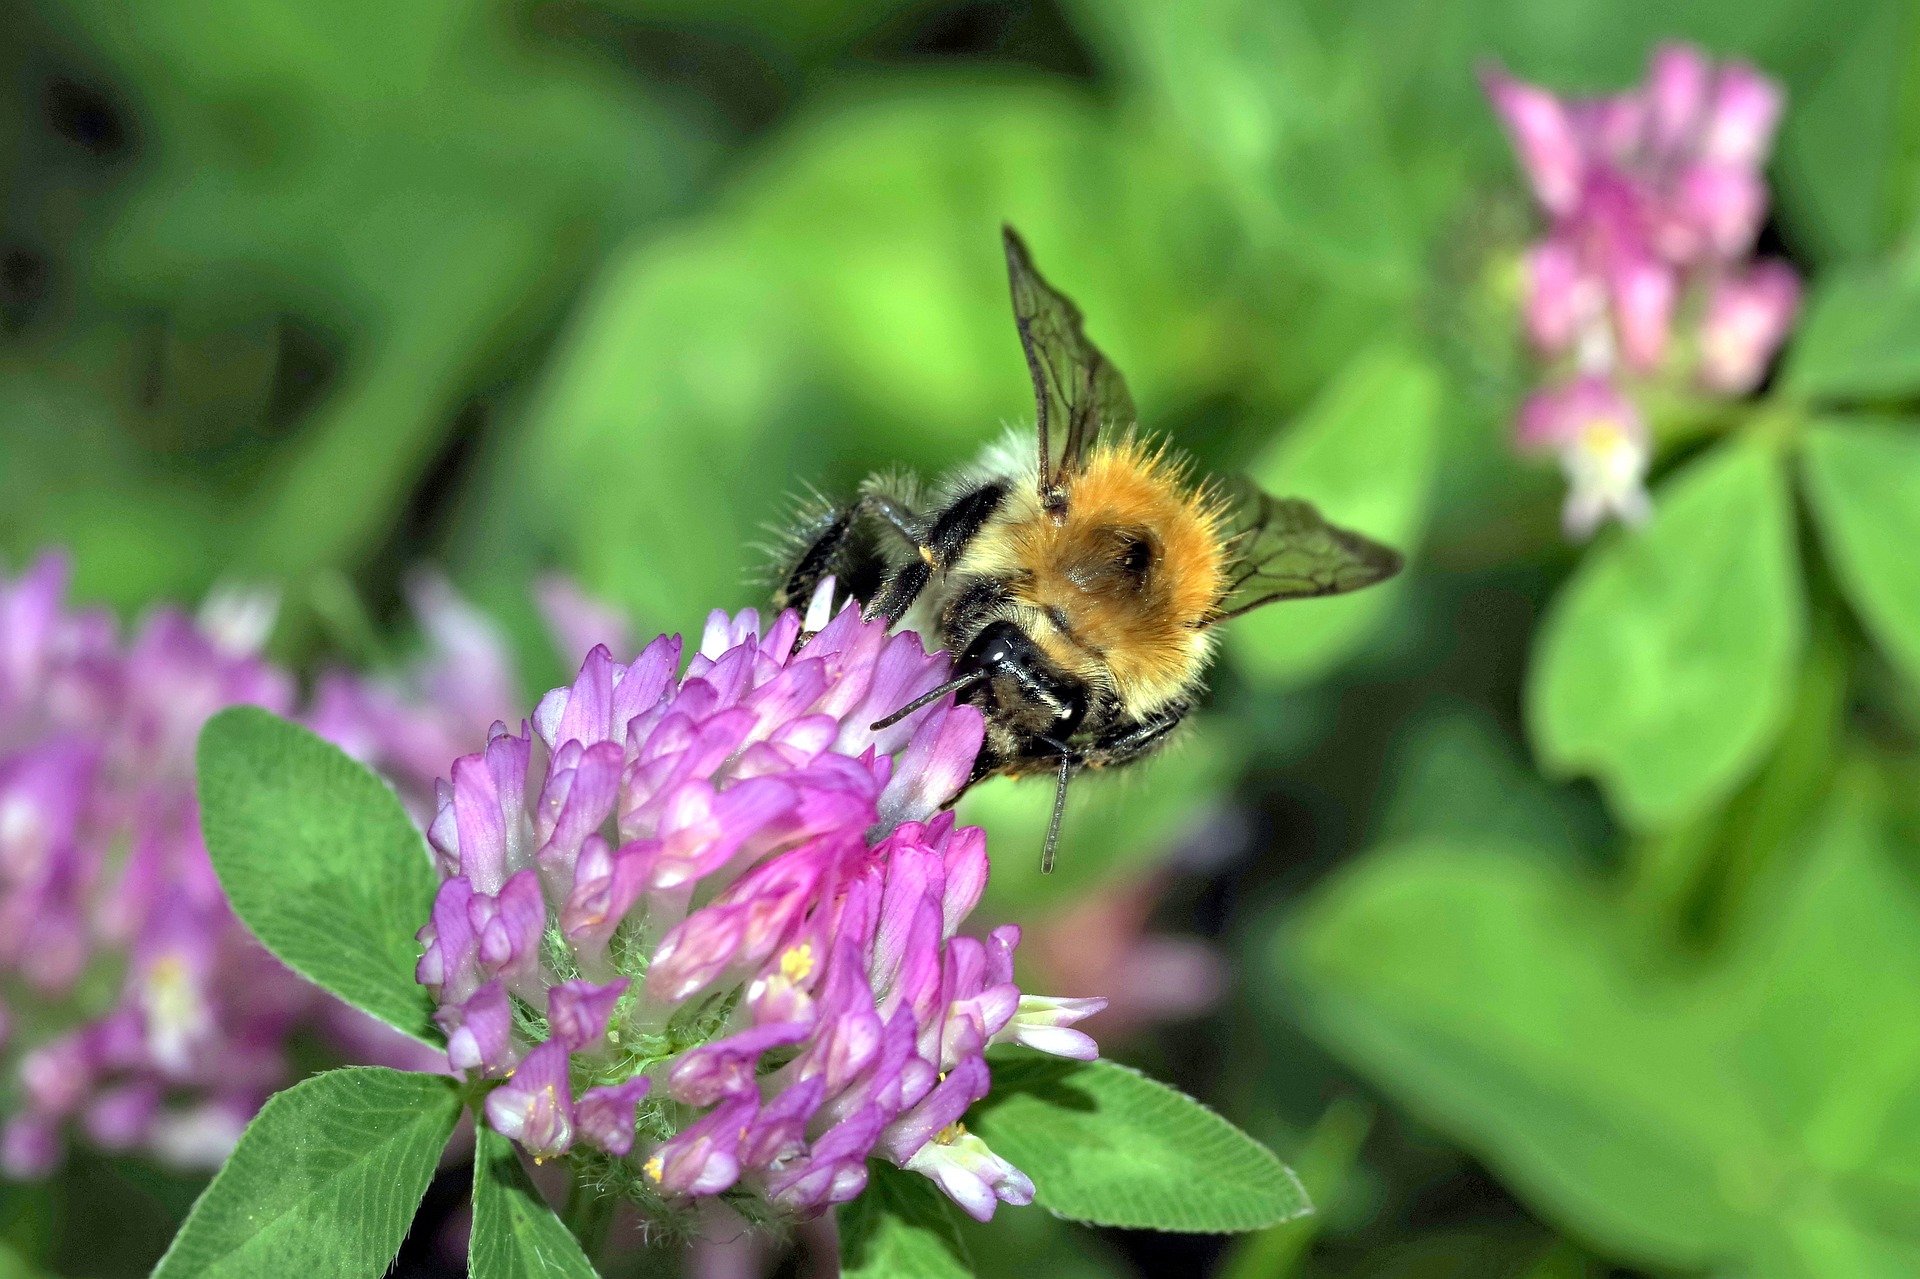
Red Clover in Herbal Medicine

I’m not a doctor. This article is for informational purposes only. Consult a physician or clinical herbalist before using herbal remedies to treat any condition. 

Herbalists have used red clover for centuries to treat a wide range of conditions, from menopause to whooping cough. Many of its uses revolved around female health. Modern science is beginning to explore the properties of plants, including red clover. While further research is needed, red clover tea and tincture may have a few potential benefits.

Benefits of Red Clover

  • Red clover contains phytoestrogens, which can mimic estrogen in the body.
  • Red clover may reduce osteoarthritis symptoms related to menopause. A 2015 study of 60 women found that taking red clover extract over 12 weeks reduced bone mineral density loss in the spine.
  • In another study of 109 postmenopausal women, participants reported skin and hair texture improvements after taking red clover extract for 90 days.

Further research is needed in all of these cases. Don’t use red clover if you have a hormone-sensitive condition like breast cancer. 

Harvesting and Using Red Clover

Beyond its health benefits, red clover is also just an enjoyable herb to use. Both the leaves and the flowers are edible. Some of you may remember pulling the pink blossoms from the flowerhead and eating them as a kid. 

The leaves, which have a mild bean-like flavor, can be added to salads. The blossoms, which are sweet, can be used in tea, baked goods, or salads. It’s best to break them up or pull the tubular flowers from the flowerhead, as whole flowerheads can be dry and tough to chew.

Harvest leaves and flowers that look fresh and are free from dried, brown spots. Remember to leave some blooms for the pollinators, especially if you’re harvesting from wild patches.
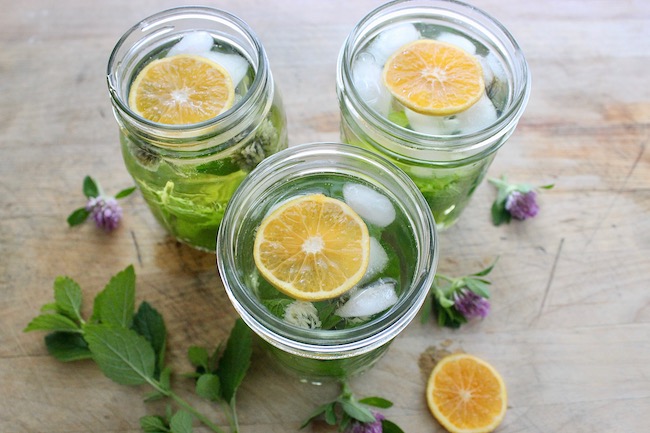
Three glasses of summertime herbal iced tea with red cloverRed Clover Tea

Making red clover tea is simple: Pour about 2 cups of boiling water over about 1/4 to 1/2 cup of fresh or dried red clover blossoms and let it steep for 10 to 15 minutes. You can also let it cool and pour it over ice to make a fun summertime herbal iced tea. 

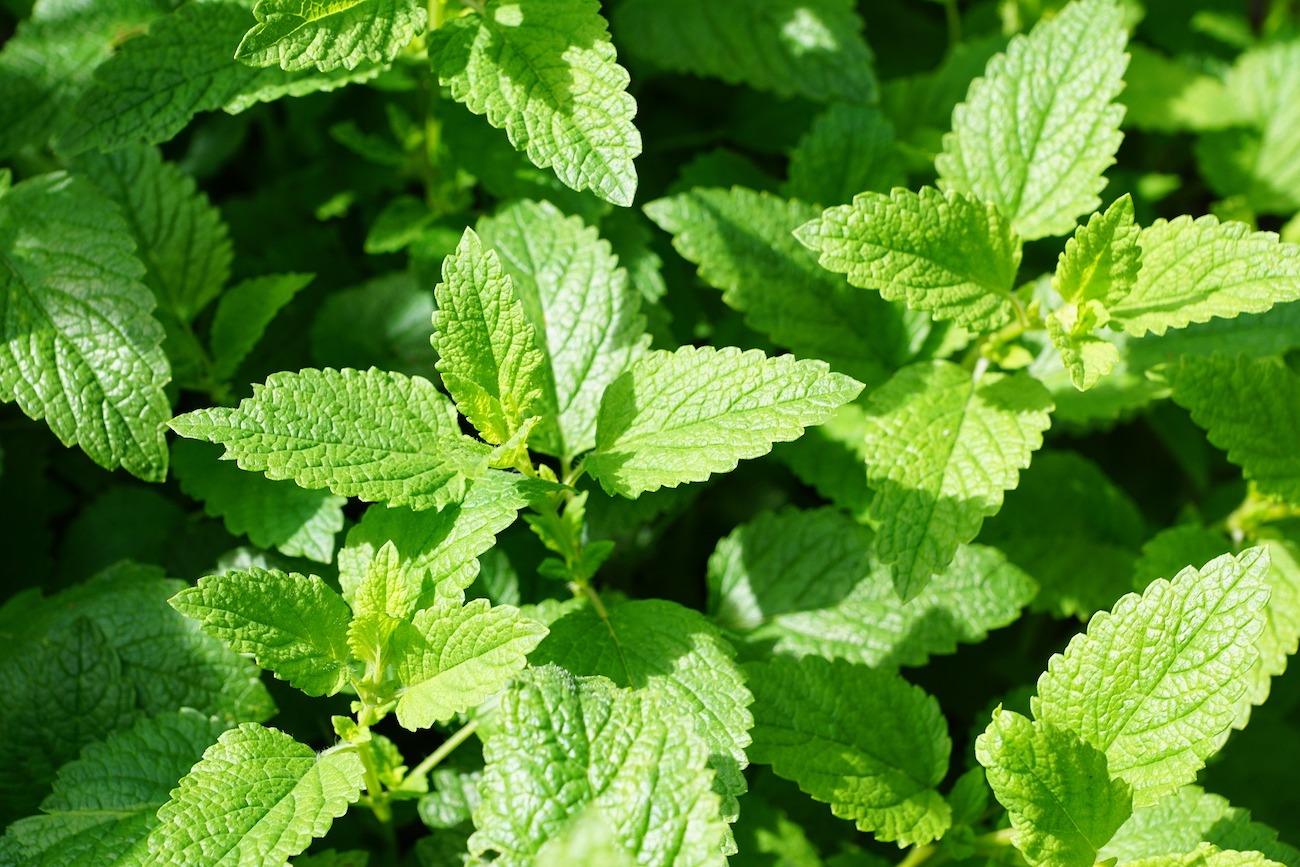
Red clover mixes well with other flavors. Feel free to experiment with adding lemon balm, mint, white clover, chamomile, or orange slices to the mix and sweeten with honey or maple syrup to taste.

Red Clover Tincture

Using the folk method, you can make a basic red clover tincture with fresh or dried red clover blossoms. All you need is a few simple ingredients and some patience. 

You simply place the blossoms in a glass jar and cover them with 80-proof alcohol. Then, keep the tincture somewhere dark for 2 to 6 weeks, shaking it once a day. After this period, you can strain it and begin using it.

Be sure to check out our complete instructions for Folk Method Tinctures.

Red clover is a fun herb to grow and use. Try growing it as a cover crop in your garden this season and enjoy its many soil health, culinary, and herbal benefits. 

The King of Herbs: Growing Basil

Once you start growing your own fresh basil, there’s no going back. While tomatoes may get most of the attention in America’s summertime gardens, basil is the king of herbs. The basil you can grow at home is also more impressive than in the store. It’s much cheaper too! Thankfully, it’s also quite easy to grow, and you still have plenty of time to grow basil in your garden this summer.

Direct Sowing Basil

This time of year, the simplest way to grow basil is to direct sow it. Basil is native to tropical and subtropical regions of Asia, including Thailand, Iran, Pakistan, and other countries. Due to its tropical upbringing, basil thrives in full sun and needs a mimic of 6 to 8 hours of sunlight to produce. It also grows best in rich, well-drained soil and germinates best when the soil temperatures are around 70-75°F.

To direct sow basil, plant 3 to 4 seeds every 12 inches. Lightly cover the seeds, no more than two times the depth of the seed. Basil takes about 5 to 14 days to germinate. When the plants have four leaves, thin them to 1 plant every 12 inches for fuller, bushier plants. You can transplant extra plants to another bed.

Transplanting Basil

Basil can also be started in flats or containers indoors. To get an early start next spring, start your basil indoors about four weeks before your last frost. In flats, space seeds ½” apart. Thin to two inches apart and transplant in 3-4 weeks.

Growing Basil From Cuttings

Interestingly, basil is also easy to grow from cuttings. Take a cutting from your own or a friend’s basil plant that has at least four sets of leaves. Remove the bottom set of leaves and place the cutting in a clean, filtered glass of water in a sunny spot indoors. Change or refill the water as necessary until the cutting has clearly visible roots. Then transplant the cutting to the garden bed with loose, rich soil or a container.

Basil plant growing in a potGrowing Basil in Containers

Basil is also a suitable herb for container gardens. Start your basil just as you would for the garden. Select a container with drainage holes (or make them) and use potting mix and some good-quality compost. Keep the container somewhere sunny and water consistently. Basil doesn’t like to be soggy but thrives with consistent moisture, and containers tend to dry out more quickly than the garden. 

Can you Grow Basil Indoors?

You can grow basil indoors, but it’s much trickier. As basil enjoys full sun, providing adequate light in a home year-round is hard. Here in the northern hemisphere, you may be able to grow basil in a sunny, south-facing window. Your basil plant may need more light if it seems weak or spindly. A grow light bulb placed close to the plant may allow it to thrive. Read the bulb’s instructions for the exact placement. Many bulbs must be surprisingly close to a plant, just a few inches from its top leaves.

Ideas for Using Homegrown Basil

If you ask anyone (or Google) what to do with basil, they’ll tell you to make pesto. Don’t get me wrong, I love pesto, but there’s so much more to basil than just pesto! If you haven’t worked with fresh basil often, here are a few of our favorite ideas for using it.

  • Chop it up and toss it onto homemade or delivery pizza.
  • Make a classic Caprese salad with fresh tomatoes, mozzarella, basil, salt, and olive.
  • Use it for refreshing cocktails or cocktails like bloody marys, watermelon coolers, or limeades. 
  • Top your morning toast or bagel with slices of fresh tomato, basil leaves, salt, pepper, and a drizzle of olive oil.
  • Take your grilled cheese up a notch by adding basil leaves in with the cheese.
  • Basil pairs well with lemon and strawberry. Try adding a new twist to lemon cake or strawberry shortcake recipes by topping them with finely chopped basil.
  • Add basil, garlic, and other herbs to your favorite bread recipe if you love baking.
  • Basil, cheese, white beans, salt, and pepper, make for a tasty, easy-to-throw-together pasta dish. 

Basil as a Medicinal Herb

Basil also has a long history of use in traditional medicine. Basil has been used as a carminative (to relieve gas), to help ease stomach aches, and to improve digestion and appetite. Research indicates that it may inhibit gastric acid secretion. As it’s also a culinary herb, experimenting with basil as an herbal remedy is fairly safe. You can try basil in food, teas, and tinctures

*None of this is intended as medical advice. Always consult your doctor. 

Basil’s fresh, gently spicy flavor makes it a must-have for the kitchen and the garden. It’s not too late to add basil to your garden this year! Start basil from seed, transplants, or cuttings in the garden or patio containers.

Herb Garden: Spring Maintenance

Spring is an exciting time! It’s easy to get caught up in the rush of starting annuals, building new gardens, and adding new plants to our spaces. It’s also important to remember to care for our existing gardens. Spring is an excellent time to look at and refresh our kitchen herb or medicinal herb gardens. 

Tidy Beds

While it was once common practice to tidy herb garden beds in the fall, many of us now hold off on this chore. Various pollinators and beneficial insects use our gardens’ dead leaves and plant materials as winter habitats. Insects like solitary bees, butterflies, and predatory beetles depend on these materials to overwinter or as a place for their eggs or pupae. 

It’s best to wait until temperatures are consistently above 50°F to do your cleanup to help support these garden helpers. Then you can remove any dead material and trim perennials like lemon balm.

It’s also an excellent time to go through and pull any early weeds before they get a chance to take hold. A stirrup hoe can be a handy and quick way to remove small weeds. 

Add Compost to Your Herb Garden

Compost improves your soil by adding nutrients and structure. Adding compost can help heavy soils drain better and help sandy soil to hold more moisture. For most gardens, adding 2 to 3 inches of finished compost is a good idea once you have everything tidied up. This will allow you to get new annuals off to a good start and give perennials essential nutrients to put on good spring growth. 

It’s important to know your plants. Some herbs, especially those from the Mediterranean, like lavender and rosemary, don’t generally need or enjoy rich soil. Around these types of plants, you may only need to add compost every couple of years. 

Compost should be spread on top and gently raked in. Be sure not to disturb the roots of perennials or cover their crowns with compost. 

Mint PlantDivide Perennial Herbs

Early spring is an ideal time to divide many perennials. Spreading herbs like hyssop are good candidates for this. Take a sharp shovel and cut a clump in half or smaller sections. Try to damage the roots of each section as little as possible. Fill in around any section you leave with compost or good soil.

Dividing is easy but is a lot like transplanting annuals. There are a few essential steps to make sure your plants thrive. The first step is to stress your plants as little as possible. Avoid sunny days and transplant on cool, overcast days if possible. Transplant them into loose soil and add compost if needed. After transplanting, water your plants thoroughly and keep them moist while they get established.

You may also need to move plants to rearrange your garden or those that have self-seeded in less-than-ideal spots. Moving plants is very similar to dividing. You want to use a sharp shovel or trowel and try to get all the roots and disturb them as little as possible. 

Your divided or moved plants may wilt initially but will quickly recover if you’ve followed these steps. 

Mulch Your Herb Garden

We use mulch in all of our gardens, and it has many benefits. Mulch can help suppress weeds, keep the soil moist, and add organic matter as it breaks down. You can use whatever type of mulch you wish, but it’s best to avoid using dyed ones, especially around edible plants. 

Generally, you want your mulch to be about 2 inches thick, but some find 3 inches works better with coarser material. Don’t use too much mulch, as it can block air from the soil. Avoid putting mulch directly over the crowns of plants, as this can prevent new growth and cause crown rot in some species. 

Carefully Plan Any Changes and Additions

While completing your spring chores, taking stock and making a plan is a good idea. Did all of your perennials make it through the winter? What annuals did you enjoy most last year, and which did the best? What herbs did you run out of this winter?

Careful consideration can help you maximize your gardening efforts this season. When adding new beds, drawing them out on paper is a great idea. You can also use stakes and string to mark out their location.


Spring is fun, but we must remember essential maintenance. Completing these five tasks can help ensure you have a beautiful herb garden this summer.