Tag Archives: food preservation

Putting Up Produce the Old Ways: Fermenting, Drying, and Cellaring

For the modern gardener keeping a surplus harvest means blanching and freezing or canning. These methods certainly have their virtues but it’s important to remember they’re not your only options. For hundreds of years humans put up their harvests without the aid of modern canning jars or electricity.

For some in areas with frequent power outages or off grid houses freezing produce may not be the best option. Canning, especially pressure canning, can be relatively time and energy intensive. Plus fermenting, drying, and cellaring all have their own benefits.

Fermenting

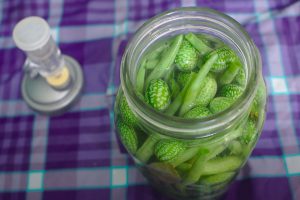
It sounds a little weird but fermented food may be some of your healthiest preserves. Fermented food has lacto-bacteria that has been shown to improve gut flora. Your gut flora is important to your digestion but new studies have also shown gut flora to be an important facet of your overall health.

Easy fermented foods include pickles, kraut, and kimchi but nearly any vegetable can be fermented. Check out this post for a more in depth look at fermenting vegetables.   
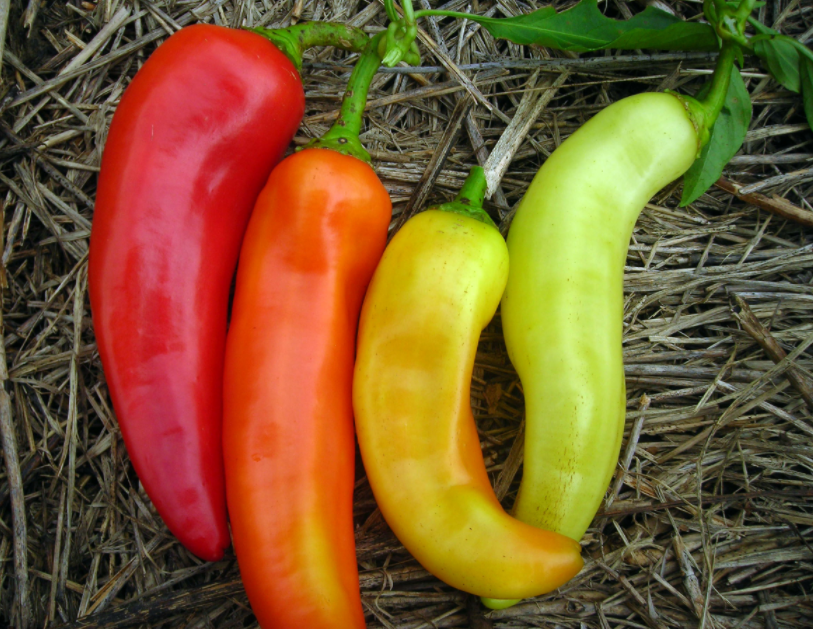
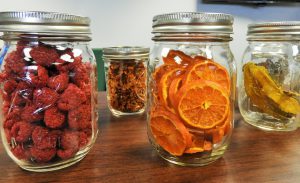
Drying

Drying or dehydrating produce is probably one of the easiest methods of preserving produce and it can be much less energy intensive than canning or freezing but still keep for a very long time. Dried produce can be eaten as snacks or rehydrated for use in soups and stews during the winter months. It’s also great lightweight food for families who enjoy camping or backpacking.

Before electricity was available drying food was mostly used a preservation method in warm, arid climates where food could be quickly dried outside before it rotted. Today you can find many plans online for solar dehydrators which will help those in more humid climates achieve the same effect. Thankfully for those in really humid areas or without a passion for DIY projects there are tons of electric dehydrators available on the market and most are very affordable.
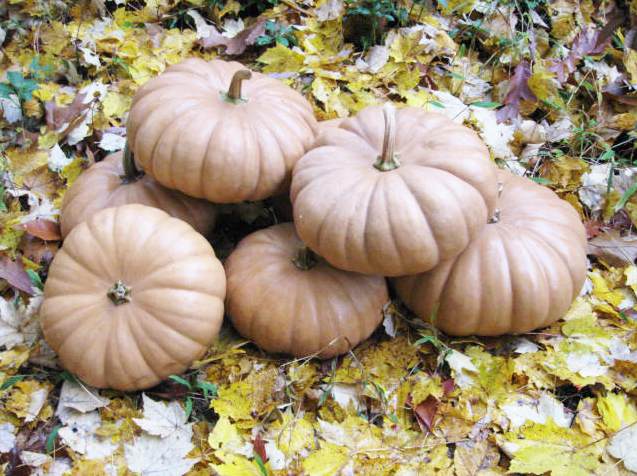
Cellaring

Don’t skip this section just because you don’t have a root cellar! There’s many ways to store produce fresh even if you live in a small apartment. Check out this post, How to Store Crops Without a Root Cellar for our best ideas.

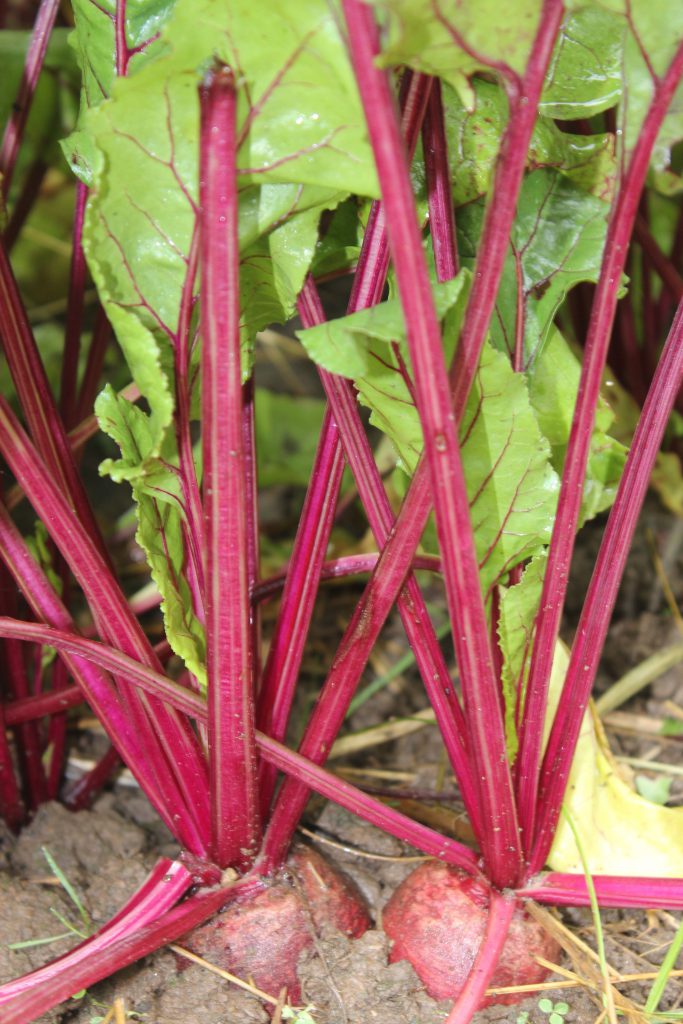
A lot of produce can be kept fresh in storage including onions, carrots, beets, turnips, winter squash, even cabbage and brussels sprouts! Cellaring is a method in which heirlooms will often have the advantage. As many were bred when people put up all or much their own food heirlooms often have some of the best storage abilities. Keep this in mind this winter as you’re choosing varieties.

Succession Planting

For anyone who dreads spending time preserving a great way to avoid a lot of food preservation altogether is to use succession planting. This is when you start plants at different intervals so that they’re ready at different times. Rather than planting all your green beans in one day plant a row or two (depending on your family’s size) one day and then plant again in a few weeks. This will spread your harvest out over a longer period of time ensuring you can enjoy more of it fresh!

For more tips check out, Succession Planting 101.

These methods may be old but they’re still awesome! Fermenting, drying, and cellaring can help you avoid food waste and keep healthy, local food continuously available.

Pin it for later.

How to Store Crops Without a Root Cellar

Tan Cheese Pumpkin

For many crops the preferred storage method negates the need for a root cellar. Anything that is canned, dried, or frozen can be kept right in your kitchen without any change from store bought groceries. However there are some crops that are stored fresh but require specific conditions. Things like winter squash, beets, and cabbages would have traditionally been kept in a root cellar. Unfortunately most modern houses don’t include that feature. Unless you’re ready to invest in building one, a little creativity can help keep your winter produce without a lot of effort.

Make a root clamp.

Root clamps are an old way of storing vegetables underground without an actual root cellar. They’re simple holes in the ground to store cabbages, potatoes, and other root vegetables. The vegetables can be layered with straw or hay, keeping a thick layer between them and the dirt to keep out any frost. On top is an especially thick layer followed by a couple whole bails to cover the top. You also want the straw or hay to be between each individual vegetable.

Today some people add an old cooler or clean trash can as a liner for the root clamp. Coolers however are not deep enough to avoid frost in cold climates.

Keep it in the garden.

In places where the ground doesn’t freeze very early storing root crops right in the garden can be an excellent choice. For crops like beets, carrots, turnips, potatoes, and radishes just leave them in their bed and cover them with a good amount of hay or straw. They can then be dug as needed.

You can also grow greens and brassicas through the winter by using cold frames, row cover, or backyard hoop or green houses.

Utilize cool places in your home.

Whether it’s a garage, a basement, under a bed, a certain cabinet, or a closet many of us have a spot in our home which stays rather cool. Crops like sweet potatoes, onions, and squashes that prefer cool, dry storage can just be stuck in baskets in these places. They will last longer if they aren’t piled up too much and have good air circulation.

Fruit crops like storage apples and pears can also be stored in this manner. However many people advise wrapping each individual fruit in newspaper to help them keep longer and discourage any rot from spreading.

Crops like potatoes, carrots, beets, and other roots that need damper conditions can also be stored in these same places. For these crops you’ll need containers and a packing material like shredded newspaper, straw, or sand. This material should then be kept damp (not wet!). You can use a spray bottle to add moisture as needed. You should trim the tops off the vegetables leaving about 1/2 inch then layer them in your container with your material in between so that none are touching.

Cabbages can be stored with their roots in damp sand or in just a basket like squash. They do better in damper places than squash does though.

Refrigerate root crops.

Root crops can also be refrigerated. For those with leafy tops trim the leaves to 1/2 inch. Potatoes also store well in the refrigerator.

Use them as decor.

Some squash, onions, and soft neck garlic store fairly well at room temperature and can double as some farmhouse type decor. Squash looks great on fall table settings and onions and garlic look gorgeous braided and hung in the kitchen or pantry.

Maintaining your storage crops.

It’s important to note that none of these methods are leave it and forget solutions. Even with a proper root cellar it’s important to periodically go through your produce and check for ones that are starting to rot or mold. If you don’t remove them the rot will spread to the rest hence the saying, “one bad apple can spoil the bunch.” Ideally you can catch them while they’re still useable.

You should also pay attention to your different varieties. From radishes to pumpkins different varieties have different storage capabilities. using varieties in order of how long you can expect them to keep is just another part of gardening and seasonal eating.


While these methods may not be as idyllic as a farmhouse root cellar they can work just as well. Keeping food properly in storage can help you save money on groceries, give you more self-sufficiency, and lessen your environmental impact. So pack your carrots in a container in the closet or store baskets of sweet potatoes under your bed, and stock that winter larder!

Pickled Peppers

In later summer and fall massive amounds of produce can start to overwhelm any gardener. It’s exciting and wonderful but when the neighbors start avoiding you because they really can’t take any more summer squash it’s time to preserve the harvest.

For peppers one of the easiest, tastiest things to do is to pickle them. Water bath canning is surpisingly easy and safe. It requires only basic equipment and is a great way to put up your homegrown harvest.

My favorites are jalapenos or banana peppers but you can use whatever you’ve got.

Sweet Banana (Long Sweet Hungarian) Pepper

Here’s what you’ll need:

Water bath canner (large pot, lid, and rack)

Canning jar tongs

Canning jars, new lids, and rings

5-6lbs of peppers

12 cups of white vinegar (5% acidity)

4 cups of water

*Optional*

Pickle Crisp – follow directions on package for crisper peppers

To begin harvest and wash all your peppers. Slice into rings or small pieces and place in a clean bowl. If you’re using particularly hot peppers you may consider using gloves and safety glasses. Hot pepper juice in your eyes is not fun.

You’ll need to sanitize your jars and rings. Check all the jars for nicks and then boil them and the rings. Keep the jars hot until you’re ready to fill them.

Combine the vinegar and water in a saucepan and bring to a boil. While the brine is heating pack your peppers tightly into your hot jars leaving 1/2 inch headspace .

One the brine has boiled it can be poured over the peppers leaving 1/2 inch headspace in each jar. Slide a rubber spatula around the outside of each jar to release any air bubbles the wipe each rim with a clean rag.

Place new lids on all the jars and put on rings, turning them until they’re fingertip tight. Using the jar tongs place each jar in a boiling water bath canner and boil for ten minutes.

Ta da! You’ve got peppers that will keep safely without electricity for over a year. They’re are great tossed on subs or baked on homemade nachos or pizzas.