Thyme certainly isn’t the most popular herb in backyard gardens but we’re stumped as to why! This little plant has a lot of great things going for it. Check out some of thyme’s benefits to learn more about why it deserves a spot in your garden.
Thyme has medicinal properties.
Thyme may be generally thought of as a culinary herb but it also as a long history of medicinal use. It is primarily used to treat lung and throat issues like colds, coughs, and sore throats. It’s an excellent ingredient for homemade cough drops, soothing teas, and gargles. Thyme can also be used for soothing for upset stomachs.
It’s a hardy perennial.
It’s a hardy perennial. At SESE we offer three varieties of thyme. German Winter Thyme and Creeping Thyme are hardy in zones 4-10 and Summer Thyme is hardy in zones 6-9. If you’d like a low maintenance garden it should definitely be on your list.
Thyme can be started from seed.
While many perennials can be a bit tricky to get going from seed thyme is actually quite easy. It can be started indoors with other garden plants like tomatoes and peppers and set out after the danger of frosts have passed in the spring. It may take a little while to get going but not having to buy transplants may be worth the wait.
It’s delicious.
In the kitchen, thyme is incredible versatile. It can be used in sweets like shortbread cookies or savory dishes like sauces, meats, and beans.
Thyme is beautiful.
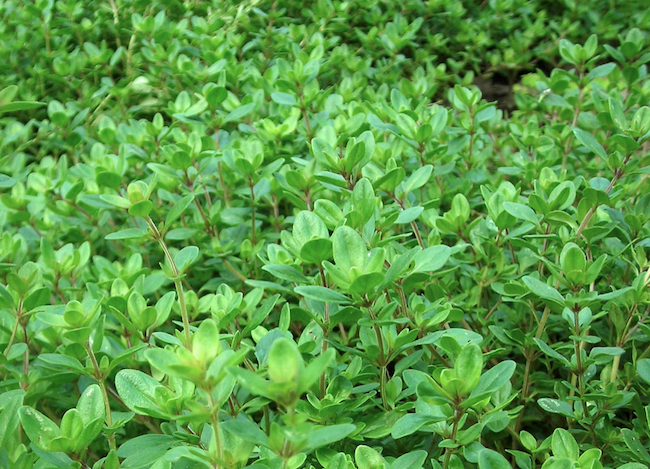
Thyme plants a truly beautiful and different varieties offer a plant perfect for every garden. German winter thyme is shrubby and upright while summer thyme is a bit smaller. Creeping thyme is a vining plant that creates an excellent ground cover for rock and herb gardens. Even though they have different appearances all three can be used as culinary or medicinal herbs.
It attracts beneficial insects.
Thyme’s little flowers attract a variety of beneficial insects including native pollinators, honeybees, and predatory wasps.
Thyme makes an excellent companion plant.
It can be planted in with cabbage, potatoes, eggplant, and strawberries. It’s thought that it repels cabbage worms, flea beetles, and tomato hornworms.
It’s good for you.
In case you needed a reason besides its wonderful flavor to add thyme to your recipes thyme is very nutritious. It’s high in iron and antioxidants.
Thyme will tolerate shade.
If you have an area of your garden that’s get’s too much shade to be an excellent vegetable patch you might want to add some creeping thyme. It will do fine in areas that are fairly shady.
It doesn’t need much water.
While you need to water your thyme plants while they’re getting established once they’re mature these Mediterranean plants require very little water. They’re perfect for water conscious gardeners or those in drought-prone areas.
If you’re planning your garden for next year you may want to add thyme to your list! These are just a few of the many reasons this wonderful herb deserves a spot in your garden. What’s your favorite thing about thyme?
Pin it for later.