Category Archives: Garden Advice

Cover Crops for Great Green Manure, Mulch, and More

By Ira Wallace

Warm weather and late April rains have our fall-planted crimson clover, winter rye, and Austrian winter peas growing like weeds and just starting to bloom.  As an edible bonus, the winter peas gave an abundance of sweet pea shoots to add to salads all winter and spring. The bright red flowers of crimson clover provide much-needed pollen and nectar for pollinators and other beneficial insects in spring.

To select the best cover crops for your garden, consider which functions are your priorities, the time of year, and how long the cover crop will be in the ground. Cover crops are important tools all year for filling in gaps between crops while also preventing soil erosion, suppressing weeds, providing habitat for pollinators, and improving fertility. Some even provide an edible bonus, for you and for pollinators. Here are some cover crop favorites in the Southeast.

Winter Nitrogen Fixers – soil fertility out of thin air.

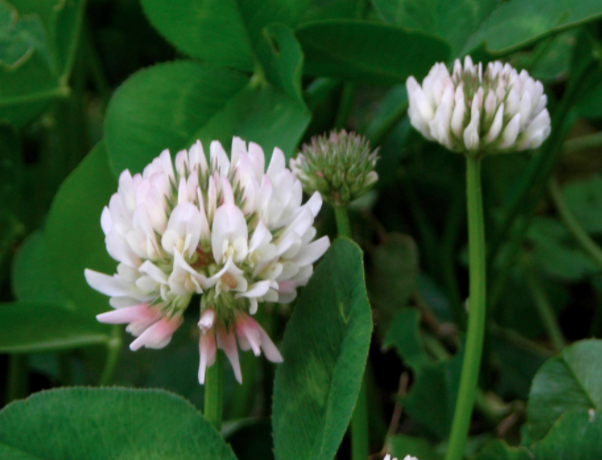
  • red-Clover-2-GryphonClover (crimson, white, and red Sow clover six to eight weeks before your average first frost date. Clovers fix nitrogen in the soil and thus boost nitrogen for next spring’s garden. Mow one or two times when about half of the crop is flowering. Allow the residue to decompose for at least two weeks before planting vegetables.
  • Hairy Vetch– Sow hairy vetch six to eight weeks before the average first frost date. This vine-like, vigorously-growing, cold-tolerant, winter-hardy, annual legume adds nitrogen and builds soil organic matter. Hairy vetch grows well in cereal grain mixtures and is an excellent spring weed suppressor.
  • Pea shoot and Brassica Flower xaladWinter Peas (Austrian)– Sow winter peas four to six weeks before the average first frost date. Sometimes called “black pea” and “field pea”, this is a cool-season, annual legume with good nitrogen-fixing capabilities. Usually planted with rye, oats, or barley to reduce the chance of winter kill. Cut and turn under at full bloom for maximum nitrogen.

Winter Soil Builders and Subsoil Looseners – for the surface or deeper down.

  • Winter Rye (Cereal Rye)
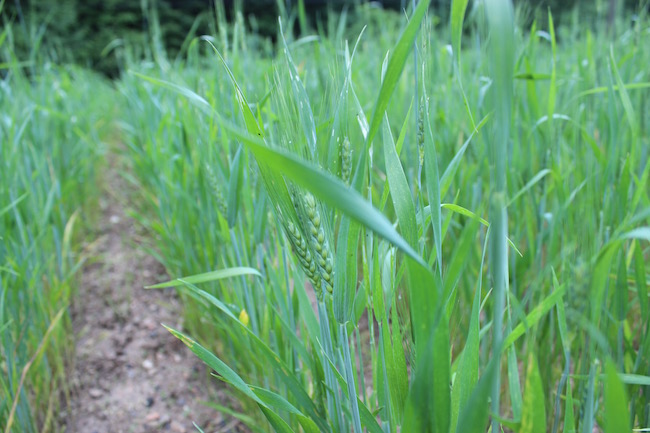
    Sow winter rye six weeks before the average first frost date and up to two weeks after. A cold-hardy crop, winter rye will grow well into the spring. Winter Rye increases soil organic matter as it decomposes. Mow one to two times when at least 12 inches tall, or when half of the crop has immature seed heads. Allow residue to decompose for at least two weeks before planting vegetables.
  • Oats – Sow oats eight to ten weeks before the average first frost date. Oats are killed by the hard frosts. They form a winter surface mulch, preventing erosion and increasing soil organic matter as they decay.

Edible Cover Crops

Traditional gardeners in the Southeast plant a big bed of winter greens (turnips,  mustards, kale, and collards) to keep the garden covered and provide fresh eating until spring.  Plant this beautiful edible greens cover crop in August or September to build organic matter and provide healthy meals all winter long. Try a mixture of the old Southern favorites and contemporary choices like Seven Top turnip, Lacinato kale, Red Russian kale, Southern Giant Curled mustard greens, and Tatsoi.

If you are in the upper South or in the mountains, cover your winter greens with row cover or plant in a cold frame for winter harvests. Left uncovered in cold winters, the leaves will be too damaged for good eating, but you’ll have fresh new growth in early spring if winter lows aren’t too bad.

For more reason to plant cover crops read our Cover Cropping for Unpredictable Weather


Warm Season cover crops and filling in the summer gaps

  • Sorghum-Sudan Grass hybrid Plant in spring and summer, beginning after the soil has warmed and up until six weeks before first frost. This hybrid is unrivaled for adding organic matter to worn-out soils. These tall, fast-growing, heat-loving summer annual grasses can smother weeds, suppress some nematode species, and penetrate compacted subsoil.


  • pink-eye-purple-hull-webSoybeans (Edamame) and Southern Peas (Cowpeas)
    Plant in early summer through mid-summer, between spring and fall crops. Mow before pods have formed or when pods are still green and have not matured. These legume family plants can fix nitrogen for an added bonus.
  • buckwheat-webBuckwheat
    Plant from spring through early fall when the ground will be open 5 weeks or more. Buckwheat establishes quickly, suppresses weeds and attracts pollinators. Mow one to two times when half the crop is in flower and before hard seeds have formed. Will be killed by frost.

Although fall through winter is the most common time when gardeners grow cover crops, savvy gardeners include summer cover crops in their garden plans. No matter which cover crops you choose or when you fit it in your garden rotation, cover crops allow you to grow your own nitrogen and organic matter in place.

When to Mow or Turn Under Cover Crops

A lot of factors go into determining the best time to turn under or at least cut down your winter cover crop. To get the most biomass, wait until half of the cover crop is in flower but make sure to get it cut down and incorporated before it goes to seed. Some freshly cut cover crops like winter rye inhibit seed germination for the following crop. If you are planning to direct seed allow 2 to 4 weeks for your cover crop to decompose before planting. This same property can be an advantage in weed suppression if the cover crop is just crimped or rolled and left as a mulch for transplanted tomatoes.

Another factor to consider is when you want to plant the next crop. For early spring plantings you may need to cut and turn in your cover crops well before flowering and allow a longer time (maybe 3 to 6 weeks) for the organic matter to decompose before planting. You can speed up decomposition of the cover crop 1 or 2 weeks by sprinkling in some mature compost or applying compost tea to add beneficial soil organisms before turning it under.

For most home gardens you can cut your cover crop with a hand sickle or scythe and add it to your compost. This leaves the considerable roots to add organic matter and aerate the soil. You can also weed-eat it or mow it and just let it lay there on the ground as mulch or till it in.  For the home gardener, Roto-tilling  is the fastest and easiest way to incorporate your cover crops, but you can also spade in your crop residues the old fashioned way. Digging in your covers crops aids in faster decomposition and less nitrogen loss into the atmosphere.


Sweet Potatoes, Potatoes, or Both? Decide for your garden.

ginseng sweet potato (slips for spring planting)dark red norland (seed potato)

Don’t be fooled: potatoes and sweet potatoes may share a name, but these two crops are grown very differently. We’ve broken down some of the differences to help you decide what to grow:

Plant Family: Genetically, potatoes and sweet potatoes have little in common. Potatoes hail from the Solanaceae family: their closest relatives are tomatoes, peppers, eggplants, and other nightshades. Sweet Potatoes are most closely related to morning glory: they are in the family Convolvulaceae.

Crop Rotation: Sweet potatoes should be easy to fit into a crop rotation, while potatoes may be quite difficult. Potatoes should be rotated by 3-4 years with nightshade crops, while sweet potatoes only need to be rotated with themselves. Planting potato seeds is not that difficult, you just need to take good care.

Plant Starts: While potatoes may be grown from any sprouting spud, it is best to start from disease-free Seed Potatoes. Sweet potatoes may be started at home by sprouting your own slips (green shoots off the mother root to be separated and planted), or the slips may be purchased.

Timing: We ship seed potatoes from March through April, directly from our grower’s farm. Our Virginia-grown sweet potato slips begin shipping in May.

Planting: Potatoes don’t mature well in hot weather, so it is best to start an early spring crop (we start ours in March) and grow a fall-maturing crop for best quality roots for winter storage (we start a second crop in June). It can be difficult to find seed potatoes after April, so order seed potatoes in the spring and store them in the refrigerator until planting time. We plant our heat-loving sweet potato slips in June.

Yields: Yields vary, but high-yielding sweet potato plants often produce as much as 5-10 pounds per plant. Potatoes may yield 3-5 pounds per plant, but this will depend on hilling: the new potatoes are produced above the seed potato, so new soil needs to be piled over the plants throughout the growing season.

Storage: Both sweet potatoes and potatoes can be stored for months without refrigeration. Light-sensitive potatoes must be stored in a cool, dark place (preferably 40-45°F). Sweet potatoes can be stored at room temperature so long as they are kept in the dark (otherwise they will start sprouting at temperatures above 70°F or so).

Check out our full Sweet Potato Growing Guide and Potato Cultural Notes.

Easy Bamboo Bean Teepees

Bean teepees

Once upon a time, when I made my first attempt at putting in a garden and was as clueless as they come, I tried planting some pole beans. I new they needed some kind of trellis to climb and I thought maybe a teepee sort of a thing would be easy. I found a stick of some sort, stuck it in the ground, tied some yarn around the top (that’s right, I used YARN, fine, wool knitting yarn,) and staked the yarn to the ground. Maybe I even used pins to stake it. In case you can’t tell, my background is in textiles, not gardening.

Needless to say, my teepee fell apart almost as soon as the first little bean tendrils reached out for it. The yarn broke and eventually the stick fell over. It would have been funny if it hadn’t been so sad.

Last week I learned one way to do it right, using a few of the bamboo stalks we have in profusion, so I’d like to share that with you.

  1. Cut or collect a bunch of bamboo stalks and cut them to around 9′ long, 7 per teepee. Cut off all the branches. We found this was easily accomplished using a machete and whacking from the top down.

2. Pound a t-post into the ground where you want the center of your teepee to be and tie one of the stalks to it using strong twine, like baling twine.

setting up bean teepee

3. One by one, tie the other six stalks to the center one near the top, with the bottoms propped against the ground about three feet from the center. I did a lot of complicated winding around of the twine to make sure each one was secure, and then wound a bunch more twine around all of them once they were all up.

Bean teepee top

Alternate method: you can also tie four of the stalks together lying on the ground, with one a little longer than the others to be the center pole, then stand them all up and arrange them in place. Once they’re up you can tie on the remaining three stalks.

alternate bean teepee

4. Wrap twine around each outer stalk at about 1.5′ and 3′ up, going all the way around. This will give the plants something to grab on to as they climb.

bean teepee support strands

5. Now plant your beans or peas! We put in eight in a little circle around the base of each stalk.