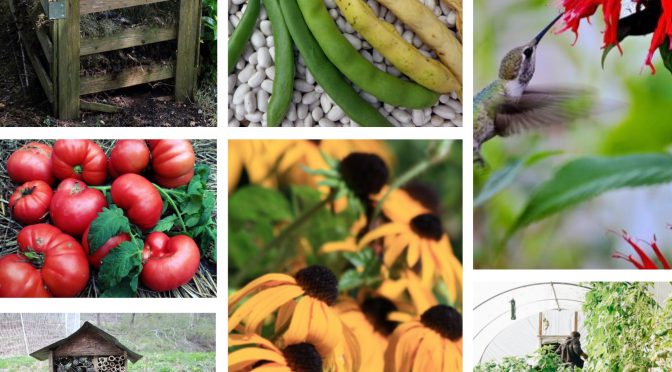
If you’ve perused the latest catalog, you may have noticed we’re offering some new varieties for the 2021 season! Here are a few of those new varieties you might want to consider when planning your garden.
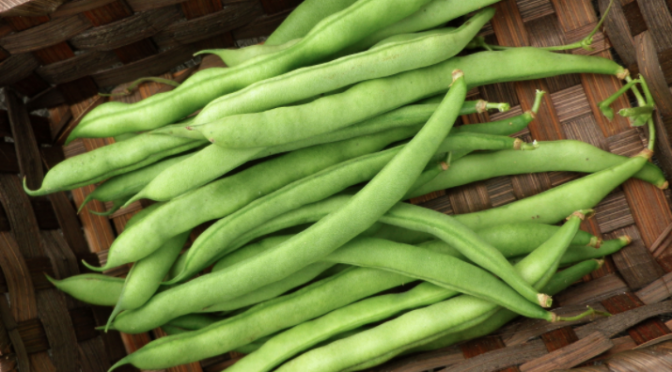
Beans
Ideal Market (Brown Creaseback)
This heirloom was first sold in 1914 as Black Creaseback in Mobile, AL, by Van Antwerp’s Seed Store. Later reintroduced in 1924 in New Orleans as Reuter’s Ideal Market by Chris Reuter Seed Company.
Ready to harvest in just 55 days, this variety offers 5-6 inch green, stringless pods with good flavor and crisp texture. They get the name “Ideal Market” for their are earliness, long season, and the pods’ good keeping quality on the vines!
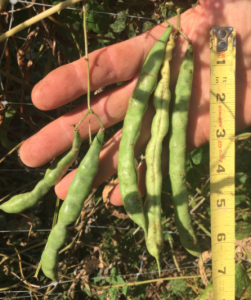 Sparkman Cutshort
Another Alabama variety, this is a family heirloom from grower Dan Geer. These beans have 6-7 inch pods and are good fresh or as shelly beans. The seeds are brown and tan with speckles and swirls.
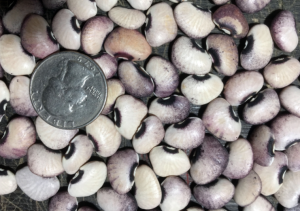
Limas
Alabama Black Eye
These unique lima beans get their name from their small black eye. Another Alabama family heirloom, the tall, vigorous plants produce 3-4 small creamy-white seeds per pod in about 85 days. Cooked, they have excellent flavor, and the seeds turn rosy beige.
Cabbage
January King
This Northern European heirloom dates back to 1897! It produces 3-5 lb. firm heads with light green inner leaves and beautiful semi-savoyed purple-tinged outer leaves. Perfect for planting in early fall, the hardy, slow-growing plants offer a harvest in January or February.
Chicory
Wild Garden II Chicory Mix
[Frank Morton] A rainbow mix of different chicories, now with even more leaf shapes and colors – add some pizzazz to your Fall salads!
Collards
 Nancy Malone Wheat Purple
This gorgeous collard is an Alabama family heirloom from MacArthur Walter and his wife Annie’s mother, Nancy Wheat. The plants grow large, approximately 1½-2 ft tall and 3-3½ ft wide.
Whaley’s Favorite Cabbage Collards
This old-timey variety has been featured on the PBS shows “A Chef’s Life” and “Somewhere South.” It has a flavor milder than most collards, even in the summer. It’s winter hardy, and the loose heads make excellent collard kraut.
Mustard Greens
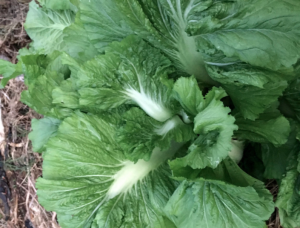 Feaster Family Heirloom
This variety has been grown by the Feaster family in Shiloh, FL, for many generations on their Florida Pioneer Family Farm. Thanks to Working Food and Jerome Feaster for the seed!
It has broad, pale green, smooth leaves that can get quite enormous, reaching 2 ft. tall. The leaves have a nice spicy bite that sweetens when they cook and a large crunchy and juicy mid-rib. It grows well year-round in north Florida but does best during the cooler months when it’s greens season.
Swiss Chard
Fordhook Giant
This heirloom chard dates to 1924. It’s a reliable variety that produces big, vigorous plants with big white stems and big dark green leaves!
Onions
Rossa Di Milano
This Italian heirloom has sweet white flesh and beautiful bright red/purple skins. These distinctively flattened barrel-shaped onions store exceptionally well and make a tasty addition to any savory dish.
Texas Early Grano 1015Y (Texas Supersweet)
These short-day, Vidalia-type onions are one of the most famous Texas onions. The sweet bulbs can get as big as a softball. They have yellow skin, white flesh, resistant to pink root disease. Bulbs store for 2-4 months. They were developed by Texas A & M in 1960.
It’s best to start these in the fall/winter and for transplanting in early spring. (In Texas, they’re started Oct 15 – i.e., 10/15 – hence their name!)
Tokyo Long White (Bunching)
This Japanese heirloom produces slim white onions with upright blue-green tops that grow quickly up to 12 in. and can form clumps up to 8 inches. They’re ready to harvest in 65-95 days.
They’re tolerant of heat and some cold, making them great for harvest in spring, summer, and fall. Their mild flavor makes them an excellent addition to salads and stir-fries.
Hot Peppers
Balik
This variety is from Gokhan Erdinc of Istanbul, via Two Seeds in a Pod. Ready to harvest in 46 days, this variety produces sleek, crunchy peppers, about 1 in. x 3 in., generally with two lobes, similar to fish in shape.
Their name, pronounced BA-luck, means “fish” in Turkish. They’re productive plants with milder heat than most Jalapeños.
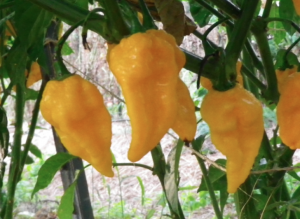 Grenada Seasoning
These 3′ tall plants produce peppers that are ready to harvest in about 94 days. The peppers ripen from green to yellow and have a unique flavor with intense fruity and floral notes.
They have mild heat but are spicier than most of our spice peppers. These peppers received stellar reviews in our 2019 pepper taste test and are unlike any other pepper we have tried.
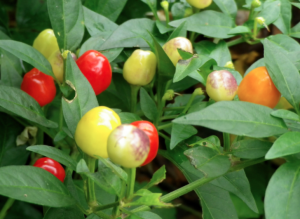 Sally’s
These 12-18 in. plants bear lots of small ½ in. x ½ in. fruits with medium heat. Ready to harvest in 50 days, these little peppers ripen from cream to purple-tinged to yellow to orange, then red.
Their short stature and ornamental value make this pepper well suited to small gardens and container growing.
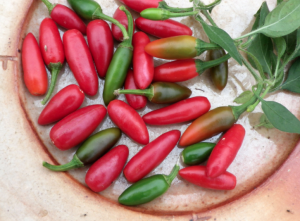 Xochiteco
This heirloom is from Southern Mexico. The peppers are ready to harvest in 55 days and ripen from green to red. They vary in shape but average 3/8 in. x 1 in. Ripe peppers are easy to pick, very juicy, have medium heat, and make an excellent hot sauce!
The 3 ft. plants have a tendency to lodge and make new stems from the base. We recommend support cages or staking. The plants have fuzzy leaves – but white flowers and calyx shape indicate that this variety is probably in the common C. annuum species, and not the rare C. pubescens species.
Tomatoes
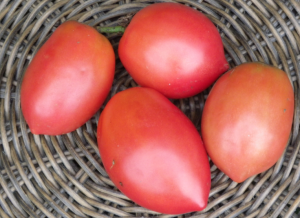
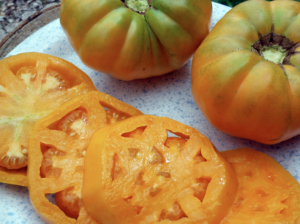 Kellogg’s Breakfast
This variety is a West Virginia family heirloom selected and named by Darrell Kellogg of Redford, MI. These 1-2 lb orange beefsteaks are delicious, perfect for a tomato sandwich.
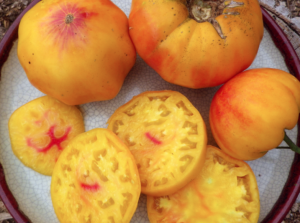 Virginia Sweets
This variety offers sweet, delicious fruits that average one pound. They’re ready to harvest in about 80 days and are beautiful yellow with red striping.
 Mr. Fumarole
Ready to harvest in 68 days, this variety produces dark pink, slightly oblong fruits, 3-6 in. with pointed tips. They have a complex, tangy flavor that’s well suited to eating raw or cooked.
This one made the cut because 2-year-old Marsden and his grandpa, after tasting a Mr. Fumarole tomato, each tried to get more Mr. Fumarole for themselves by encouraging the other to take a different tomato instead!
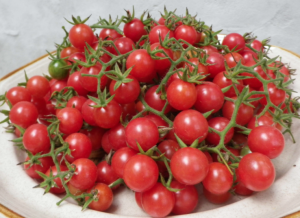 Everglades
This cute little tomato is similar to Matt’s Wild Cherry, but pinker, with some flavor differences. The Seedstock comes from Melissa DeSa of Florida. Vigorous, disease-resistant plants bear sweet, dark pink, ½ in. fruits. ‘til frost.
Little Lucky
This variety offers small, generally 4-6 oz. , bicolor, round fruits. Breeder Craig LeHoullier attributes the great flavor of this tomato to its Brandywine parentage. He says he was lucky to save the seed from a Brandywine tomato that a bee had crossed with another variety. This is the smaller-fruited and therefore more unique of the two varieties that came of that cross.
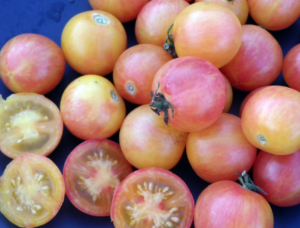 Tropical Sunset
These ping-pong ball-sized fruits ripen from green to yellow with pink striping to pink with golden striping. They have bicolor interiors, too. They are ready to harvest in 60 days.
Tropical Sunset has a delicious, fruity flavor with medium acidity and good shelf life. This variety was bred in multiple locations, including NC.
Herbs
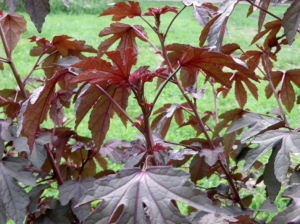 Cranberry Hibiscus
This hibiscus produces dark red, deliciously sour leaves that remain tender even as they reach large sizes. The leaves are great for use in soups, salads, stir-fries, tea, or pink lemonade. Similar in flavor to roselle. The leaves are ornamental, but it hasn’t produced any flowers in our garden.
Cranberry Hibiscus grows slowly as a young plant, then quickly when the weather’s hot. The plants surpassed 12 feet wide in our 2019 garden!
 Quillquiña (Bolivian Papalo, Bolivian Coriander)
Quillquiña has a similar flavor to the more common Mexican papalo, with notes of arugula, citrus, and rue. This Bolivian variety has narrower, blue-green leaves and a very complex flavor with more floral notes that we think a wider range of people will enjoy.
Like cilantro, it is loved by many and hated by a few. However, your opinion of cilantro is not a good predictor of your opinion of quillquiña! Quillquiña is very aromatic. One planting can provide fresh greens for months.
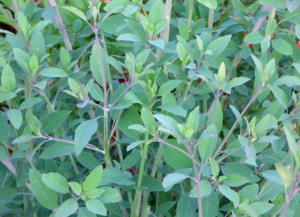
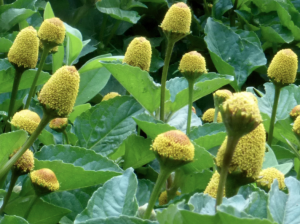 Spilanthes (Eyeball Plant, Buzz Buttons, Toothache Plant)
This plant is widely used around the world and called by many names. It’s a spreading, highly ornamental plant with gold and red, cone-shaped flowers often compared in appearance to eyeballs.
The edible leaves and flowers cause a strong tingling sensation in the mouth when eaten raw. They can be used in soups, sauces, sorbets, cocktails, and shredded in salads. Spilanthes has been used in a very wide range of medicinal applications, including for various mouth issues.
Flowers
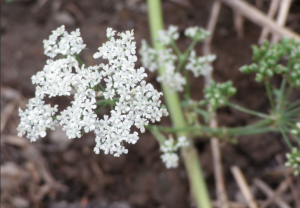 Bishop’s Flower (White Dill)
This variety has the look of Queen Anne’s Lace without the excessive self-sowing. It makes an excellent cut flower, and the white umbels attract a variety of beneficial insects. The flowers help support tachinid flies, which parasitize squash bugs.
The greens, flowers, and seeds have a pleasant, distinctive taste, but it may be best to avoid eating significant amounts. Seeds have been used for several medicinal purposes. Skin contact may lead to photosensitivity; use gloves when handling large quantities.
Plant in well-drained soil. Sow in fall before first frost, or in spring after last frost.
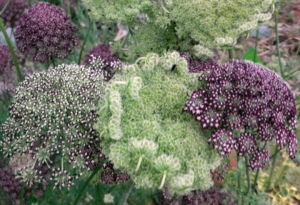 Dara
Dara
Like Bishop’s Flower, Dara is a less aggressive relative of Queen Anne’s Lace. Dara produces elegant flower clusters in pink, dark purple, and white. The flowers attract pollinators including tachinid flies, which parasitize squash bugs.
Dara is best planted in fall, for spring flowers, in most climates. Here in Virginia, our spring planting reached only inches, but our fall planting reached 60 in. and produced larger flowerheads over a longer period.
Mexican Cosmos
These vigorous plants bloom until frost. They offer 2 in. golden yellow flowers on 5 ft. plants.
The seedstock is courtesy of a seed-saver in far Northern California, who received this variety from a seed-saver in Wisconsin.
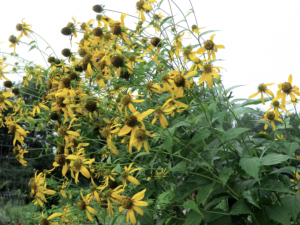 Cutleaf Coneflower (Sochan)
Native to the Southeast, this is a traditional Cherokee food. The plant produces delicious leaves and shoots in spring. Harvest young leaves and shoots tender enough to be palatable.
Cutleaf Coneflower has abundant 2-3 in. yellow flowers that feed pollinators in late summer and early fall, followed by seeds that feed native birds.
This plant tends to spread via rhizomes. Many gardeners will find it necessary to rein it in. We recommend it only for larger garden sites. Our current seed lot is from single-flowered plants that may have experienced some cross-pollination with a double-flowered cultivar.