All posts by Ira

Here Comes The Sun(flowers)…

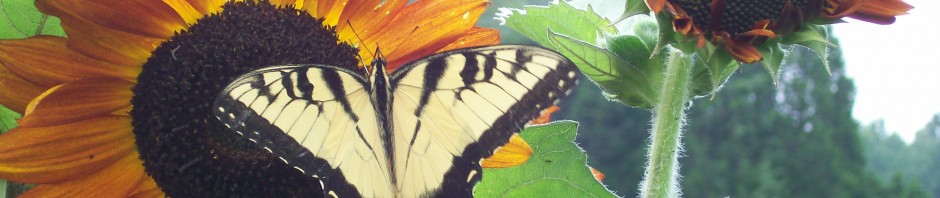
Spring is swiftly approaching, and let me tell you, I can’t wait for sun—and for sunflowers! Sunflowers will brighten up your garden and bring a smile to your face. Southern Exposure loves them so much that a blooming sunflower graces our logo! To us, sunflowers symbolize the unity of beauty and utility, and serve as a reminder of the boundless source of life’s energy and creation.  Maybe, that’s why we carry fifteen varieties of sunflowers.

Autumn Beauty sunflower

Beauty and Utility United

If you are going to be growing sunflowers in the hopes of harvesting sunflower seeds, you should stick with Black Mammoth. This variety is the traditional tall, single-headed sunflower—stalks can grow to be eight to ten feet tall! Black Mammoth is a confectionery variety of sunflower, which means that its big seeds will be great for munching.

If there are children frequenting your garden, you should consider planting our adorable Short Stuff or Sunspot varieties. Kids love these dwarf sunflowers as they only grow to be about three or four feet tall. They are also perfect for borders & container gardens and for growing seed to feed birds in the wintertime.

Are you into D.I.Y. (“Do It Yourself”) projects? If so, why not experiment with dying fabric the old-fashioned way? Hopi Indians crushed the purple-black seeds of the gorgeous Hopi Dye variety and used the pulp as a natural dye for coloring woven baskets. If you want to try growing these sunflowers for seed, plan to mature the seeds in the driest part of the growing season.

The Many Faces—er—Heads of Sunflowers

Some people may not realize that not all sunflowers are stalks topped with single heads. Sunflower plants can have many branches with many heads! Poly-headed varieties usually grow to be about five to seven feet tall. Although their seeds are too small to harvest for human consumption, poly-headed sunflowers are valuable additions to a garden as they are visually striking—a single plant can yield flowers of many different colors.

Plus, birds love the tiny seeds of poly-headed sunflowers. Take, for instance, our ornamental Cucumber-Leaf variety, which you may want to plant just for your neighborhood birds. When the heads of the sunflowers mature and dry out, your feathery friends will flock to them! They tend to prefer this variety to other kinds of sunflowers. (However, all types of sunflowers attract birds, which is bad news for saving seed…so, use bird netting on poly-headed sunflowers while they’re drying down and tie paper bags over the large heads of single-headed sunflowers. Seeds will continue to mature inside the bag).

One benefit of poly-headed sunflowers is that they are less likely to fall over because of heavy heads. Black Mammoth sunflowers, on the other hand, may fall over due to strong winds or loose soil if left untrellised. Another great thing about poly-headed varieties is that you will get a longer bloom out of them. Black Mammoths might have two weeks with their heads at maturity before they wither up, but the many flowers on a poly-headed plant will give you about a month and a half of blooming action!

Sunflower Facts

Lastly, here are some general things you may want to know about our favorite flower:

  1. As most plants orient themselves towards the south to get the most light possible during the day, sunflowers tend to lean south. In fact, the French word for “sunflower” is “tournesol,” which literally means, “turn with the sun.” So, if you happen to have a fence in your yard that runs east to west, a smart idea would be to plant your sunflowers on the north side of the fence so that the sunflowers can lean against it! Talk about trellising made easy…
  2. Don’t fertilize your sunflowers with manure or anything else that is high in nitrogen. Too much nitrogen leads to sunflowers that are too tall and thus more likely to fall over. Also, a surplus of nitrogen can mean more leaves and less flowers.
  3. Frost kills! When planting sunflowers, either start them in a greenhouse/indoors and transplant them or directly seed them in the ground after the danger of frost has passed.
  4. If you’re wondering when to plant sunflowers, we’d recommend planting them a couple of times over the course of the spring/summer since they flower for a limited time. For instance, if you plant your first batch in April or May, plant some more in June to maximize the time you get to spend admiring these lovely flowers.
  5. Sunflowers are beautiful, easy to grow, great for kids, and have few bug problems. What more could you ask for?

Tomato Varieties: Finding the Right Heirloom Tomato Seeds

A tomato rainbow- cherry tomatoes, beefsteak tomatoes, brandywine tomatoes, paste tomatoes.

Tomatoes are a great place to start when it comes to planning your garden.  Since there are so many great varieties of tomatoes it can be hard to figure out where to start.  You might be tempted to plant tomato seeds for each of them!  But, if you are limited by garden space, time, and tummies for them all to go, then it is probably a good idea to think about what you want to use them for and which flavors suit you best.

Heirloom tomatoes have gained some popularity in the past few years.  It seems like: once you go heirloom you never go back.  For the most part this is true – most varieties developed before 1940 were bred for great flavor.  Some heirloom tomatoes were also developed for growing conditions – such as short summers or resistance to plant diseases like the dreaded late blight.  So, it is important to note, that just because a tomato variety is an heirloom doesn’t guarantee that it will be delicious (although it’s a good indication).

Cherokee Purple Heirloom Tomato- sometimes called a black tomato

Cherokee Purple is a beefsteak, heirloom tomato variety.  These tomatoes hold a rare distinction of actually having a purple color.  Most ‘purple’ tomatoes are more pink than purple.  The Cherokee Purple tomato also has a distinctive interior.  The flesh has a rich dark color while the  locule (the cavity where the tomatoes’ seeds are contained) filling has a deep  green color.  The tomato’s flavor is rich and juicy.

Heirloom -Yellow Brandywine Tomatoes

The Yellow Brandywine tomato has all the delicious flavor of a traditional Red Brandywine tomato.  The fruits are a rich yellow orange color,and have a smooth texture.  Yellow Brandywine fruits often have some ribbing and generally weigh 1-2lbs, definitely a beefsteak tomato. If the tomato plants experiences drastic shifts in temperature fruit shapes can become irregular.

Eva Purple Ball Heirloom Tomato

The Eva Purple Ball heirloom tomato plants take about 78 days before harvest.  Fruits are great all around tomatoes they can be sliced and  for sandwiches, cooked down into tomato sauce, and even dehydrated.  Eva Purple Balls produce uniform sized fruits that are resistant to cracking and rarely have blemishes.

Green Zebra - tomato

The Green Zebra tomato retains its green color after it ripens. It has a good earthy flavor and is popular with tomato aficionados.  Although this tomato was developed in 1985, it can certainly hold its own in a garden with heirloom tomatoes.

Matt's Wild Cherry Tomato

This cherry tomato wins taste test after taste test with its sweet flavor.  The tomato plants produce high yields of tiny currant sized fruits.  If you are going to plant this tomato in your garden you will certainly need to either place a cage around it or steak it.  Matt’s Wild Cherry tomato plant tends to sprawl.

Roma VFN Paste Tomato

The Roma VFN tomato is a great example  of a tomato that has not only been selected for flavor but for disease resistance as well. While no plant can ever be 100% safe in the garden the growing tomatoes should not suffer from Veritcillium Wilt, Alternaria stem cranker, or Fusarium wilt- race 1.  This open pollinated tomato variety is widely adapted to grow in a wide range of climates and growing conditions.

Growing Peanuts at Home

Peanuts are a great addition to a home garden since they require minimal care and provide bountiful yields. If you’re looking to try something new in your garden this year, maybe it’s time to take a closer look at the potential of peanuts.

Home-grown peanuts offer lots of possibilities in the kitchen. Talk about peanut gallery! They can be roasted in their shells, ground into peanut butter or boiled for a traditional down-home Southern snack.

Carwile's Virginia, an heirloom peanut variety introduced by Southern Exposure. The plants have great drought resistance.

When you are selecting peanut seeds for planting, it’s helpful to keep in mind that there are four main types of peanuts. Virginia peanuts have the largest seeds, and are usually roasted in the shell and have a more gourmet quality. Runner peanuts typically have a uniform size and are the preferred choice for grinding into peanut butter. Spanish peanuts have the smallest seeds, and are used for mixed nut snacks. They also have the highest oil content. Valencia peanuts are known for being the sweetest and for having attractive, bright red skin.

If you purchase a peanut seed package from us, you’ll notice that we ship peanuts still in their shells to ensure seed protection and preservation. Before you plant your peanuts, they will need to be shelled. Be careful not to damage the seeds while cracking them open.

In the garden…

Peanuts generally need a long growing season and relatively sandy soil, although Tennessee Red Valencia peanut can grow in clay soil. However, if you add enough organic matter by hilling or planting in raised beds, most peanut plants will be able to grow in clay soil.

Selecting peanut seeds for planting is easy once you figure out what works best with your garden conditions. Growing peanuts requires 130-140 frost-free days from the time they are sown until harvest time. If your growing season falls just short of this time window, it’s possible to start growing your peanuts indoors or in a greenhouse until the danger of frost passes and then transplant them outside.

A peanut plant in flower. From here on the plant needs steady water.

Plant peanuts one to two inches deep and about six inches apart. Next, add a thick layer of compost and a layer of mulch.

Be aware–peanuts need shallow weeding. You could damage them by digging too deeply into the ground where they are are developing. When the plant begins to flower, pegs will drop  into the ground under the flower and produce peanuts. Hand-weeding is the only option after the peanut pegs.

Also, after your plants start flowering, it’s important not to let them dry out or they won’t produce as many of the mouth-watering legumes you’ve been waiting for.

Once frost is in the forecast or the plant stems begin to turn yellow, it’s time to harvest. Try not to harvest while the soil is wet, and don’t wait too long to harvest your peanuts–they’ll  start sprouting in the ground if left unattended! Dig around the perimeter of where the plant’s leaves have sprawled. Lift the plant out of the ground and flip it, so that the leaves are on the ground. If rain is in the forecast, bring your plants into a shed or garage.

Dried peanuts (left); freshly harvested peanut plants (right).

A couple days later, it will be time to pull the peanuts off the plant. Most of them will be in a clump at the center of the roots, but some will also be attached to the lower branches.  A well-grown peanut plant can yield 50 -100 peanuts–more than enough for your next ball game outing! Spread the peanuts out to dry for a month where critters won’t be able to get to them, then store them in a closed container. Peanuts left in their shells can stay fresh for years.

In the kitchen…

Home-grown peanuts are fun and simple to use in your kitchen and offer some great snack options. You can roast them, grind them into a fresh peanut butter or boil the raw, green peanuts.

Roasting peanuts is easy as pie…or, shall I say, peanut brittle! Simply spreading your peanuts on a cookie sheet and bake them at 350 degrees for 20-25 minutes, stirring occasionally to make sure they roast evenly. You can add a sprinkle of salt over them if you wish. Yum!

Roasted peanuts
Home-grown peanuts turn into home-made peanut butter!

To make peanut butter, mix two cups of roasted peanuts with two teaspoons of vegetable or peanut oil. “Chop” this mixture in your food processor for three or four minutes.

Feel free to add honey to taste, or toss in some of lightly chopped peanuts for a chunky texture.

To make boiled peanuts the good ole Southern way, you’ll need one pound of freshly-dug (green) peanuts still in their shell, four cups of water, and one quarter cup of salt.

Combine the salt, water, and peanuts in a thick-bottomed pot. Bring to a boil and cover.   Simmer the peanuts and saltwater for at least three hours. For added flavor, you could throw in a dash of paprika or your favorite spice blend.

Boiled peanuts

The longer the peanuts boil, the tastier they will be. Be sure to eat your boiled peanuts within a few days–they don’t last as long as roasted or raw peanuts. But you probably won’t need me to remind you to eat up. Your taste buds should do the job just fine!