Winter squash and pumpkins are among the few foods you can harvest in July or August and eat in January. Before the advent of modern refrigeration, these squashes and pumpkins were an essential way that growers could put fresh, vitamin-rich food up for winter. Unlike most vegetables, which must be canned, dried, or frozen, properly storing winter squash and pumpkin is a fairly simple, low-effort process. Exactly how long they last depends on the variety and storage conditions you provide.
Squash Storage Period
While we love the flavor of all of the winter squash and pumpkin varieties that we offer, not all of them are equal in terms of their storage ability.
Generally speaking, acorn squash and delicata can last up to 2 months, butternuts 2-to-3 months, hubbarbs 5 to 6 months, and some specialty cultivars 9 months to a year.
These numbers may vary widely, depending on the specific variety and proper curing and storage. Just look at these as general guidelines. I’ve had butternuts store for 6 months, but that doesn’t mean they always do.

Thankfully, for many squashes, storage actually improves their flavor. Typically, we advise people to get vegetables from the garden to their plate as quickly as possible for the best flavor. Tender vegetables like sweet corn, broccoli, and peas begin converting sugars to starches as soon as you harvest them.
The opposite is true with squashes, particularly those used for longer storage like Hubbards. These storage squashes convert starches to sugars once harvested and have the best flavor when they’ve been allowed to cure and store for at least a couple of weeks.
Our Favorite Squashes for Longterm Storage
If the squash you grew doesn’t keep as well as you had hoped, you may want to add an excellent keeper to the plot next year.
- Seminole Pumpkin – 1 year
- Tahitian Melon Winter Squash – 9+ months
- Tan Cheese Pumpkin – 1 year
- South Anna Butternut Winter Squash – 6+ months
Garden Planning for Winter Squash and Pumpkin Storage
Unfortunately, many gardeners’ favorite varieties, like Winter Luxury Pumpkin or Candystick Dessert Delicata Winter Squash, don’t keep as well as those mentioned above.
If you’re a fan of winter squash, one of my favorite ways to plant squash is to pick two or three cultivars with short-, medium-, and long-term storage ability. Rather than growing a big patch of one, plant a few of each. This will give you plenty of squash for hearty stews, curries, and baked goods over a longer period.

My Squash Won’t Last Much Longer, What Do I Do?
If you have a lot of squash or pumpkin that you don’t think you can use up in time, I recommend freezing it. You can’t freeze squash raw; you need to cook it first.
My favorite method is to halve and bake winter squash and pumpkins, then scoop the soft, cooked flesh into freezer-proof containers, cool, and freeze. Alternatively, you can peel the squash or pumpkin and boil it until tender.
If you don’t have enough freezer space, pressure canning pumpkins and winter squash is another option. Keep in mind that you need a pressure canner; it’s a low-acid food that’s unsafe for water bath canning.
Drying winter squash and pumpkins also works, especially if you already own a dehydrator. Dried winter squash and pumpkins are wonderful for quick soups and camping trips.
There are plenty of great ways to use winter squash and pumpkins. Here are a few of my favorite recipes for using them up and preserving them:
- Pressure Canning Pumpkin
- Dehydrating Winter Squash and Pumpkin
- One Pot Butternut Squash Curry
- Pumpkin Whoopie Pies
- Pumpkin Puree and Waffles
- Pumpkin Spice Cinnamon Rolls
- Winter Squash and Shallot Tart
Storage Quick Tips
Previously on the blog, we’ve covered exactly how to properly harvest, cure, and store winter squash and pumpkins. For this post, I’ll focus on a few key points:
- If possible, allow winter squash and pumpkins to fully ripen on the vine before harvest (the stem should start developing wood-brown stripes near the fruit). This improves storage ability.
- Harvest winter squash and pumpkins before your first frost.
- Avoid storing squash near apples, pears, and tomatoes that put off ethylene (the ripening hormone).
- Ideal storage conditions for winter squash and pumpkins are between 50 and 60°F, and humidity is 50 to 70%.
Winter squash and pumpkins are among the best storage crops. Choosing the right varieties and storing them properly can allow you to enjoy squash throughout the entire year!
")
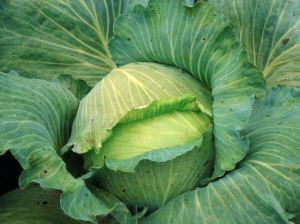 Cabbage
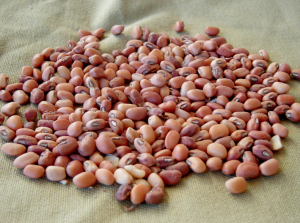 Cowpeas