Category Archives: Garden Advice

Planning and Planting for an Abundant Fall and Winter Harvest

article by Ira Wallace, with Lisa Dermer, photo by Irena Hollowell

Who wouldn’t want a fall garden abundantly producing cabbages, broccoli, carrots, turnips, parsnips, radishes, bok choi, Brussels sprouts, a wide variety of greens, and even peas? The trick to growing a cool season garden, and setting up the fall garden to continue through winter, is planning and preparation.

Check your understanding of cool-season. When grown for fall, many “cool-season” plants actually need to be sown and transplanted in high summer heat, and some as early as June.

Make room! We start our winter crops in August and September, and those plantings will need to supply us through February! We need lots of space for these plantings, so planning ahead is critical.

Below are our tips for getting the most out of your fall garden.

Choosing the Best Fall Crops for Your Garden

Look for storage varieties: these varieties have been bred to be grown in the fall and harvested for winter storage, or left in the ground to be harvested during thaws. Storage tomatoes can be harvested green to ripen slowly wrapped in newspaper in cardboard boxes; storage beets and radishes grow very large and keep well in the ground or root cellar.

Of course, be sure to choose the crops that you and your family enjoy and that are well-suited to your climate!

Calculating Time to Plant or Sow

Calculate back from your average first fall frost date to determine when to plant fall crops. Add 14 days to the listed days to maturity for your variety to account for the “fall effect” of shortening days and cooler temperatures. For plants with a long harvest period, like a broccoli that will make side shoots for 3 weeks after the central crown is gone, add that time in as well. (This may be as long as a month or more.) Add an additional 14 to 28 days if you will be starting transplants from seed, to account for transplant shock and setback.

For us, this means sowing most broccoli and cabbage in late June, with a second sowing 2 weeks later and often a third that we plan to keep growing under row cover until Thanksgiving or later if the weather is with us.

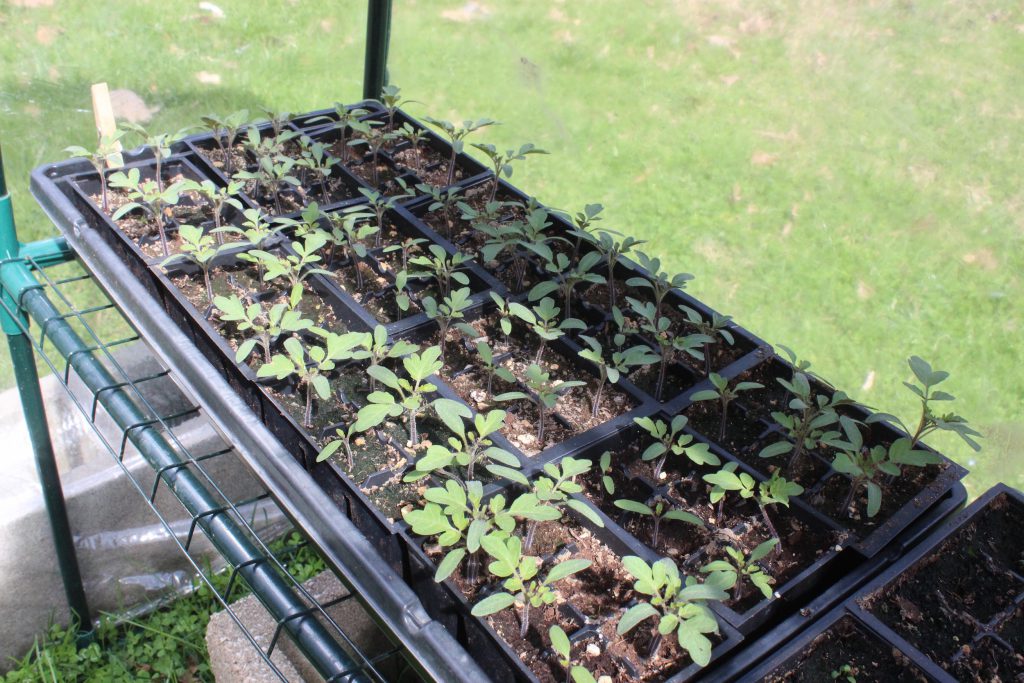
Sowing seedlings in pots or flats for transplanting out later lets you start your fall garden before space is available in your outdoor garden. Use benches or tables high enough off the ground (at least 3 feet) to deter flea beetles or use an enclosed shade structure.

We sow our fall crops in outdoor seedling beds well-supplied with compost in a location shaded from the harsh afternoon sun. The north side of a stand of corn, caged tomatoes or pole bean trellis makes an excellent choice. Outdoor seedling beds should be covered with thin spun polyester row cover or the newer Protek net row cover to guard against flea beetles and other insects. Summer broccoli and cabbage seedlings are ready to transplant in 4 weeks during the summer. Lettuce and Oriental greens in 2-3 weeks.

Making Space in your Summer Garden

Come summer, it can be tempting to fill every inch of the garden with summer tomatoes, peppers, squash, melons, and more. But even the most densely planted garden will still afford room to plant fall crops. Summer lettuce, green beans, radishes, greens, and root vegetables all yield space by late summer for the fall garden. Beds that were once filled with spring cool-season crops, like peas and fava beans, often rotate best into fall cool-season crops (if they’re not used for late summer successions). Plan for summer cover crops to be ready to turn under in time for fall crops.

When will each spring and early summer crop be finished harvest? You can calculate using the listed days to maturity, but we find that a mid-point check allows us to adjust for weather, later-than-planned planting, early bolting, or unexpectedly extended harvests.

Preparing the Ground for Fall Crops

Caring for the soil is even more important when growing 2 or 3 crops a year in the same area. Generously add compost and any other needed amendments before planting your fall crops. Keep plants growing fast and reduce risk of disease by providing regular and adequate moisture (at least 1 inch each week).

Season Extension

If you’ll be planting in cold frames, under row cover, or in a greenhouse, you can adjust your average last frost date backwards by two weeks or longer when calculating when to plant fall crops.

Seeking input: what are your top five heirloom tomatoes?

Overwhelmed by heirlooms? We sell seeds for over 100 tomato varieties, and we feel that all those varieties have special value to be preserved. So we understand that choosing which to grow in your home garden can be daunting, especially if you’re limited to just a few plants.

Here’s my personal top five list. My experience growing and eating these tomatoes over the years is why they’re my favorites. We’d love to hear from you about your favorite tomato varieties, and why.

granny cantrell tomato1. Granny Cantrell’s

Granny Cantrell’s is my absolute favorite VERY LARGE heirloom. These red-pink beauties are similar in size to the Brandywines and Cherokee Purple, but I think the flavor of Granny Cantrell’s is even better. I also find the plants to be hardier and the fruits keep better off the vine, even when picked fully ripe.

Very large tomatoes like Granny Cantrell’s may not be the best choice for beginners: they need even moisture, a long frost-free season, and soil high in organic content.

dr. carolyn tomato2. Dr. Carolyn

Dr. Carolyn tastes sweet and complex, more like one of the larger heirlooms than a cherry tomato. This variety is a strain selected from the yellow-gold Siberian heirloom Galinas, but the two cannot be confused: Dr. Carolyn tomatoes are such a pale yellow, they’re almost translucent. Unique and very beautiful.

stupice tomato3. Stupice

As early as the most popular early hybrids, these classic orange-red globes blow me away every year: how can an early tomato taste so good? And by choosing an open-pollinated variety, you can save your own seed and select for your micro-climate.

black prince tomato4. Black Prince

I grew Black Prince the first year I had my own large garden, and their flavor was so fruity, they were unlike anything I’d ever tasted. A Siberian heirloom with a chocolatey-red appearance, Black Prince produces well for me even those years when I don’t give my plants optimal fertility or watering. Plus they’re early and tolerant of cool springs.

white wonder tomato5. White Wonder

Take care to mark the location of your White Wonder plants well, or you may have a few dropping off the vine over-ripe before you stop waiting for the fruits to turn red. White tomatoes are fun in the kitchen, for white tomato sauces or pale ketchup. But my favorite way to eat these is to bite into them like an apple, straight off the vine (perhaps it’s not surprising then that these would be derived from the heirloom White Apple!). (Ira Wallace comments that White Wonder’s flavor can be a less flavorful years when the weather is very wet — but this tomato still makes my top 5 list, I’ll keep growing it and hoping that the weather cooperates.)

How to Sprout Sweet Potatoes for Slips — Green Shoots for Planting

Sprouting sweet potatoes to make slips (the green shoots from a mature sweet potato that are used for planting) is one of our favorite spring activities. If you haven’t selected and stored roots from last year’s harvest for this purpose, you’ll need to order sweet potato slips (or if you want to add a new variety to your harvest).

Read on to learn how Sean at Living Energy Farm grows his sweet potato slips in early spring. You’ll also learn how to select seed sweet potatoes and store them through the winter to grow your own slips next year.

How to Grow Sweet Potatoes: Sprouting Your Own Slips

by Sean Thomas

Growing sweet potatoes is a year-round adventure, with lots of activities to keep you busy even in the winter and spring. They’re also an easy vegetable to seed-save and grow again each year. It’s fairly simple, with a bit of knowledge and work, to produce your own sweet potato slips (sweet potato vines) for transplanting. And if you sprout your own roots, you’ll get 2-3 times more slips per sweet potato. That’s a lot of extra taters.

Selecting Roots for Growing Sweet Potato Slips

The first thing you need to know is which roots to put aside for sprouting. Luckily, the best sweet potatoes for eating aren’t the best for producing slips. All those big impressive sweet potatoes you dug up, you can eat those. It’s the smaller ones you want to save because they’ll be the best for sprouting.

The ideal size for a slip producing sweet potato is about two inches in diameter. In the photo to the right there are some Violettas, a purple sweet potato with white flesh grown at Living Energy Farm. The large eating ones are on the left, and the smaller ones for slip production on the right. We select our seed stock right in the field after harvest, but you can pick them out now from the roots you’ve been storing. In my kitchen, I find smaller ones left this time of year anyway, because it’s hard not to eat all those big taters first.

A Quick Word about Storing Sweet Potatoes Over the Winter

Winter storage is the same for eating sweet potatoes and slip-producers. It’s best to keep them inside somewhere, in a dark place, like in boxes or paper bags in a closet, and then covered with a blanket to keep out any sunlight. The ideal storing temperature is between 55-60 degrees. If the temperature rises too high they can sprout early, and if it falls below 50 for an extended period of time they’ll harden up and become pretty much useless. It’s great to store your eating sweet potatoes for as long as possible, but storage is even more important if you want to grow sweet potato slips, because those roots will have to make it to March.

We store our organic sweet potatoes overwinter with the dirt still on the skins (we gently brush off any excess dirt) because this keeps the skins intact and the roots healthy and ready to sprout in the spring.

Sprouting Sweet Potatoes

So you’ve stored your sweet potatoes over the winter and picked out your seed stock. Now it’s time to sprout them. First you want to figure out how many slips you’ll need. Most commercial producers figure on 1000 slips per bushel, but if you’re doing this at home, a good rule of thumb is 10-15 slips for every root around 1-2 inches in diameter (If the roots are eating size figure on about 6 slips per root).

It will take about 4 weeks to sprout your sweet potatoes. I put mine in a dark closet the first week of March, the roots in paper bags and boxes for good air ventilation, with a small heater and humidifier on the floor of the closet. The ideal temperature for sprouting is 75-85 degrees with 90% humidity. I keep the door closed to protect them from any sunlight and I check the temperature and refill the humidifier daily.

After a couple weeks, you should start to see some sprouts form on the end of the roots. When most of your taters have sprouts about ¼ inch long, they’re ready. If sprouts start getting longer than that before you are ready to plant them, just turn down the heat a bit. If after a couple weeks you don’t see any sprouts, you’ll probably need to turn up the heat.

There are sixteen varieties of sweet potatoes in our sprouting closet: orange, white, gold, and purple sweet potatoes, all grown at Living Energy Farm in Virginia. They’ve been sprouting for a few days now. By the end of March the weather will warm up (hopefully) and the sweet potatoes will be all sprouted. Then it’ll be time to bed down the roots, but that’ll be left for another post.

Good luck sprouting!