Tag Archives: corn

Processing Flour Corn at Home

Kentucky Rainbow (Daymon Morgan’s Knt. Butcher) Dent Corn

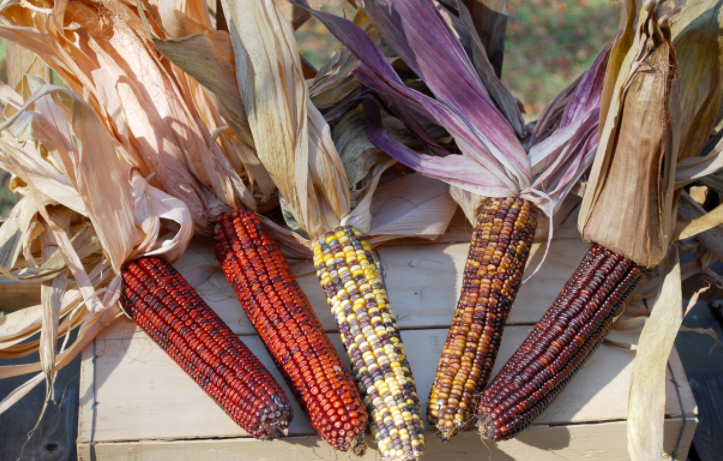
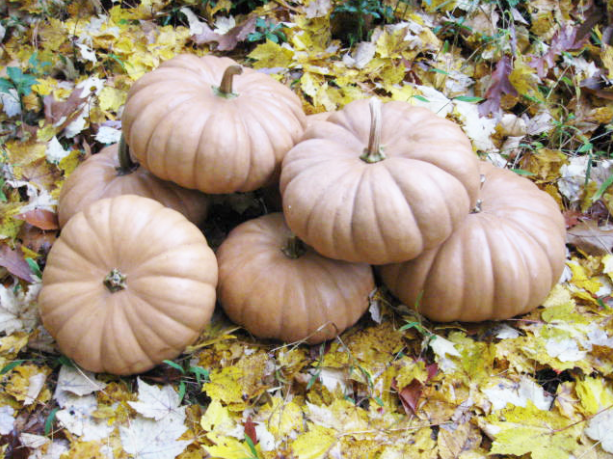
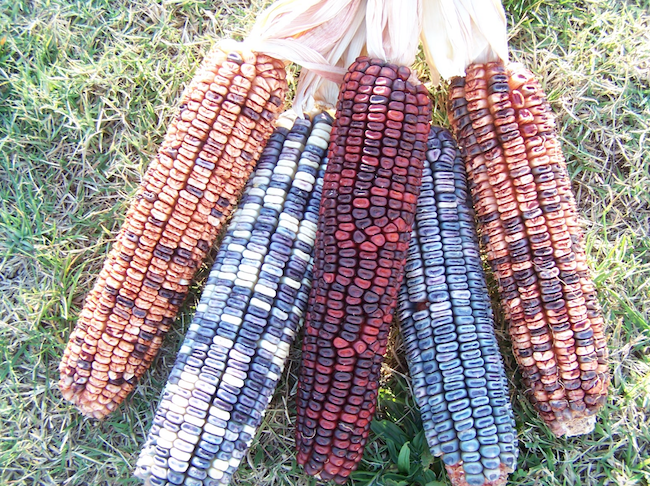
Today many people grow flour corn solely for decoration. Flour corn varieties certainly are beautiful but they have so much more going for them than their looks! Many Native American cultures relied on these corns as a staple food. Today they’re still an excellent way to produce and eat a more local diet. They really aren’t difficult to process into delicious cornmeal, flour, or grits.

Harvesting

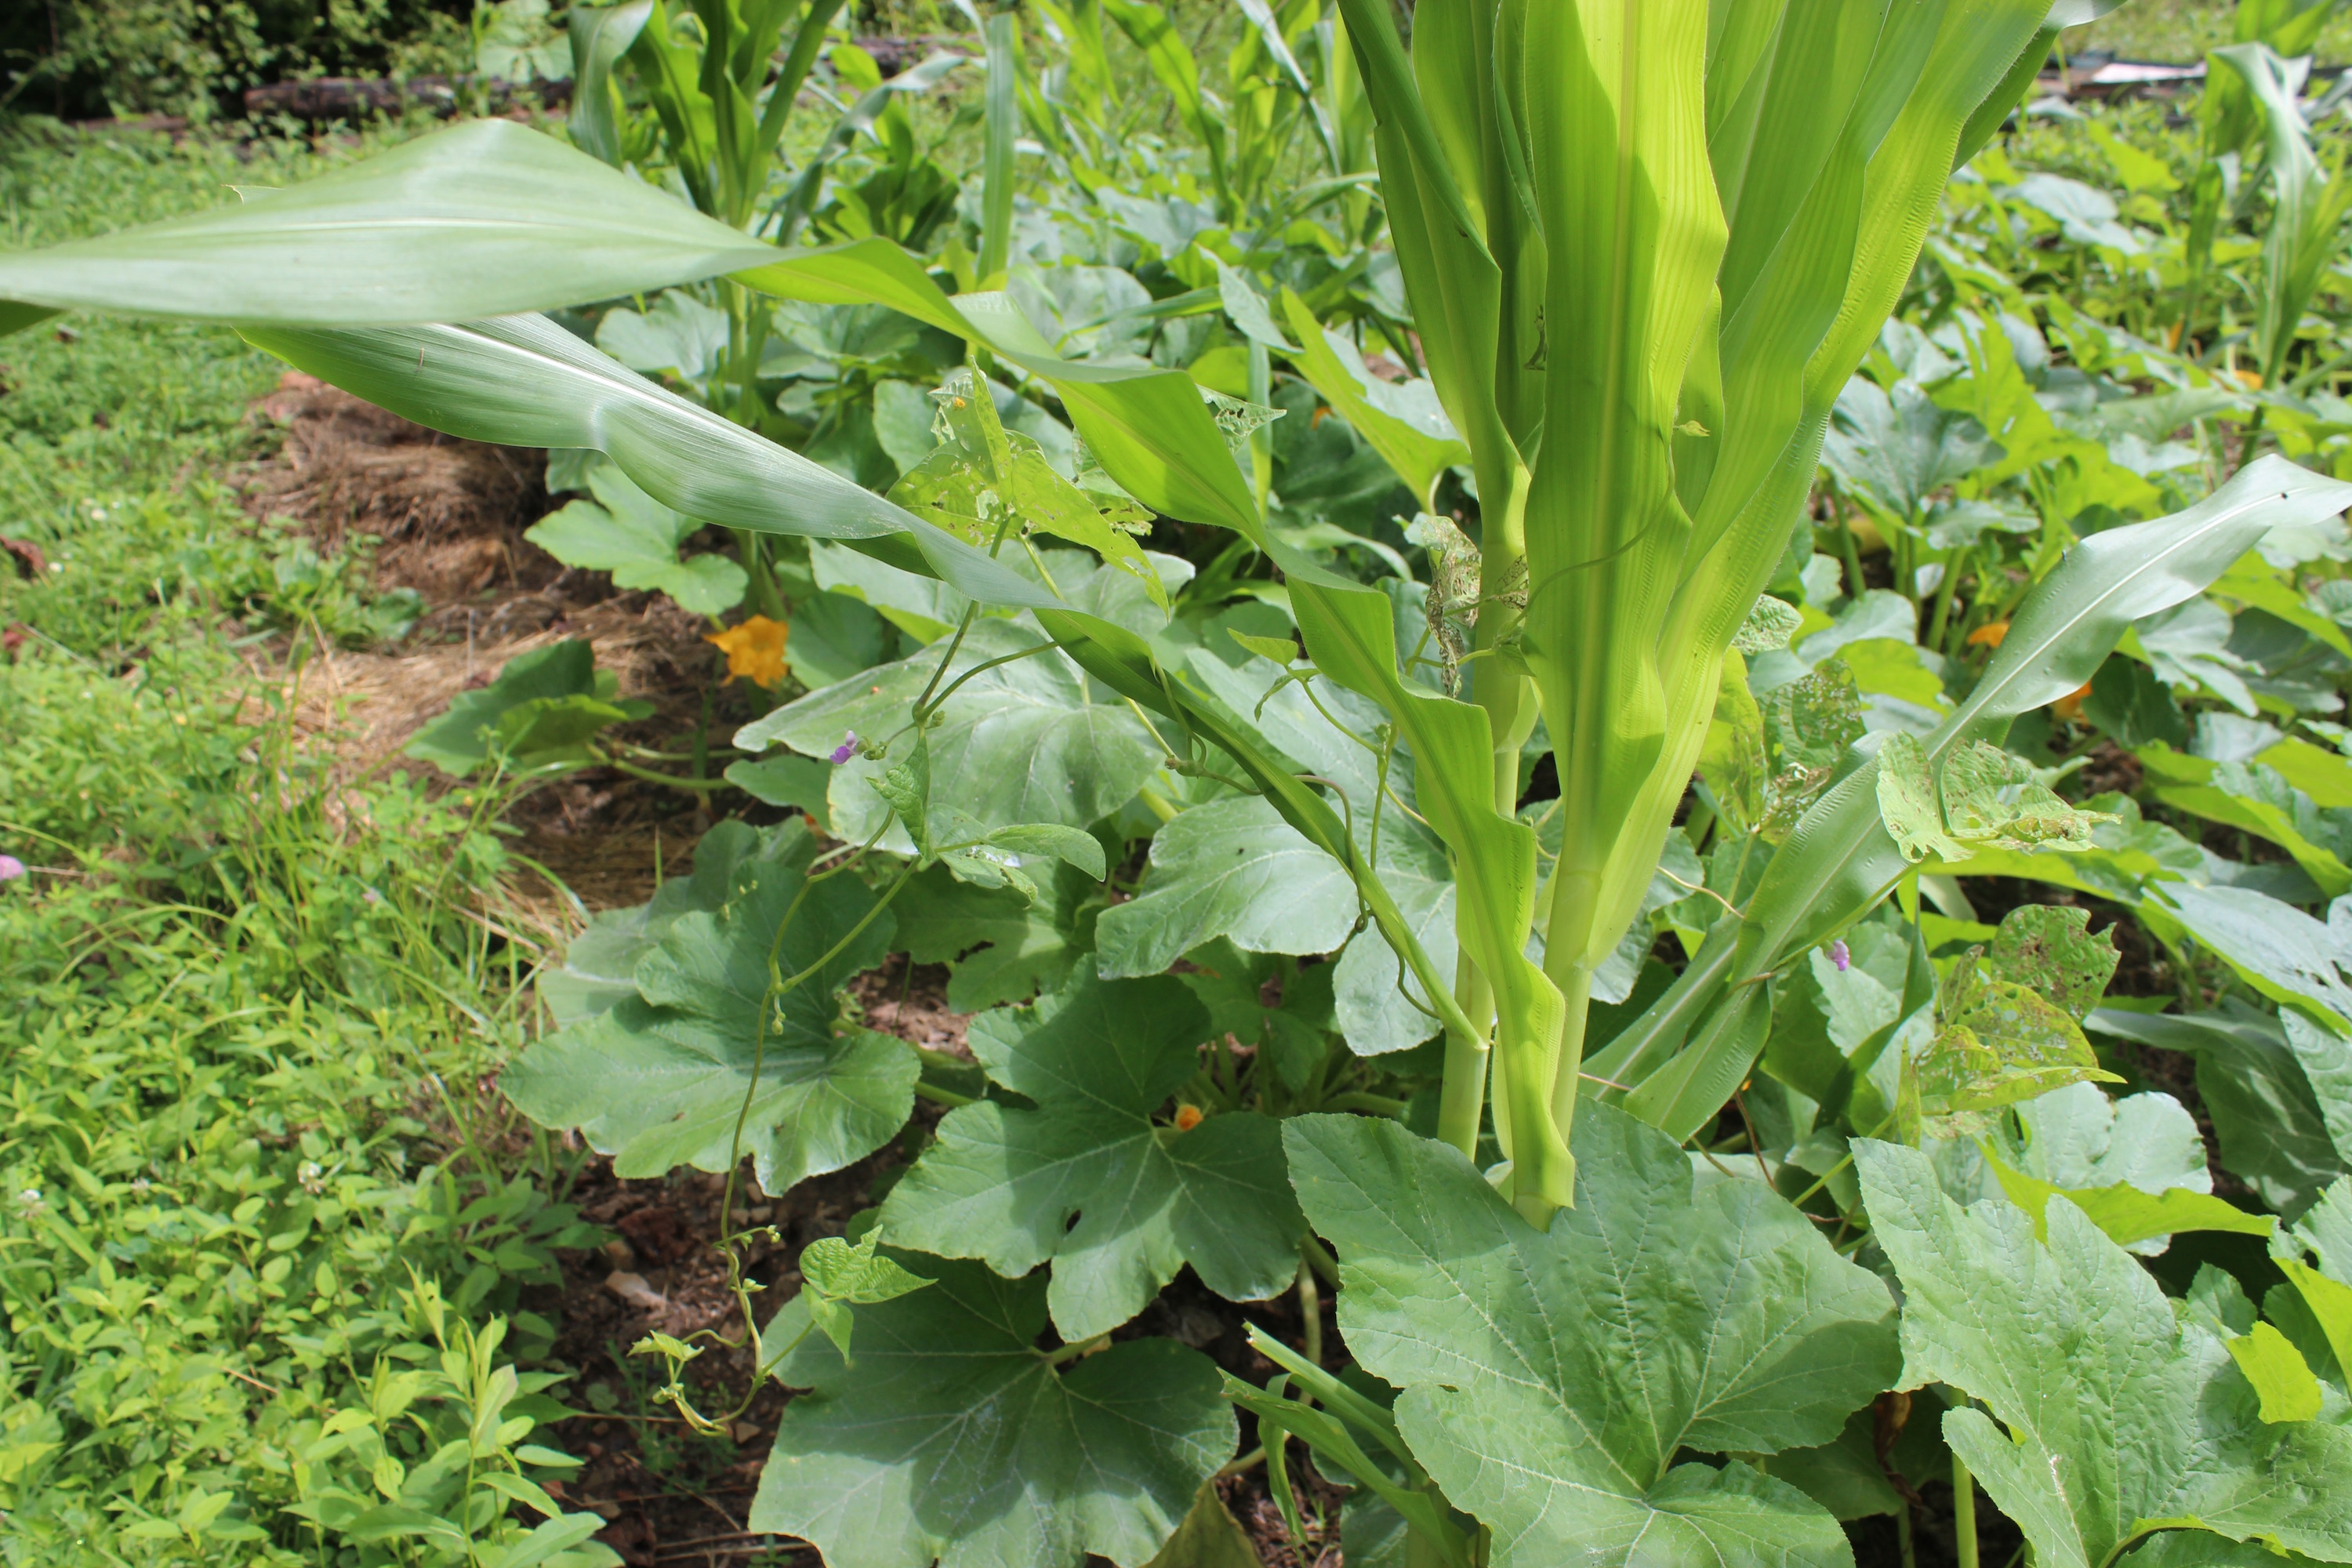
Most flour corns have two numbers listed for “days to maturity.” The first number or set of numbers is when the corn will be ready to harvest in it’s milk stage like you would sweet corn. You’ll know it’s at this stage when the tassels turn brown. It won’t be nearly as sweet as modern hybrid sweetcorn however it’s still quite tasty when roasted with butter. The second number or set is when your corn will be fully mature and ready to harvest for flour. The husk should be papery and dry.

You should harvest your corn on a dry day before your first fall frost. Then you can pull the husk back from the corn and hang them so the kernels can finish drying completely. Traditionally corn husks were sometimes braided or tied together to hang the corn in small bundles. You’ll know when the corn is completely dry because the kernels will crack instead of squishing under pressure. 

It should be noted that gourd seed and popcorn varieties can also be processed into flour and Native Americans often used them this way.

Shelling & Winnowing

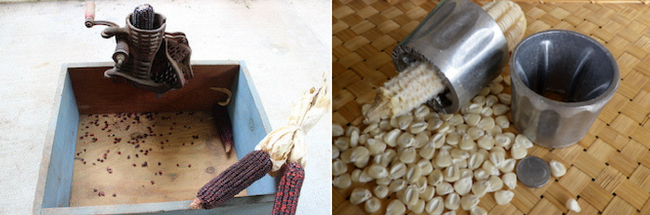
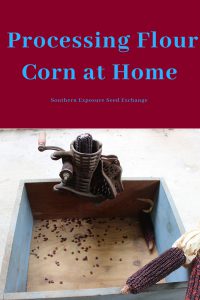
When your corn is dry it can be processed. The first step is to shell your corn. This can be done by hand or with a corn sheller. Doing it by hand can be time consuming and tiring if your doing anything but a very small quantity. At SESE we offer two handheld corn shellers, one for flour corns (above right) and one for popcorns. You can also sometimes find larger corn shellers like the one pictured above left at antique stores, flea markets, or auctions. 

Once your corn has been shelled odds are they’ll be bits of corn cob mixed in which is also called chaff. To remove this you’ll need to winnow your corn. Don’t worry though it’s easy and there’s no special equipment required. Simply place a quantity of your corn into a large bowl or bucket. Then place an empty one in front of a fan. A household box fan will work perfectly. Then slowly pour your corn into the bucket in front of the fan. The fan will blow away the lighter pieces of material while the corn will fall into the other container. You may have to repeat this several times before the corn is clean.  

Nixtamalization

It may seem like you should now be able to just grind your corn and eat it there’s actually another step. In order to get the all the available nutrition from corn it needs to be nixtamalized. Traditionally this was done by soaking or boiling the corn in lime water. Native Americans in North America used wood ash for this but today it’s common to use pickling lime which should be easily available with home canning supplies.

Here’s what you’ll need:

  • 1/8 cup of pickling lime
  • 1 1/2 quarts of water
  • 1lb corn

Pickling lime is caustic so rinse it off quickly if it gets on your skin and avoid getting any in your eyes. Be extra careful if there are small children around.

Dissolve your lime in your water and combine the lime water and corn and bring them to a boil. Avoid aluminum pots as they react with the lime. Turn off the heat and let your corn soak overnight. In the morning rinse your corn well in a stainless steel colander. While it’s rinsing rub off some of the corn’s outer layer (this will give you a finer flour).

The corn can then be used whole in soups or stews or ground into flour. Depending on what you’re using to grind your corn you can grind it wet or dry it to grind later by laying it out in a single layer on a screen or using a dehydrator.

For a more in depth look at the history and importance of Nixtamalization check out this article from Cook’s Illustrated.

**For most people this corn isn’t going to make up a large part of your diet so it won’t be harmful to skip this step if you feel you need to.

Grinding

Traditionally corn was ground in a mortar and pestle or with a grinding stone. Thankfully today there are a variety of home grain mills available that are suitable for grinding corn. You can find ones that are hand crank or electric, ones with stone grinding wheels and ones with metal, and mills that can handle wet, oily products and those that can’t. What you choose will depend on your budget and goals. 

Depending on what you’re hoping to make with your corn (like fine flour for tortillas or courser corn for grits) you’ll need to set your mill to achieve a specific coarseness. 

Some mills may require more passes to produce fine flour. If your mill is taking multiple passes it may be helpful to strain the corn through a wire mesh colander and run the larger pieces back through separately rather than the entire batch.

Storage

If you grow an ample amount of corn your going to want to store some for later. Flour corn is best stored at two stages. First it can be stored on the ear once it’s completely dry. You can even leave it hanging if you want. Alternatively, to save room you can store it in containers after it has been shelled and winnowed. It will stay fresh much longer as whole kernels than if you grind it into flour. 

Adding flour corn to your backyard garden is a great way to produce more than just fresh produce for yourself. It’s easy to grow and store for use throughout the year and making your own grits or tortillas can be a great family activity. 

Pin it for later.

The Three Sisters Garden Guide

The Three Sisters Garden has gained some popularity in recent years and for good reason. Unlike conventional agriculture The Three Sisters Garden works with nature to provide for the crops needs, keep maintanence low, and keep soil fertility up without the addition of chemical fertilizers. It’s was perfect for the Native Americans and is perfect modern organic gardener.

Before the advent of large agricultural equipment these features weren’t just nice and environmentally friendly they were necessary. Imagine gardening without metal tools, sprinklers or hoses, or commercial garden additives nevermind tractors and cultivators. The traditional Three Sisters Garden was easy to grow and provided the basic staples of the Native American diet. Together corn, beans, and squash provided balanced nutrition.

To plant a Three Sisters Garden the traditional way you should prepare a fairly large space. Corn needs plenty of plants in one area as it’s wind pollinated. In some cultures the space was circular to help with pollination. The corn is planted in hills about 5 inches high, 18 inches across and 5 feet apart. The tops should be flat to prevent rain water run off. These hills allow the soil to warm more quickly in the spring and allow for better drainage. Traditionally it was common to add some fertility to each hill like fish or fish scraps before planting. Unless you fish a lot, compost or manure will do for the modern garden. If using manure mix it with the soil or bury slightly so it doesn’t burn the plants. Plant 4 corns seeds in a six inch square in each hill.

Pungo Creek Butcher Dent Corn

Three Sisters gardening often works best with flint, dent, or flour corn varieties as they are harvested at the end of the season. If you choose sweet corn you’ll have to carefully make your way through sprawling squash plants to reap your harvest. Alternatively you can plant sunflowers in place of corn which was also done by some native cultures.

You can find Southern Exposure’s flour, flint, and dent corn varieties here. Native American varieties include Hickory Cane Dent Corn and Cherokee White Flour though other varieties work well too.

Once the corn is 4 inches tall it’s time to plant the beans. This is also a good time to give your patch a good weeding before the plants get large. Then you can plant 4 beans in each hill placing them 3 inches away from the corn plants completing your original square. They’ll use the corn plants as living trellis and provide them with nitrogen throughout the growing season. Corn is a very heavy feeder so sustained nitrogen is essential to a good crop. In choosing bean varieties make sure you purchase pole beans not bush beans. It’s also a good idea to choose native or heirloom varieties unless your using sunflowers in place of corn. Some modern bean varieties have such big vines they can be too heavy for corn plants.

Genuine Cornfield Pole Snap Beans

You’ll also want to consider whether you want green beans or drying beans. Some varieties are dual purpose. Most Native Americans planted and harvested their beans as drying beans so that they could be harvest in the fall and stored for winter use.

You can check out Southern Exposure’s pole beans here.

Once the beans have sprouted it’s time to weed again and then plant the squash. Planting squash too early can shade out beans before they have a chance to start climbing. The squash should be planted in the in new mounds identical to those that were for the corn and beans. Plant three seeds and thin to just two per hill. The squash vines ramble throughout the garden shading our weeds and keeping soil moist. This is particularly advantageous in areas prone to drought because corn also requires good moisture for good harvests. When the squash shows its first true leaves it’s probably time to weed again.

Choosing squash can be difficult because of the variety of options. Any vining plant (not bush) in the cucurbit family will do though most native american grew winter squash varieties and harvested all there crops in the fall for storage throughout the winter. At Southern Exposure our favorites tend to be moschata squash plants. These varieties are more resistant to the squash vine borer and can be harvested early and used in summer squash recipes or left to mature and harvested as winter squash for storage. Some people have also used cucumbers, watermelons, and gourds with great success. Just keep in mind with cucumbers and melons you’ll need to carefully make your way through your patch to harvest while the other plants are still growing.

Tan Cheese Pumpkin

You can find Southern Exposure’s winter squash here. Once again the moschata cultivars can be eaten early as summer squash or eaten as winter squash. These include varieties like Seminole Pumpkin, Tahitian Melon Winter Squash, Thai Kang Kob Pumpkin, and more.

While they are called Three Sisters Gardens many Native Americans included more than just three crops. For instance the Wampanoag people planted sunflowers on the North side of the garden so they wouldn’t shade the other crops but would help attract pollinators. Some cultures also incorporated pollinator plants like bee balm or other crops like tobacco or amaranth which is grown for its edible leaves and seeds.

Growing a three sisters garden can be an easy fun project for the organic gardener. It’s low maintenance and beautiful. Though most people don’t have to grow corns, beans, and squash as staples anymore it can be a great way to keep organic gardening techniques, cultural traditions, and seed saving alive and well.

If you’re having a hard time choosing plant varieties consider Southern Exposure’s Three Sisters Garden Package which includes Bloody Butcher Corn, Genuine Cornfield Beans, and Seminole Pumpkin Squash seeds plus a planting guide.