If you’re a lover of heirloom varieties like we are, chances are you’ve got an eye for the unique. We love adding uncommon plants to the garden that bring with them a touch of whimsy. Here are ten distinctive heirloom varieties to add to your wishlist to make next season’s garden stand out.
Grandma Nellie’s Mushroom Pole Snap Beans
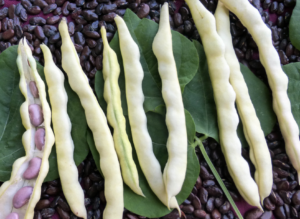 These pole beans are a true treasure! Just as their name suggests, they taste a bit like mushrooms when cooked. Grandma Nellie’s are a heavy yielder and are ready to harvest in just 56 days. They’re tender when picked at around 5 inches.
The original seed for this variety came from Marge Mozelisky and was given to her by her grandmother.
Costoluto Florentino Tomato
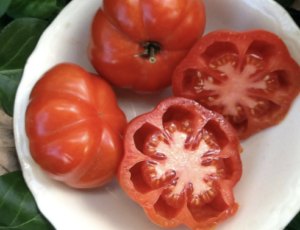 This uniquely shaped tomato is sure to be a standout! It’s an Italian heirloom from the Tuscan region that bares 8 to 12 oz, deeply lobed, red fruits. It’s great for slicing, sauces, and making stuffed tomatoes.
It’s also a great choice if you live somewhere hot; Costoluto Florentino was one of the most heat tolerant and productive varieties in the 2011 University of Georgia trials. It also did well in the cool wet, summer we had here in Virginia in 2013.
Mrihani Basil
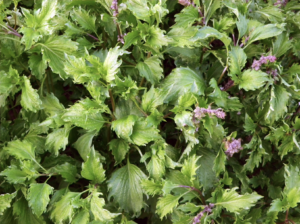 This ruffled basil comes from Zanzibar off the eastern coast of Africa, where it’s used in food and perfumes. Mrihani is excellent tasting, relatively mild, with notes of anise. This basil is relatively easy to grow, slow to bolt and has excellent resistance to Downey Mildew.
Lion’s Ear (Klip Dagga)
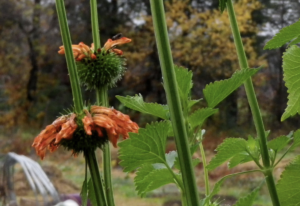 If you like the unusual and unruly, this orange monster is for you! This plant grows large and sprawling, reaching heights of 4 to 10 feet. Lion’s Ear or Klip Dagga starts blooming in late summer, producing nectar-rich, fuzzy flower tubules that leap from sharp, spiky green bracts. These orange flowers are a favorite of hummingbirds and butterflies.
The nectar of Lion’s Ear has a sweet grapefruit taste. The leaves and flowers of this plant have been used in traditional herbal medicine in Africa and India.
Lion’s ear is moderately drought tolerant and prefers well-drained soils. It’s a tender perennial and may regrow if winter lows are above 20°F.
Balik Hot Pepper
 This productive pepper is named for its unique shape. Balik, pronounced BA-luck, means “fish” in Turkish. These peppers have two lobes generally resembling a fish in shape. They are sleek, crunchy, 1 to 3 inches long, and have milder heat than most Jalapeños. The plants grow about 18 inches tall.
White Wonder Watermelon
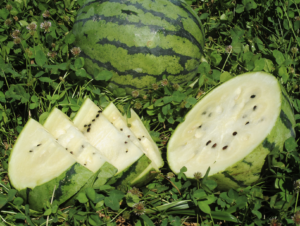 While it may not look like most watermelons you see, it’s just as good. The creamy white flesh is crisp with a fresh, sweet taste. White Wonder produces high yields of 3-10 lb icebox-size melons.
They’re rare today, but white-fleshed watermelons were popular in the 1800s. This unique white-fleshed melon is sure to be a hit at farmers’ markets or on the picnic table!
Lemon Cucumber
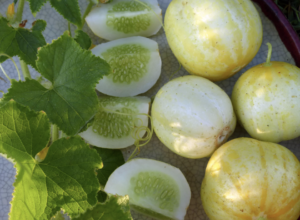 This unique cucumber produces seven ft. vines covered with crunchy round yellow fruits. Lemon Cucumbers are ready to harvest in about 67 days. Pick them at 1½ in. for pickling or two in. for salads. You’ll love this excellent, never-bitter, old-fashioned cucumber flavor with a hint of nuttiness.
Wonderberry (Sunberry)
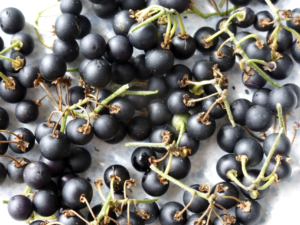 These Garden Huckleberries are an interesting relative of the tomato. They grow like tomatoes, but Wonderberry is more finicky to germinate. The tiny seeds need to keep moist for a much longer period. However, they self sow readily.
Plant genius Luther Burbank developed this variety. It produces three ft. plants that yield dozens of clusters of dark, ¼ in. berries; each cluster holds 8-12 fruits. Wonderberry’s unique, huckleberry-like flavor makes for intriguing dessert fillings, jellies, and syrups!
Don’t consume the green fruits as they are likely toxic.
Erlene’s Green Cotton
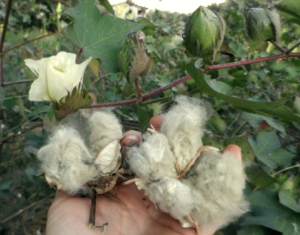 This beautiful, green-colored cotton is a family heirloom from Erlene Melancon in east Texas. Erlene said that she has been spinning green cotton for years and that her grandmother loved using colored cotton in her quilts.
Erlene’s Green produces five ft. tall plants. The fibers are light olive green and can be spun off the seed. Harvest the bolls shortly after they open so that the fiber does not fade in the sunlight. Once it is spun and washed, it turns yellowish-green.
Watercress
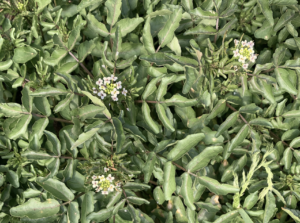 Rich in vitamins and used in salads for mustard-like flavor, this green stands out for the way it grows. As the name suggests, Watercress should be transplanted into a stream of cool, clean water. Alternatively, you can grow it in pots adding fresh water daily or in trays with just enough water to float the crowns. Watercress needs partial shade in hot weather.
Adding these or some of the other unusual heirlooms we carry is a great way to make your garden uniquely yours. What unique heirlooms are your favorites? Share your garden with us on Facebook or on Instagram using the hashtag #southernexposureseed and tagging us @southernexposureseed.