
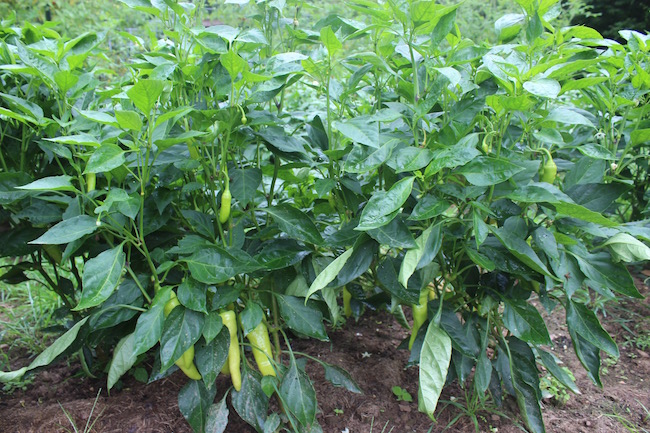
Starting your first garden can be overwhelming. There are so many decisions to make like location, varieties, and even what tools to purchase. There’s plenty to learn and do. Any gardening book will dive into planting dates, pests, garden amenments and more. Starting with these 10 tips can help get you on track for a great first season.
Have your soil tested.
Learning as much about your soil as possible can help ensure your garden is a success. You’ll be able to add appropriate amendments and avoid wasting time and money. It can also help you select varieties. For example, carrot varieties like Chatenay Red Core Carrots perform better in heavy clay soils because they are short and have blunt ends.
Amend your soil as needed.
Once you’ve tested your soil and had a look at your results it’s time to amend your soil. Certain amendments like lime or fertilizer should only be added if your soil test indicates a real need. Lime is used raise the soil’s pH. Raising it too much can make certain nutrients inaccessible to plants. Adding too much fertilizer can also be detrimental and can run off causing toxic algal blooms in your local watershed. A safe place to start is adding organic matter in the form of good quality compost. It can provide a variety of nutirents, help sandy soils hold moisture, and help heavy clay soils drain better. If you’re on a tight budget check out our post for free amendment ideas.
Choose a gardening style that works best for you.
In a recent post, we discussed the pros and cons of raised beds. While they’ve become very popular they may not be the best choice for everyone. The same goes for no-till gardening, hugelkultur beds, container gardening, and other gardening styles. Start with what’s easiest for you and experiement from there.
Start composting.
Every home should have a compost bin! Composting creates free soil for your garden and helps reduce waste. Apartment dwellers should check out vermicomposting as a small space alternative to an outdoor compost pile.
Use mulch.
Mulch helps to hold moisture, supress weeds, add organic matter, creates habitat for beneficial insects, and can even help prevent certain plant diseases. We have a number of articles about different types of mulch on the blog.
Learn about crop rotation and cover crops.
Crop rotation is key to a healthy garden. Never plant the same type of plants in the same place two years in a row. Cover crops can be used with crop rotation to decrease pest and disease pressure, reduce erosion, and add nutrients to your soil.
Start small.
It’s common advice and worth heading. You’ll get more from a well maintained small garden than a poorly cared for larger one. It can be really tough to narrow down which varieties to choose but it’s worth it. Add one or two varieties and increase your garden size a bit each year.
Consider your water source.
Lugging watering cans around is time consuming and exhausting. Put your garden as close to a water source as possible. If you can, invest in some hoses and a sprinkler or drip irrigation.
Choose varieties appropriate to your area.
When selecting your seeds and plants be sure to read carefully. For example, folks that live in zones farther north should look for varieties that mature quickly and folks in the far south should consider more heat tolerant varieties.
Knowing your hardiness zone can help you select appropriate varieties. For information about hardiness zones visit our post, Everything You Need to Know About Plant Hardiness Zones to learn more.
Start your own transplants from seed.
Starting your own transplants ensures you get the varieties you want and those that are well-suited to your area. It’s not as hard as you think. Check out Pam Dawling’s advice for starting seeds here on the blog.
Starting a garden is an incredibly rewarding experience but it can be tough. Use these tips for your first garden to make sure your garden is a success.
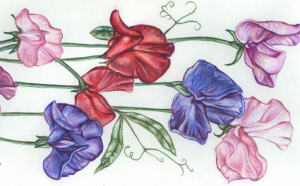 Not to be confused with edible peas, these fragrant beauties are actually toxic in large amounts. They require a trellis but can be direct sown as soon as soil can be worked in the spring and offer early color. Soaking seeds for 8-10 hours before planting can help with quick germination. They’re great for cut flower arrangements. It’s best to direct sow sweet peas but for extra early flowers you can start them indoors. Use large pots as sweet peas develop large roots. At Southern Exposure we carry
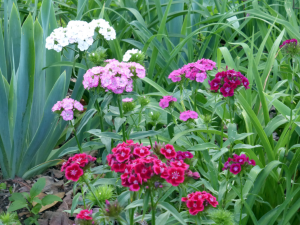 While
While 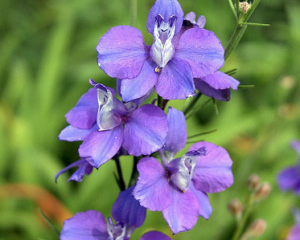 These hardy annuals are easy to start from seed. Direct sow as soon as soil can be worked in the spring. They grow 36-48 inches high making them a great backdrop for shorter flowers or perfect for cut flowers. They can also be started started indoors for extra early blooms!
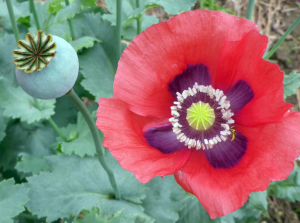 Poppies are an excellent spring annual. They germinate best when soil temperatures reach 60°F. Poppies need light to germinate so they should be pressed or lightly raked into the soil rather than planted deep.
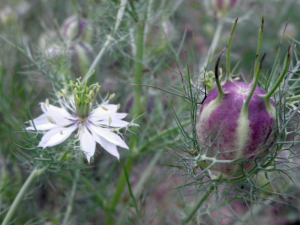 Sometimes called fennel flower because of its nutmeg flavored seeds, Nigella has flowers in shades of blue, pink, white and purple.
  A favorite for cut or dried flowers,