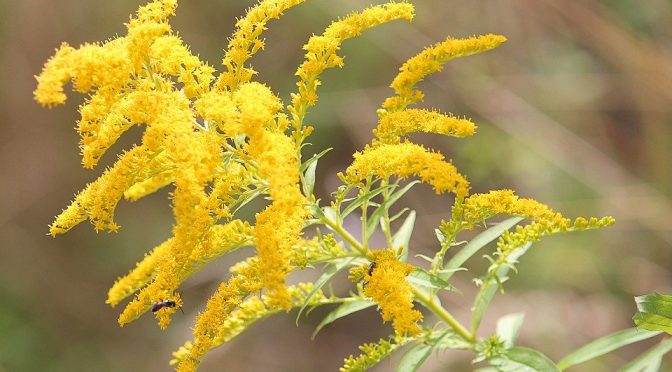
Just before we enjoy the beautiful colors of fall foliage, the land gives us its last summer show. Wildflowers like ironweed, Joe Pye weed, and goldenrod bloom in abundance. In some, we can find more than just beauty. Goldenrod is a wonderful medicinal herb that’s best harvested while in bloom.
Medicinal Usage
Goldenrod was first used in herbal medicine by Native Americans. Topically goldenrod has been used on toothaches, burns, sores, and infections. Internally it’s often used to treat digestive, respiratory, or urinary ailments. Recent research has shown that goldenrod teas and tinctures may effectively prevent and treat UTIs and kidney stones in particular.
Identifying Goldenrod
There dozens of species of goldenrod, 38 in Virginia alone! Identifying individual species can be challenging even for experts. However, all goldenrod species have similar properties and are used medicinally, so it’s okay if you’re unsure precisely what species you’ve got.
However, you do want to make sure you do have a goldenrod. Some similar-looking species like ragwort are toxic. Goldenrods have a woody stem. Though the leaf shape may differ from species to species, typically, leaves are tapered to the tip. Leaves are generally larger near the base of the plant. They often have a hairy or rough underside and have parallel veins. Their tiny yellow flowers grow on an inflorescence (like a plume) at the plant’s top. Many have multiple inflorescences.
If you’re unsure about identifying goldenrod, plan to forage with a knowledgeable friend. You can also check a wildflower field guide or the Ohio Perennial and Biennial Weed Guide for more detailed information.
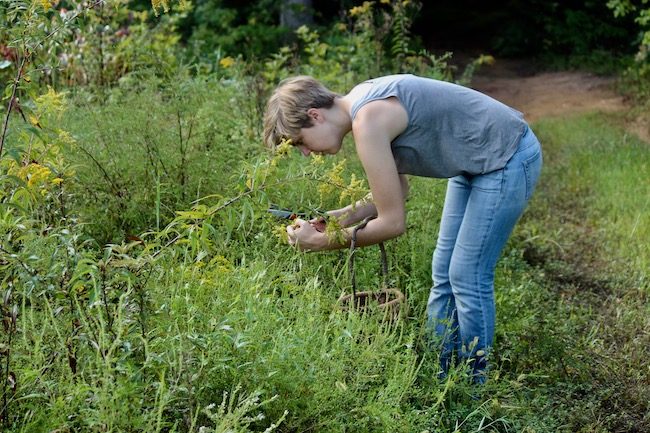
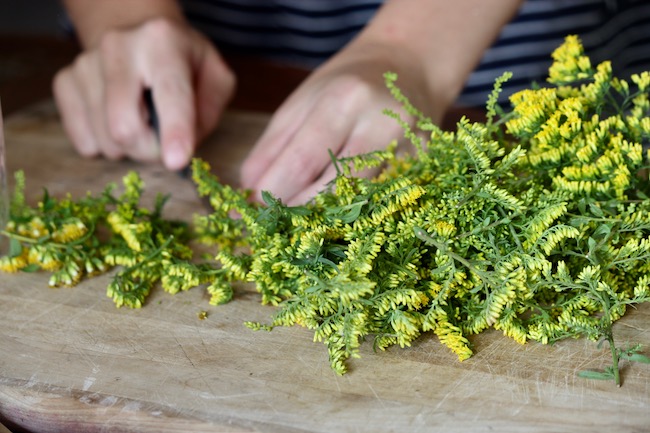
Harvest
To harvest goldenrod, you want to catch it as the flowers have just started blooming. Select plants that look healthy and free of mildew and disease. Bring along a pair of scissors and snip off the plume of flowers. It’s okay to get some leaves. You can use them too.
Avoid harvesting an entire patch. Bees and other native wildlife rely on species like goldenrod as they get ready for winter.
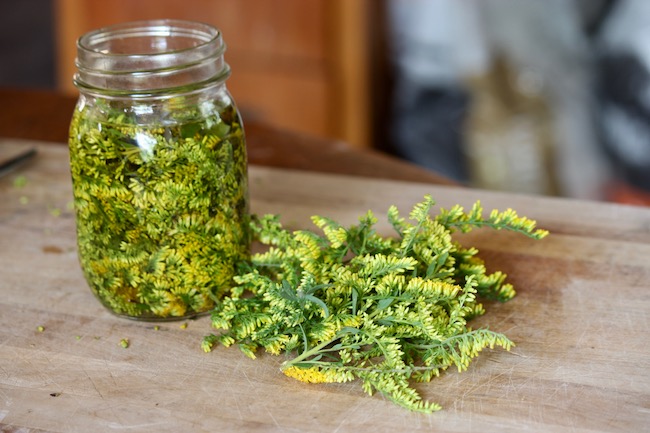
Making Tincture
To make a tincture, all you’ll need is alcohol (at least 80 proof or 40%), a glass jar with a lid, and your goldenrod blooms. If you don’t have goldenrod near you, you can also purchase and use dried goldenrod. If you don’t want to use alcohol, you can substitute it with vegetable glycerin.
Roughly chop up your blooms and place them in a glass jar. Then cover them with alcohol. Most people like to use vodka because it doesn’t have much flavor, but you can use whatever you’ve got on hand. I’m using rum for this tutorial.
Push the flowers down if needed. You don’t have to pack them in super tight, but you want to make sure that you completely cover them with alcohol; otherwise, they could mold.
Place the lid on and let your tincture sit in a cool, dark place for a minimum of 4 weeks before using. If you’re using dried goldenrod, shake your jar each day for the first couple of weeks to ensure the herbs absorb the alcohol and don’t just float on top. You can keep your tincture just like this for months, or you can strain out the blooms when you’re ready to use it.
You can use this method (the folk method) to tincture many herbs, including lemon balm, mint, echinacea, calendula, goldenseal, ginseng, and more.
Using Your Tincture
Always consult a physician before using your tinctures to treat any medical condition. Start with trying a 1/2 to 1 teaspoon before taking a lot. To make it taste a bit better, you can mix it with honey.
Making Tea
You can also make tea from fresh or dried goldenrod. About 2 tablespoons of fresh flowers or about 1 tablespoon of dried flowers will make a cup of tea. Steep your tea for 10-15 minutes.
Drying Goldenrod
To dry your goldenrod for later, you can spread roughly chopped blooms on a screen to air dry or dry them in a dehydrator on the herb setting. Store in an airtight container out of direct sunlight. It will last about a year.
***This article is not intended as medical advice. Please consult a physician before using these to treat any conditions.***