

Pole beans are a treasured southern crop for many reasons. They have a lot of flavor, interesting history, and are easy to grow and productive. We’ve also found that they’re enjoyable to grow. We love making “bean tunnels” with pole beans. These bean tunnels make picking easy, create shady areas to rest in the garden, and make a great fort or play house for kids. Here’s the easy method we recommend for building and growing a DIY bean tunnel.
Supplies
You’ll need to round up a few supplies to build a bean tunnel. You’ll need some fence posts, strong but flexible fencing panels, and a fence post pounder or mallet to place your posts. Generally, we use green metal t-posts and cattle panels, but you may find other materials that are also suitable with a bit of work. Depending on what type of fencing and posts you’re using you may want some extra wire to help secure the panels to the posts.
Preparing Beds for a Bean Tunnel
You’ll want your bean tunnel set up so you can walk through it. Therefore you’ll need to create two beds with a walking pathway in between. These can be traditional or raised beds.
Typically, the path in the middle should be about 5 feet wide. When the base of your tunnel is about this width, you’ll be able to create a sturdy yet fairly tall tunnel.
You may find that closer to 6 feet or 4 feet works better for you but I would recommend experimenting with holding up your fencing to see what the arch will look like in place.
Once you’ve decided on their positioning, prepare the beds as you usually would for planting. You may want to loosen the soil with a broad fork or tiller and add a couple of inches of finished compost.
 Setting Up Your Tunnels
As I mentioned in the previous section, you’ll probably want your posts placed so that the bottoms of the tunnel are about 5 feet apart. You need two posts per panel, with one on each side. To ensure you’re happy with this size, mark out your measurements and have two people hold the panel in place. If it looks good, you can go ahead and place your posts.
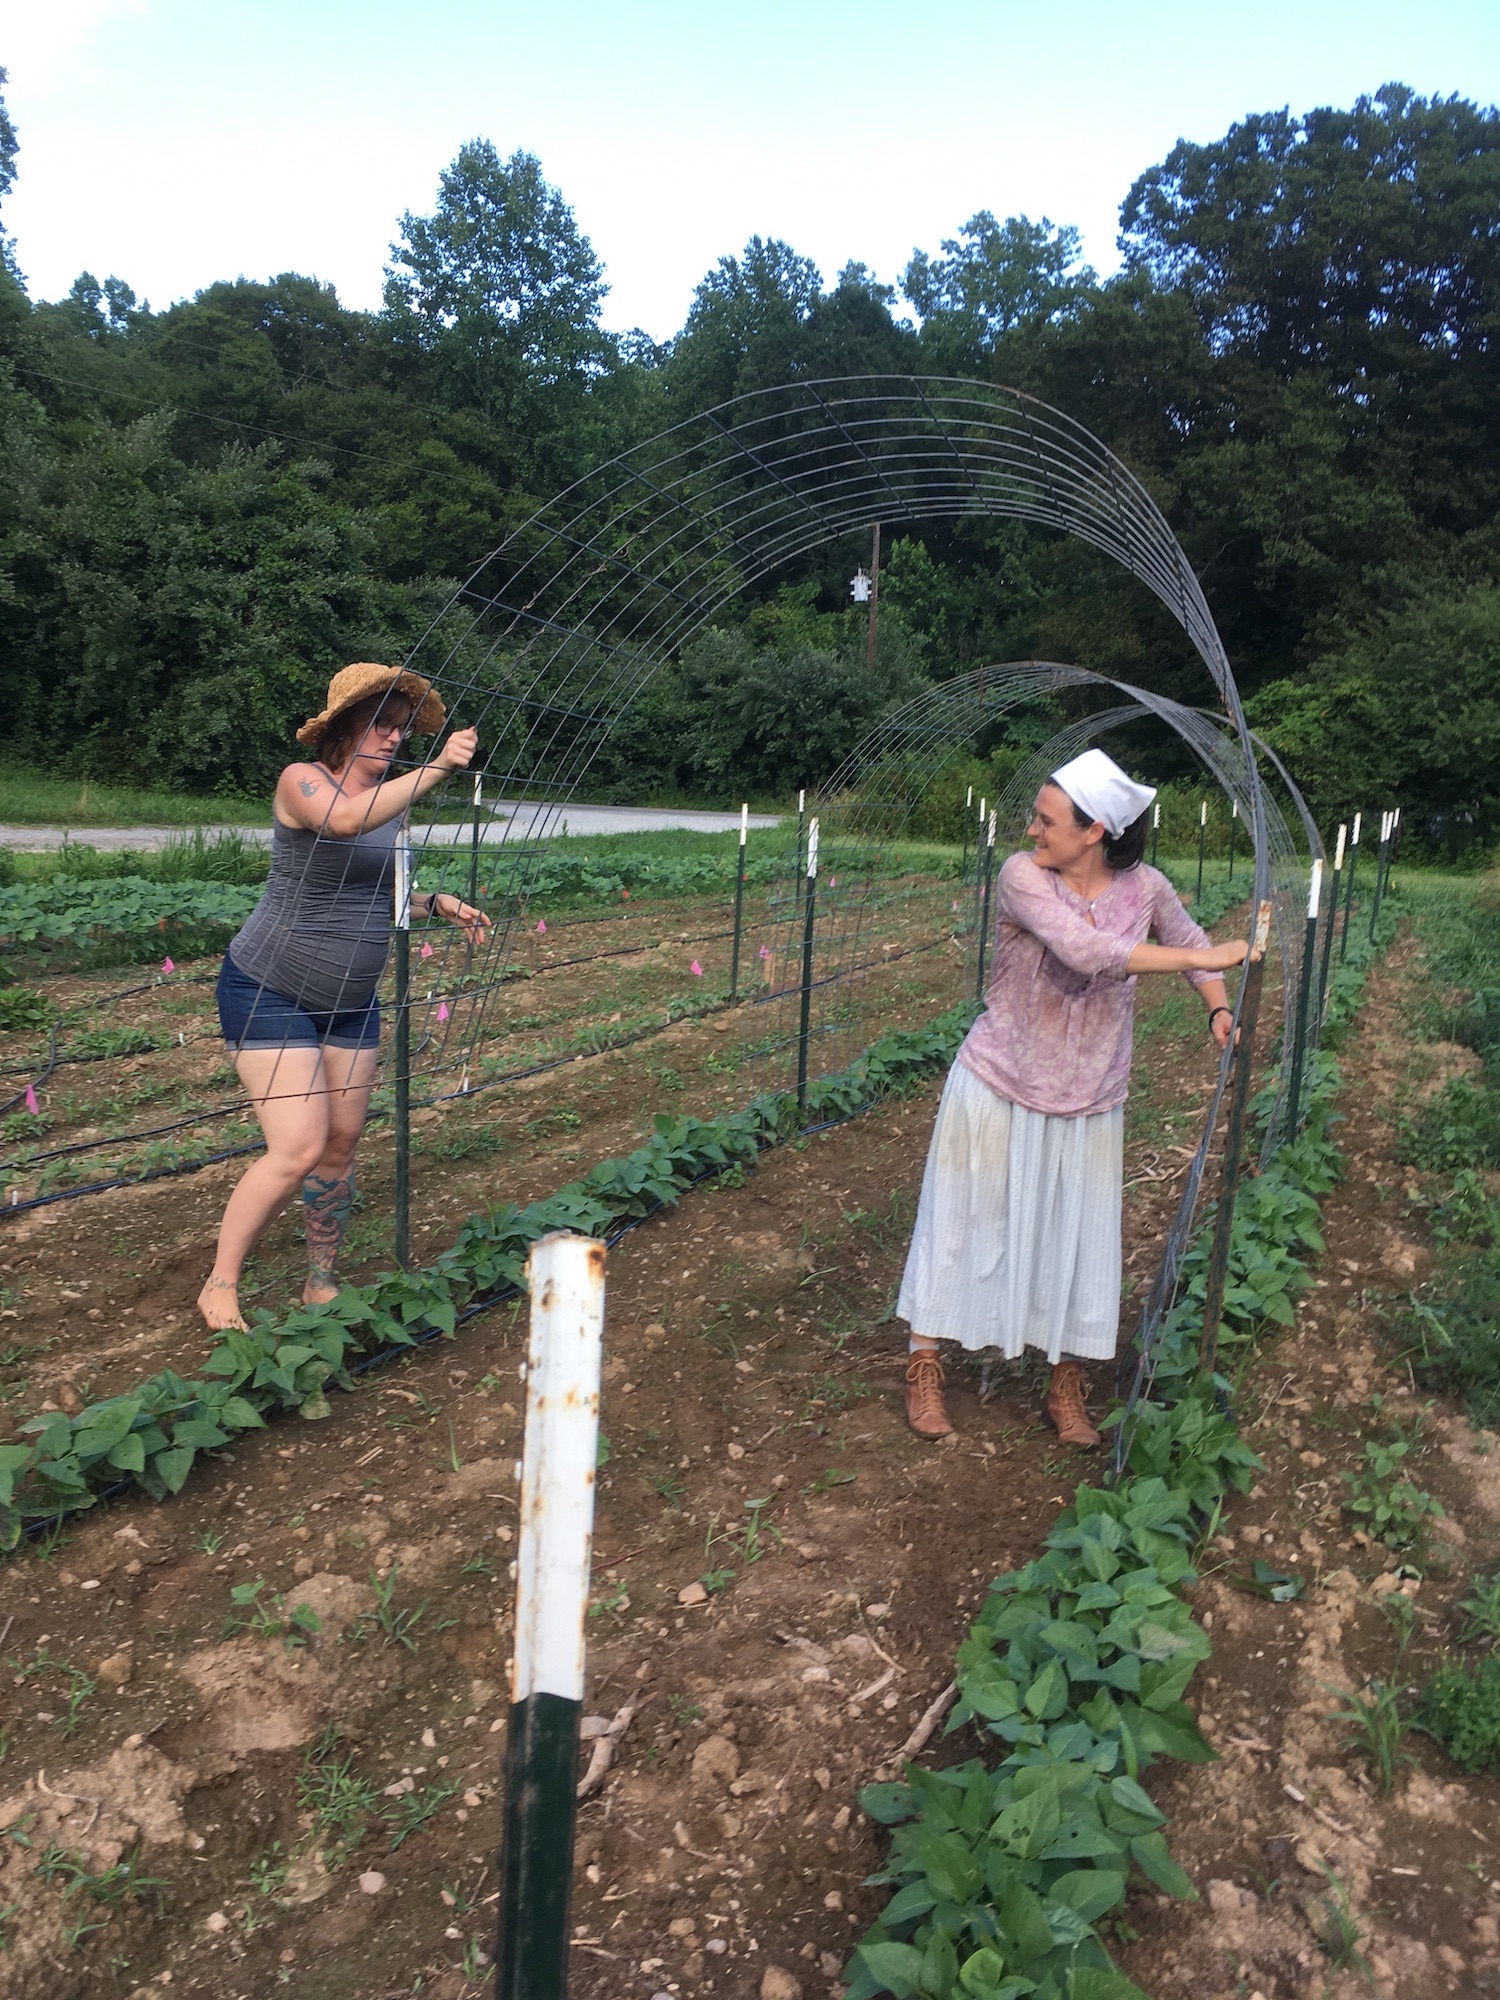
Once your posts are firmly in the ground, you’ll need two people to lift the panel and slide it over the poles. To begin, one person should hold their end roughly in position while the other slides their end over the post. Then the second person can slide their end over the post. If you feel like the panel isn’t secure you can use fencing wire to secure it to each post.
When built using t-posts and cattle panels, we’ve found that these trellises are plenty sturdy and hold up well to wind and weather.
Planting Your Tunnels
We use these trellises as bean tunnels, but you can grow various vining crops on them, including cucumbers, gourds, pole beans, winter squash, melons, or morning glories. Some folks also plant perennial vining crops like hops, roses, or grapes in this manner. Follow sowing or planting instructions for your chosen crop and plant them along the outsides of the tunnel.
The fruits of larger crops like melons and winter squash may need additional support. You can make little hammocks for them with scraps of old cloth or pantyhose.
That’s it! All you need to do is wait for the beans to grow and keep them watered or weeded. Before you know it, you’ll have a shady tunnel covered in bean leaves. Happy gardening!