
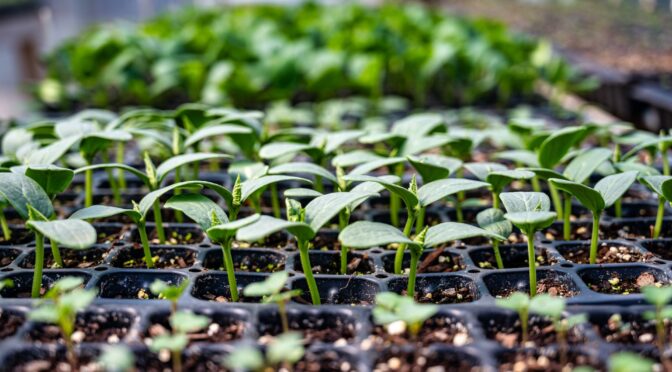
Depending on your USDA Hardiness Zone, you’ll want to start seeds indoors soon! In zone 7a in Virginia, we begin by starting onions, and by the end of January are sowing celery, celeriac, broccoli, cabbage, and cauliflower. Come February, we’ll be starting trays of tomatoes, artichokes, and more at the beginning of March. Starting transplants from seed is fun and allows you to access more varieties, but you need a few seed starting supplies.
Seed Starting Supplies You Need
Containers
What you use for containers is mainly personal preference, but there are a few things to keep in mind. First, your containers should offer good drainage. Seedlings don’t do well if they’re soggy.
Flats
One of the most common choices is plastic flats. These are easy to use, and if you buy decent ones can be used for several years. Their uniformity allows you to organize your seedlings easily.
UpCycled
Especially if you’re only starting a few seedlings, you may want to upcycle containers. Yogurt cups are a common choice; just make sure to poke holes in the bottoms for drainage and find trays to place beneath them.
Soil Blocks
Soil blocks are wonderful because they’re easy to transplant, and they “air prune” the plants’ roots. This means that soil-block plants won’t become root-bound like in typical pots where the roots grow around the inside of the pot because the roots won’t grow out into the open air. To use this method, you’ll need a small tool called a soil blocker and trays to place the blocks in.
Additionally, they’re an excellent option for transplanting crops that don’t like their roots disturbed. You won’t have to fight to get them out of a tray and potentially damage the roots.
Compostable Pots
There are also compostable pots like peat pots, or you can make compostable pots from newspapers. These make transplanting easy, but it can be pricey if you have to buy a lot of peat pots. When translating, ensure you don’t leave part of the pot sticking above the soil; it can wick moisture away from the roots. Tear the tops off before transplanting if needed.
Depending on the size of your containers and how long your seedlings need to grow indoors, you may need to pot up your seedlings. Plants like tomatoes thrive when potted up.
Seed Starting Mix
 Many gardeners and farmers use a seed starting mix to sow seeds indoors. Seed-starting mixes have the advantage of being sterile, meaning your seedlings will be exposed to fewer bacterial and fungal issues while they’re first getting started. Seed-starting mixes also hold adequate moisture for seeds without getting soggy.
If you don’t want to purchase a seed starting mix, you can make your own or use finished compost. Most ordinary garden soil isn’t a good option because it doesn’t drain well.
If you’re looking for something organic, you want to look for a seed-starting mix or ingredients with the OMRI (Organic Materials Review Institute) label. You can find comprehensive lists of certified products on the OMRI website if you want to browse different brands.
Lights
A common mistake among beginner gardeners is to plop seedlings in front of a window and not provide any additional supplemental light thinking they’ll grow like houseplants. Unfortunately, most houseplants can tolerate partial shade. In contrast, most vegetable crops, herbs, and garden flowers require full sun, which they won’t receive in a window, particularly in winter. If your seedlings don’t receive supplemental light, they’ll probably become “leggy” or tall and spindly as they reach for the light.
A quick Google search will turn up several options available for supplemental lights. One of the most affordable options is to use simple shop lights. LED bulbs are the most efficient, but you can use fluorescent
The lights should be about 2 to 4 inches from the top of your seedlings. It’s best to have a setup that allows your lights to be easily adjusted as the plants grow. If your plants look leggy, they need to be closer but don’t move them too close, or it can burn them.
Most seedlings do well with 12-18 hours of supplemental light daily. If you can get one, a timer will make managing this much easier.
Seed Starting Surface
You’ll need a place to put all of your precious seedlings! This is another choice that’s mainly up to personal preference. Some people use work benches or old tables. Large wire shelves, like those meant for storing tools, are one of my favorites. You can easily hang and adjust lights from each shelf.
Optional Seed Starting Supplies
Heat Mat
Your house may feel warm, but many crops benefit from extra heat. Tomatoes, for example, require soil temperature in the range of 75-85 degrees F for good germination. Heat mats can improve the quality of tomatoes and other heat-loving seedlings like peppers and eggplants.
Fertilizer
Most seed-starting mixes are designed to get plants started, not provide them nutrients long-term. If they’re in a container for a long time, you may need to give your seedlings a little boost. You can do this with liquid fertilizer. A bit of liquid kelp or compost tea, a tablespoon or two, added to a gallon of water is a good option.
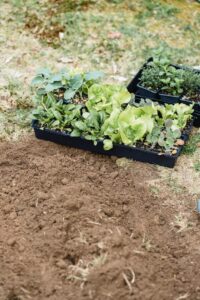
Coldframe or Hoophouse
If it’s an option for you, building a coldframe, hoop house, or setting up some other form of season extension can help you harden off seedlings and provide extra space.
Buying transplants isn’t as satisfying as watching your own begin from seed long before spring arrives. Gather these seed starting supplies for success with growing transplants.