
This is the third in our series of posts to help the many folks are getting into gardening for the first time, or are getting more serious about their vegetable gardening in these pandemic times. It’s from Pam Dawling AKA “Farmer Pam”, author of Sustainable Market Farming: Intensive Vegetable Production on a Few Acres, and The Year-Round Hoophouse: Polytunnels for All Seasons and All Climates. She managed a garden for 20 years that grew vegetables year round for 100 people. Pam also has her own wonderful, detailed, gardening blog SustainableMarketFarming.com. The first post in this series covered many useful details on Succession Planting. The second post, Last Chance Sowings discussed vegetables that need to be planted in late July or early August in order to become established in your fall and winter garden.
Pam writes from her experience in USDA Hardiness Zone 7a, in the Mid-Atlantic USA. Adapt her advice for where ever you are gardening.
===========================
August is when we establish root crops that will feed us in the fall and winter, either from storage or direct from the garden. The cooler fall nights make roots deliciously sweet. Clear out your old crops, prepare beds and sow soon.
Carrots
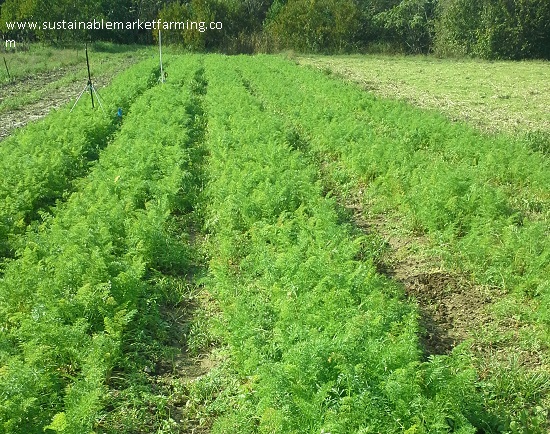
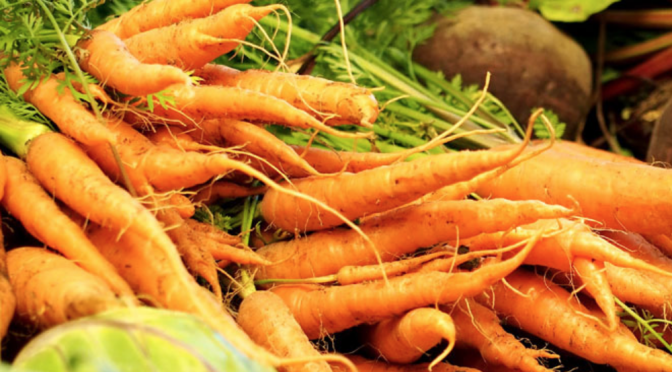
We sow our fall carrots August 4. Here in central Virginia, zone 7a, on a sandy clay loam, we grow Danvers 126, a sturdy, open pollinated variety with high yields of tasty carrots. We harvest in November and eat them all winter until next spring’s first ones in late May. It’s worth growing enough for the whole winter – in the winter time, home-grown carrots are so much tastier than anyone else’s!
Aim to sow 30 seeds/ft (1/cm), 0.25-0.5″ (0.6-1.2 cm) deep. We sow in single rows 8-10” (20-25cm) apart. Carrots do well on raised beds, because the soil stays loose and the roots can easily grow deep.
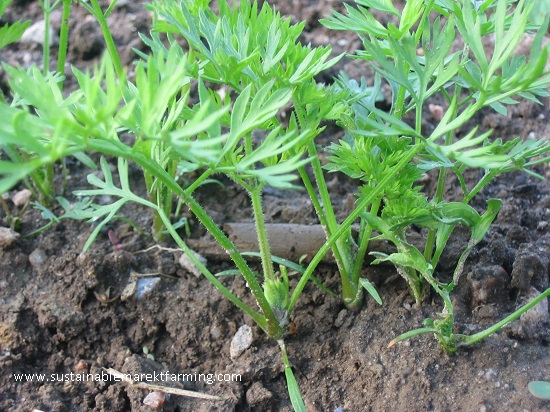
Sow carrots whenever the soil temperature is below 95°F (35°C), and be sure to keep the surface damp. Use shadecloth, or water a lot, until they emerge – it may take only 4 days. This is so different than in the spring when the soil is cold and carrots don’t come up nearly so fast (and the weeds come on strong). Hard rain in the first 3 or 4 days after planting can dry the soil to a crust that stymies their emergence. To prevent this, if you get heavy rain, irrigate for half an hour each day afterwards until the carrots emerge.
Once you see tiny carrot seedlings, we hoe the weeds between the rows. A scuffle hoe works great for this job. Then hand-weed between the carrots and thin them to 1” (2.5 cm). If you are in an area with Carrot Rust Fly (AKA Carrot Root Fly), be sure to remove all carrot thinnings and broken foliage from the garden, so you don’t lure the low-flying pest with the wonderful smell of carrot leaves.

To get decent size carrots, you have to thin them. We do a second thinning, to 3” (8 cm) apart, at the stage when we can eat the baby carrots for salads. If we get more weeds, weed them again. If carrots are spaced too widely, they will be more likely to split, and the overall yield will be reduced.
Beets
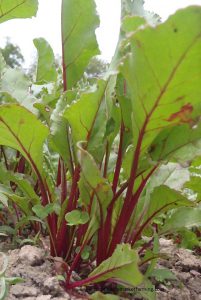
Beet “seeds” are in fact seed balls, and each one will germinate a cluster of beets. It’s important to “single” the beets (reduce to a single seedling at each spot) as soon as possible as they are their own worst enemy, and won’t grow big if crowded. We weed and thin as for carrots, in two stages, and then harvest out the biggest beets for fresh eating, leaving the others to grow for storage. Beets take 45-80 days to maturity. Trimmed beets keep well at 32°F (0°C) and 95% humidity in perforated plastic bags under refrigeration. We like tender Cylindra beets.
Kohlrabi
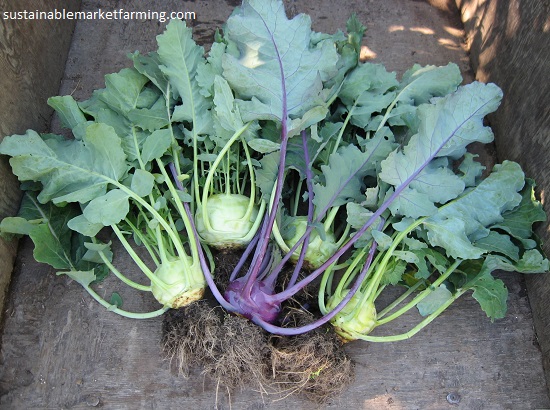
I know kohlrabi is not actually a root, but we treat it as one. Kohlrabi transplants successfully, unlike carrots and turnips, and this is our method for fall crops. We sow kohlrabi (Early Purple Vienna and Early White Vienna) in the week beginning 7/2, for transplanting 8/3-8/9 and harvesting in late October. We could sow in early August for November harvests. Harvest when the kohlrabi are 2-3” (5-7.5 cm) in diameter or even up to softball size. If left growing for too long they become woody.
Cut kohlrabi from the ground with a sturdy knife. The base of the globe can be quite fibrous, so cut either the wiry root just below the soil surface, or cut higher, leaving a small disc of the globe behind, attached to the taproot. Snip off the leaves. Kohlrabi stores well in perforated plastic bags in a fridge.
Turnips
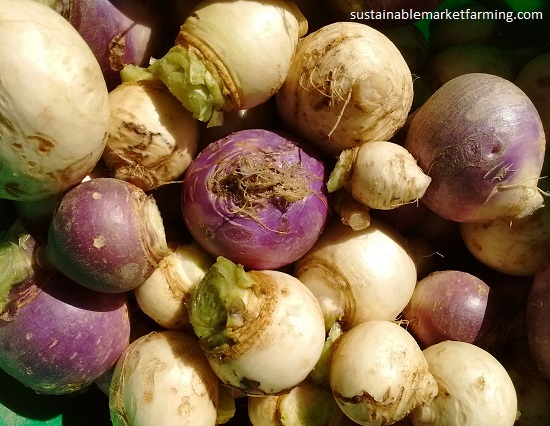
Turnips are among the fastest growing crops other than leafy greens. In zone 7, we sow 8/6 (last date for us is 9/5). Although they grow best in cool weather, turnips have no trouble germinating at high temperatures.
Turnips are available in gourmet varieties, to be eaten small, young and tender, 35-50 days after sowing, up to 2” (5 cm) in diameter. The delicious F1 hybrid Hakurei (38 days), a smooth white flat-round shape, with crisp sweet flesh, and hairless leaves, is the most famous of these. Other delicious turnips include White Egg, Red Round, and Scarlet Ohno Revival. Harvest small and use promptly, as they only retain quality for a short storage period. For storage we grow the extremely reliable workhorse, Purple Top White Globe.
Turnips are ready when 3” (7.5 cm) in diameter (30-60 days from sowing), To harvest, loosen the roots with a digging fork, then pull. Trim tops and tails in the garden (or move to the shade if it’s hot). For successful long-term storage, cut cleanly between the leaves and the root. Then wash (to make them easier to clean later), drain and store.
Storage in perforated plastic bags under refrigeration works well for us. Turnips will keep for about 4 months at temperatures close to freezing and humidity of 90-95%. Higher humidity will make them rot.
Winter radishes
In early August we sow winter storage radishes. We like Miyashige daikon, China Rose, Misato Rose and the Shunkyo Semi-long pink radish. Radishes will germinate in hot soils. Simply weed, thin and water, then harvest by thinning the rows (these crunchy thinnings are delicious!) and finally harvest for storage. Daikon can go very deep, and are tender and brittle, so dig carefully. These big radishes are great to use in the winter, for salad, stir-fries or making pickles like kimchee.
Rutabagas
Rutabagas are only sown here in late summer. They take longer to grow to a good size than turnips do, so we must start earlier: 7/15-8/4 here, (mid-August at the latest), allowing 90-100 growing days. For small plantings, plan on 10’ (3 m) per person. Yields of rutabagas can be 50% higher than turnips.
If you sow fall root crops too early in the summer, they can get woody. Rutabagas (known as Swedes in the UK) are, botanically, part swollen taproot, part swollen stem (the neck and the secondary roots growing in two rows down the sides of rutabagas distinguish them from turnips). Rutabagas are mostly yellow-fleshed with a tan and reddish or purplish skin, although there are white-fleshed varieties. They all have blue-green waxy, non-hairy leaves. Turnips come in a range of colors, white or yellow flesh, with white, purple, red or golden yellow skins. The leaves are bright grass green, usually hairy, and not waxy.
Rutabagas come in very few varieties. Gilfeather (85 days, OP) is sold as a turnip, but is botanically a white rutabaga. Sweeter and later to mature than turnips, it doesn’t become woody even at softball size. Southern Exposure Seed Exchange also has American Purple Top (not to be confused with the Purple Top White Globe turnip) and the Lithuanian Nadmorska, a large oval 90d OP.
Keys to growing mild, sweet-tasting rutabagas include cool temperatures and sufficient irrigation. The optimal germination range is 59-95°F (15-35°C). We sow four rows in 4’ (1.2 m) beds. Seeds need to be 0.5” (1.2 cm) deep. When flea beetles or grasshoppers are a problem, use row cover or insect mesh.
Early thinning and weeding are important for shapely well-developed rutabagas. Thin to 4” (10 cm) within 10 days of emergence, or at least by 1” (2.5 cm) tall; then to 10” (25 cm) when 2-3” (5-7.5 cm) tall. Our rutabagas are ready from mid-October. The flavor improves after frost.
Rutabagas are among the hardiest of vegetables, and can be left in the ground until all other crops have been harvested. They can store for as much as 6 months in perforated plastic bags in the refrigerator. They do best stored above 95% humidity. In the UK, rutabagas are not waxed as they are in North America. In fact, they store well without waxing, and I encourage you to try skipping the petroleum product.
Rutabagas can even be stored in the ground all winter, unlike turnips. Mulch over them with loose straw once the temperatures descend near 20°F (-7°C).
———————————
Pam Dawling has grown vegetables at Twin Oaks Community, central Virginia for 27 years, feeding 100 people from 3.5 acres. She has written two books: Sustainable Market Farming and The Year-Round Hoophouse. She blogs weekly at https://www.sustainablemarketfarming.com