With tomatoes and peppers ubiquitous in vegetable gardens, eggplants are often the nightshade left out. But even if your summers are on the cool side or the short side, you too can have homegrown eggplants. On our farm in central Virginia, shorter season varieties are often our best performing when summer is unusually cool or wet, and their faster-maturing fruits are the first to arrive at the table.
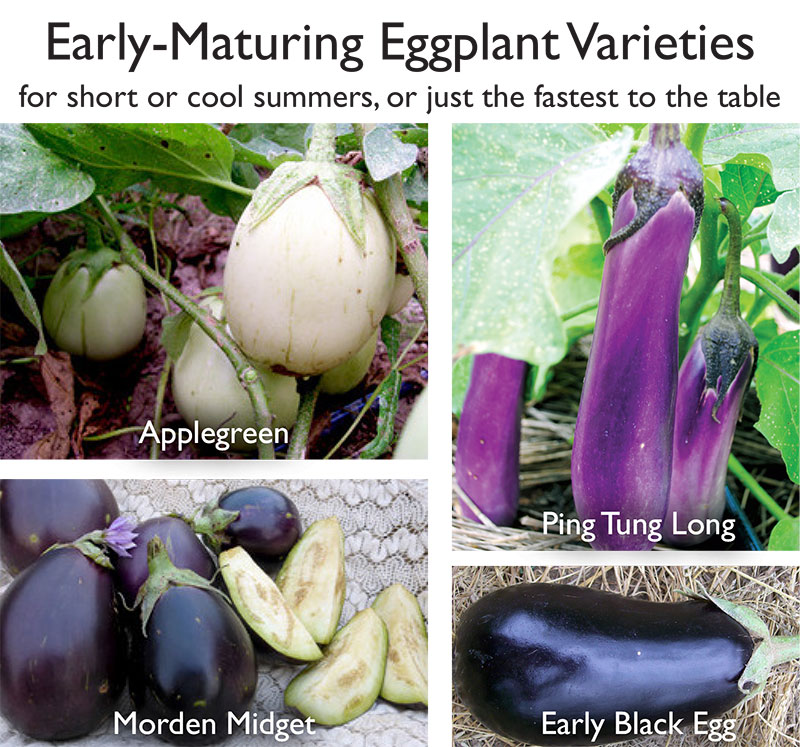
Southern Exposure sells four early-maturing eggplants: Applegreen (65 days, green-white skin), Early Black Egg (65 days, Japanese origin, deep-purple skin), Morden Midget (65 days, Canadian origin, deep-purple skin), and Ping Tung Long (62 days, Taiwanese origin, lavender skin).
I’m partial to long skinny eggplants (I like chopping them into thin half-moons), so Ping Tung Long is my favorite. I find that Asian varieties substitute well in Italian and European recipes. The lavender skins darken with cooking to a purple-tan color.
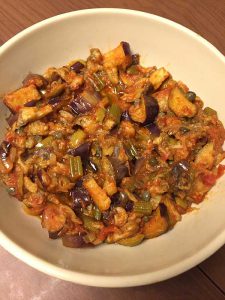
My current favorite eggplant recipe follows: a Sicilian Caponata. Caponata is vegan and gluten-free, and so full of flavor that no one will notice.
Sicilian Caponata
Adapted from David Lebovitz’s blog. Lebovitz requires deep-frying the eggplant in batches. This oven-roasted version cuts the oil somewhat, and is so much easier, and I think tastes just as good.
6 celery stalks
2 pounds eggplant (Italian or Asian types)
olive oil
salt
1 red onion, cut in half and thinly sliced (yellow or white will work but red is best)
1 cup green olives, pitted and chopped
1/4 cup capers, rinsed
1-1/2 cups tomato sauce (as a variation, make a quick, fresh sauce by simmering 3-4 diced Roma-type tomatoes in a small amount of water with salt to taste for 20-30 minutes.)
1/4 cup vinegar (red wine vinegar, white wine vinegar, or apple cider vinegar
2 tablespoons honey (or to taste)
Chopped Italian (flat-leaf) parsley for garnish
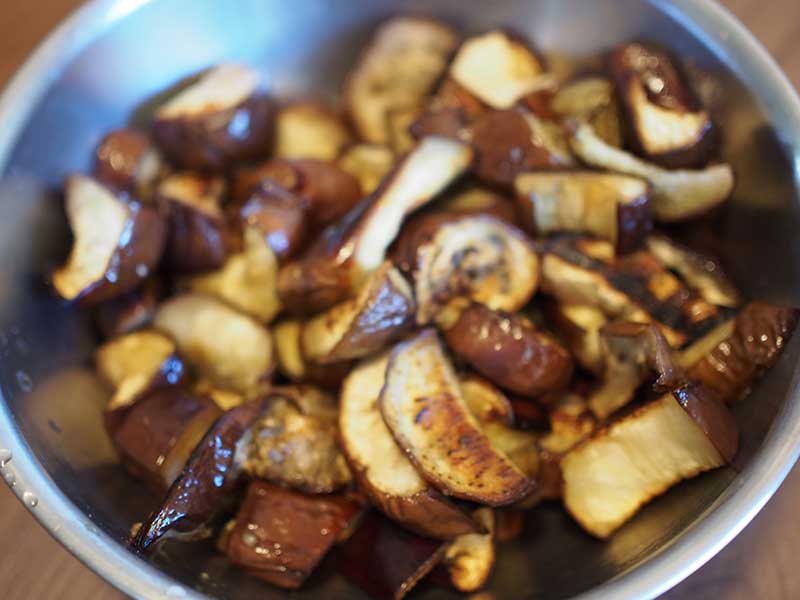
Roast the Eggplant:
1. Pre-heat oven to 375 degrees F.
2. Trim the stems off the eggplants, halve lengthwise, and slice into 1/2-inch pieces (half-moons work well for long-types, otherwise 1/2 inch cubes).
3. Toss the eggplant pieces with 1/2 to 1 tsp salt and 1/4 to 1/2 cup olive oil (it will soak up quite a lot). Spread on a baking dish and cook for 30-45 minutes, until the eggplant pieces are soft (easily pierced with a fork) and the skins have begun to darken.
Assemble the Caponata
1. Boil a medium-size pot of water. Cut the celery stalks into 1/2-inch slices. Simmer the celery until just tender, around 7 minutes. Drain and immerse in cold water to stop the cooking.
2. In a large skillet or Dutch oven, heat 2-3 tablespoons olive oil on medium-high heat. Add the sliced onion and cook, stirring frequently until translucent, around 7 minutes. Add the drained celery, olives, capers, tomato sauce, vinegar, and honey and bring to a low boil.
3. Add the eggplant and simmer for 3 to 4 minutes, stirring gently.
4. Taste and add additional salt and vinegar as desired. Transfer to a large shallow serving bowl to cool.
Serving: Allow to cool before serving, or refrigerate and serve the next day (this gives the flavors time to meld). Garnish with the chopped parsley to serve. May also be served as bruschetta — spread on bread slices that have been spread with olive oil and oven-toasted.
Winter squash may be the perfect vegetable. It is easy to grow, stores well without processing, is tasty and nutritious. For seed growers like us at Living Energy Farm, winter squash has the added advantage of being a dual-purpose crop- we can save the seed while also enjoying the bounty of delicious food.
We grow all kinds of different squashes on our farm, but moschata type winter squashes are our favorite. Moschata is a species of squash that includes seminoles, butternuts, and some pumpkins. Moschatas do particularly well in the Southeast because they are resistant to insects and thrive on heat and humidity. One of our worst insect pests is the squash vine borer, which in a bad year can wipe out non-resistant varieties. The reason mochatas resist vine borers is that they have solid stems, unlike the hollow stems of pepo and maxima type squashes. With a moschata, the vine borer has no place to go!
Pictured, from left to right: top row: Butterbush, Nutterbutter, Waltham, Waltham Virginia Select; bottom row: Honey Nut, Metro PMR, Amber Delight
Among the moschatas, butternuts stand out as particularly productive and delicious. This year we were involved with trialing seven different butternut varieties- Waltham, Waltham Virginia Select, Metro PMR, Butterbush, Nutterbutter, Honey Nut, and Amber Delight. Waltham is the standard butternut squash for its medium-large size and good flavor, but Waltham Virginia Select, which will be offered by Southern Exposure starting next year, proved to be a considerable improvement over Waltham in productivity and disease resistance.
Our all-around favorite was Butterbush, which has exceptional flavor, early and uniform ripening, and a small seed cavity. This variety has compact and productive vines which are well suited to the home grower, who may have limited space.
In addition to being fun and easy to grow, butternuts are excellent keepers. Without canning or freezing, we enjoy our butternuts from harvest in September well into February and March. Good handling and storage technique starts at harvest time. Ideally, harvest your butternuts when you have a week of warm clear weather. Choose fruits that are fully mature and unblemished for storage. Immature or damaged fruits, or fruits missing their stems, will wrinkle or rot more quickly in storage and should be eaten first. Start by clipping the fruits off the vines, leaving at least an inch of stem, and turning the fruits so the stem is exposed to sun and wind. Leave the fruits in the field, or move to a sunny spot, to cure for at least a week. The curing process dries out the stem and draws moisture from the squash, which hardens the rind and helps prevent rot during storage. If the weather is cool or wet when you harvest, squashes can be cured in an indoor space at 80-90 degrees Fahrenheit.
Once the squashes are cured, pack them gently into a box or bin, being careful to avoid puncturing the skin. You don’t need a root cellar to store winter squash; in fact, they do better with warmer temperatures and medium humidity. They should not freeze- 50 to 65 degrees Fahrenheit is ideal- but we find that in Virginia butternuts do fine in unheated outdoor buildings like sheds and barns until the weather turns really cold in late December or January. After that, a basement or cool room in the house works nicely.
Our favorite way to eat butternuts is to slice them in half lengthwise, coat them with oil, sprinkle the halves with cinnamon or savory herbs, and bake them at 350 degrees for about an hour. Some folks like to add a little molasses or honey, but some varieties like Butterbush don’t need the extra sweetness, they taste better without it.
And nothing says winter in our kitchen like a warm, hearty squash soup. We sometimes make squash soup from the frozen purees we’ve put up from our fall pumpkins, which are not good keepers. But using storage squashes like butternuts works well too, and many of us – myself included – prefer the flavor to pumpkins. Here is our favorite squash soup recipe. The quantities have been left out because it works for many different amounts of vegetables, as long as there’s plenty of squash!
Butternut squash
onions or leeks
celery or celeriac
grated ginger
garlic
cream
salt and pepper
Bring a large saucepan full of water to boil for stock. While the water is heating, slice open the squash(es) lengthwise. Scoop out the seeds and pulp into the saucepan. Peel off the skin and add it to the saucepan. Cut the squash into one inch cubes and set aside. Slice, dice, or mince, according to your preference, the onions or leeks, celery or celeriac, and garlic. Add any trimmings to the stock pan. Keep the stock at a slow boil for at least one hour.
Coat a large heavy-bottomed pan with olive oil, put on medium heat. Add onions or leeks and cook until they begin to soften, then add the garlic, celery or celeriac, and squash. Cook for about ten minutes. Then add the stock through a strainer, adding extra boiling water if necessary to cover, and the grated ginger. Cook at a low boil for 30 minutes, until the squash is soft. Mash it all up or put through a blender. Add cream as desired, and salt and pepper to taste. Yum!
It’s easy to save seed from butternuts and other winter squash. Cultivation is much the same as growing these plants for food. Give them plenty of space and adequate water for quality seed. To maintain genetic vigor, save seed from a population of at least 10 to 20 plants. And be sure to provide at least a quarter mile of isolation distance from other varieties of the same species. (SESE recommends a quarter mile to one mile of isolation, depending on planting size.) Harvest when the fruits are completely mature. Signs of maturity are different in different varieties, but with butternuts look for fruits that are completely tan. Cut a few fruits open and check the seeds if you’re not sure; they should be plump.
To save the seed, cut the squashes in half with a small knife, trying not to cut through the seed cavity. Scoop out the seeds, pulp and all, into a bowl or bucket. Add a small amount of water, if necessary, so the seeds stay wet while they are fermenting. Let the seeds ferment for at least two days, stirring twice a day. The fermentation process controls some diseases and breaks down the pulp so it is easier to clean the seed. You may need to let them ferment for more than two days in cold weather. When the pulp is soft enough to slip easily from the seeds, add more water to the bowl or bucket. Most of the good seeds will sink, and most of the pulp and immature seeds will float. Pour off the pulp and immature seeds. Repeat to separate out more of the pulp and immature seeds, adding more water with each pour if necessary. Then pour out the good seeds onto a screen and put them in front of a fan to dry. After 5 to 7 days of drying, put the seeds in a jar and store them in a cool dry place until you’re ready to plant again in the spring!
Biography:
Debbie Piesen has been working in organic agriculture for eight years, and has been growing organic vegetable seeds for Southern Exposure Seed Exchange for three years. She is currently the farm manager for Living Energy Farm, a community and environmental education center in Louisa, Virginia, that uses no fossil fuels. Living Energy Farm cultivates three acres of organic vegetables, grains and flowers for seed and market, and maintains five acres (and growing) of organic orchards.

 Sicilian Caponata
")
