Category Archives: Garden Advice

Herbal Teas: Drying & Blending

One of the best parts of gardening is enjoying your harvest. One of my favorite ways to use my garden’s edible flowers and herbs is to dry and mix herbal teas. These teas are tasty, beautiful, and fun to make. They can also be nourishing and helpful in supporting the system with minor issues like nausea, sleeplessness, colds, and stress. Here’s how you can get started making your own herbal teas too.

What Should I Put in My Tea?

You may have grown many great tea ingredients in your garden this year. Some of these herbs are usually grown for medicinal purposes, while others are often included in culinary herb gardens and ornamental flower beds.

If you’ve never made herbal tea, it’s a little more complex than just picking plants. Different herbs have different valuable parts. For example, we may use one plant’s roots while focusing on another’s aerial parts (leaves, flowers, and stems). 

Here are some of the common tea herbs you may be growing and what part to harvest:

  • Anise-Hyssop (leaves)
  • Ashwagandha (roots)
  • Calendula (flowers)
  • Catnip (leaves)
  • Chamomile (flowers)
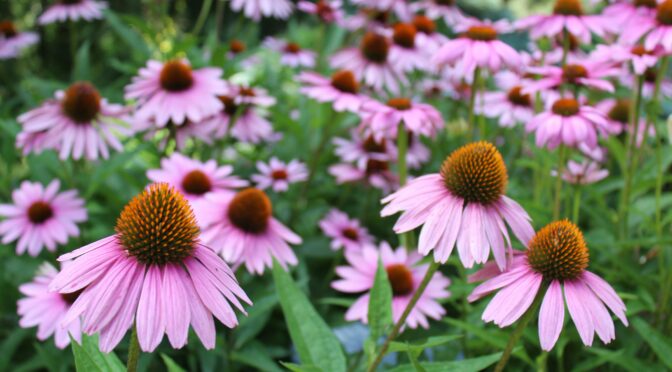
  • Echinacea (whole plant including roots)
  • Feverfew (aerial parts)
  • Ginger (rhizome)
  • Lavender (Flowerbuds)
  • Lemon Balm (leaves)
  • Mint (leaves)
  • Monarda (aerial parts)
  • Rose (hips and petals)
  • Roselle (calyxes)
  • Skullcap (aerial parts)
  • Valerian (roots)

Additionally, you may have some fun tea ingredients on hand or can easily pick up at a grocery store. These include:

  • Black Tea
  • Cardamom
  • Cinnamon Sticks
  • Fennel Seeds
  • Green Tea
  • Lemon Peels
  • Nutmeg
  • Orange Peels
  • Vanilla Beans

If you’re outdoorsy, you may also want to forage for some tea ingredients! Just make sure you are 100% confident in your identification. Also, avoid harvesting plants from areas that could be contaminated. 

  • Elderberries
  • Chicory
  • Clover
  • Ground Ivy
  • Nettles
  • Pine Needles
  • Raspberry Leaves
  • Spruce Tips
Roselle calyxes
St. Kitts and Nevis Roselle

How To Process Tea Ingredients

You can use ingredients fresh from the garden, but if you want to make larger batches of tea blends to keep on hand or enjoy tea out of season, you’ll need to preserve your herbs. 

You can air-dry many herbs, like mint and lavender. To do so, you’ll need a spot with good airflow out of direct sunlight. Mint and many other herbs will dry when hung upside down in bundles from the ceiling of a kitchen or porch. Avoid hanging them in areas where they may be hit with water or steam, like over the stove. 

You can also lay the herbs in a single layer on an old window screen or similar material that allows good airflow around them.

However, in our humid climate, it’s much tougher to air-dry fleshier herbs like roselle calyxes and roots and rhizomes like ginger, echinacea, and valerian. We generally recommend cutting them into small pieces and drying them in a dehydrator. 

How to Design a Herbal Tea Blend

To get started, it’s essential to think about why you want to make your tea. Are you trying to make a citrusy blend that’s tasty to drink iced in the garden? Do you want to make a soothing blend to drink before bed or an energizing blend for the morning?

Once I have a good idea of my goal, I start with the Herbal Academy’s basic recommendation. Generally, they advise including:

  • 3 parts base ingredient
  • 1-2 parts supporting ingredients
  • 1/4-1 part accent ingredient

This guideline is just a starting point. Start just making a batch that will make a cup or two and then change the ingredients as needed. 

For most recipes, I’ve found that a tablespoon of tea makes one 8-ounce cup of tea when steeped for 5 to 15 minutes. However, you can use more or less depending on how strong you enjoy your tea.

Example Herbal Tea Blends to Try

If you’re unsure where to start, here are a couple of basic blends I enjoy. You can start with these and adjust or change ingredients based on your needs and taste.

Sleepy Tea

It is a calming tea to drink before bedtime or when you’re trying to relax.

  • 1 cup chamomile flowers
  • 1/2 cup catnip leaves
  • 1/4 cup lavender blossoms

Stomach Calming Tea

This tea is helpful for indigestion, nausea, and car sickness. 

  • 1 cup mint leaves
  • 1/2 cup chamomile
  • 2 TBS ginger
  • 1 TBS fennel seeds

Cold Support Tea

  • 1 cup echinacea
  • 1/2 cup monarda
  • 1/4 cup orange peels
  • 1/4 cup rosehips

If you have beautiful herbs coming in from the garden, it’s tea time! You can dry your own herbs and create tasty, nourishing tea blends. What’s your favorite herbal tea blend?

6 Tips for Planting a Fall Garden in Hot Weather

Over the last few weeks, we’ve been preparing beds and sowing many of our fall crops, such as lettuce, radishes, and cabbages, here at Southern Exposure. Unfortunately, temperatures in our zone 7a and gardens farther south rarely cooperate. The 90°+ days we’ve been experiencing are far from ideal for these cool-season plants. Unfortunately, we can’t always wait until the temperatures start to dip. We need these plants to mature before cold temperatures and the dwindling light of late fall and winter set in. That’s why this week, we’re sharing our favorite tips to help you start your fall garden in hot weather.

Use Your Refrigerator or Other Cool Spaces

One of the biggest struggles with high temperatures is getting sensitive seeds like lettuce to germinate. Most lettuce germinates best around 75°F but will germinate at temperatures as low as 40°F. Rather than direct sow them or sow them in flats outdoors, we start our fall lettuces indoors and place the flats into the refrigerator for 4 to 6 days. If you don’t have space in your fridge, you could try another area that stays cool, like a root cellar. Just keep an eye on them; they need light once they germinate!

Beets in the fall gardenKeep Soil Cool and Moist with Boards, Burlap, or Cardboard

While our previous method works well for crops like lettuce or broccoli sown in flats, some crops like carrots don’t thrive as transplants. For these crops, we direct seed them into moist soil and then immediately cover the soil with boards, thick cardboard, or burlap. This ensures the soil stays cool and moist while the seeds germinate. However, you must check them and remove the covering as soon as they germinate. They’ll be leggy, pale, and weak if left covered too long.

Use Row Cover

We use row cover at Southern Exposure during every season, but in August, it’s handy for providing cool-season crops with some relief from the heat. Light row cover or shade cloth offers some protection from the sun’s harsh rays, keeping your plants and the soil they’re growing in cooler. It also keeps insects off young plants. 

Select Appropriate Varieties for the Fall Garden

Some varieties do better in this season than others. You’ll notice that many crops that are good for the fall garden, say so in their name. Some of our favorites like this include Black Spanish Round Fall Radish, Snowball Y Fall Cauliflower, and Winter Bloomsdale Spinach. However, for some, you’ll need to dig through the description. For those in the Deep South, it can be helpful to look for heat-resistant crops like Jericho Romaine Lettuce this time of year.

Winter Bloomsdale Spinach

Find Your Exact Sowing Window

Depending on your zone, you may also be able to wait until later to plant certain crops. We recommend using our garden planner or a similar app for exact planting windows for your zip code. 

You can also do things the old-fashioned way. To calculate your last possible sowing date, you must find your estimated first frost date and your variety’s estimated days to maturity. 

If you’re direct sowing a crop, add 14 days to the days to maturity; if you’re transplanting, add 14 to 28 days. Take this number and count backward from your first frost date to get your last possible sowing date, ensuring your crop reaches maturity before frost. 

Note that many crops will tolerate light frosts or can be protected with row cover or a hoop house. However, even in hoop houses that are kept warm, production dwindles in the fall as the days get shorter and shorter. 

Maintenance is Essential for the Fall Garden

Maintenance is crucial during hot weather, which can stress plants. Keep up with consistent watering and weeding. Place mulch around plants as soon as possible to keep the soil cool and moist and to suppress weeds. You can use wood chips, straw, grass clippings, or old leaves.

Getting started on a fall garden can be challenging when temperatures are still high, but getting crops in on time is essential. Using these tried and true methods can help you succeed with a fall garden, no matter what the weather looks like outside.

The Humble Rutabaga: Growing, Storing, Using

Few Americans eat or grow rutabagas these days. Sometimes called Swedes, these once cherished storage crops fell by the wayside as grocery stores and refrigerated shipping stepped onto the landscape. We find that these under-appreciated deserve a spot in our gardens and diet. Here’s why you may want to consider adding your rutabagas to your home garden this fall. Plus, some growing advice and how to put them to good use in the kitchen.

Why Grow Rutabagas

Rutabagas may not be beautiful vegetables to look at, but they do have a lot going for them! Here are a few of our favorite things about these root crops:

Rutabagas can increase your self-sufficiency. 

If you garden just for flavor and fun, don’t worry about this one! However, we know that many of our customers are homesteaders, environmentalists, and foodies looking to produce more of their own food to keep their diet local. If that’s you, rutabagas are a great choice. Rutabagas are great nutrient-dense staple crops that offer a large amount of food for the space they take up in the garden.

Rutabagas have an excellent storage life.

Rutabagas are an ideal fall crop because, unlike many, they can stay in the ground long before they get pithy. Once harvested, you can store them in a fridge or root cellar for 4 to 5 months.

Rutabagas are incredibly versatile. 

I encourage people to think of rutabagas as their own vegetable rather than a potato substitute. While they are excellent mashed, they don’t really taste like potatoes. I love them in soups, grated raw into salads, and even in cake!

Rutabagas are easy to grow.

Like any crop, rutabagas perform best under certain conditions, but we’ve found them to be pretty forgiving. They’re also much more cold-tolerant than many garden vegetables, allowing you to enjoy a longer season.

Gilfeather Turnip Rutabagas

How to Grow Rutabagas

Rutabagas are pretty easy crops to grow, but there are a few things to consider when planting, caring for, harvesting, and storing your crop.

Planting

If you have ever grown turnips, you probably know how to grow rutabagas; they grow very similarly. In the Southeast, we recommend planting rutabagas as a fall crop.

Sow your rutabagas about 8 to 10 weeks before your first estimated frost to give them a good start before cold weather sets in. Don’t sow too early. Sustained temperatures over 80°F may cause them to bolt. 

Rutabagas prefer full sun but will tolerate partial shade. Ideally, they should get at least 6 hours of sunlight per day. Direct sow your rutabagas into a bed with loose, well-drained soil. If you have heavy clay, add some compost and broad fork the bed to loosen the soil.

Sow seeds about 1/2 inch deep, 1 inch apart in rows 12 to 16 inches apart.

Care 

Thinning is essential to rutabaga care! Rutabagas must be thinned within their first month of growth, or they won’t bulb properly. Nobody enjoys thinning, but if you don’t do it, it could ruin your harvest. Thin rutabagas to 8 inches apart.

Some folks have pest issues with rutabagas in the first few weeks. In this case, we usually recommend a floating row cover. It’s a great way to exclude pests without using pesticides. 

Consistent watering is also essential for rutabagas. For the best harvests, you never want the soil to dry out. The old rutabaga adage is “If in doubt, water.”

You also want to keep the weeds at bay and mulch around your rutabagas as soon as possible. The mulch will help suppress weeds and keep the soil cool.

Harvest

Rutabaga greens are delicious, much like turnip greens. You can harvest them whenever they are reasonably sized. To encourage continued growth, avoid taking all the leaves from one plant. 

Rutabagas can become massive, but we recommend harvesting the bulbs when they are 3 to 6 inches in diameter for the best flavor. You can keep them in the ground for a long time in late fall and winter, as their growth slows in the short days and cool weather. However, you should harvest them before temperatures drop below 20°F.

Nadmorska Rutabagas
Nadmorska Rutabagas

Storage

After harvest, you can store your rutabagas in a fridge or root cellar for up to 5 months.

First, cut the tops to about 1 inch above the bulb and wash off any loose soil. Allow the rutabagas to dry. If you’re putting them in the fridge, you can pack them into bags.

To store them in a root cellar or similar area like a garage or basement, pack them in containers of moist sand or sawdust so they aren’t touching. It’s not possible for everyone, but ideal storage conditions for rutabagas are between 90 and 95% humidity and cold but above freezing.

Cornish Pasty made with rutabagas
David Johnson [1], CC BY-SA 3.0, https://creativecommons.org/licenses/by-sa/3.0 , via Wikimedia Commons

Using Rutabagas

  • Experiment with rutabaga greens this fall in place of turnip or collard greens.
  • Make Cornish pasties, a traditional British pastry, often filled with rutabaga.
  • Make a traditional jack o’lantern. Rutabagas were carved on Halloween long before pumpkins!
  • Bake a rutabaga spice cake with a warm, nutty flavor that’s perfect for fall!
  • Try rutabaga noodles with a veggie spiralizer.
  • Lastly, for the homesteaders and small farmers, rutabagas have traditionally been used as livestock fodder. They can be a helpful crop in years with poor hay harvests.